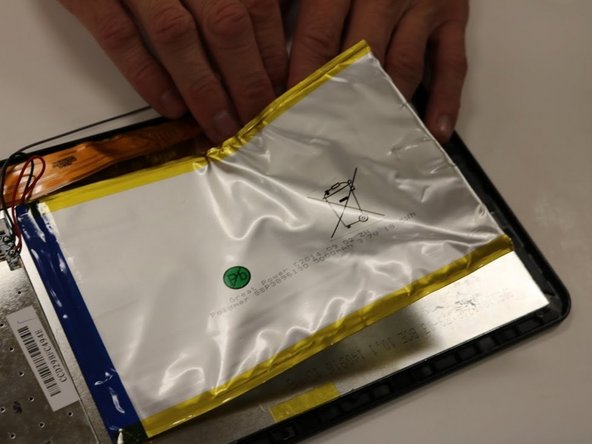
Saltar al contenido principal

DigiLand DL1010Q Battery Replacement

Qué necesitas

  1. DigiLand DL1010Q Battery Replacement, Rear Case: paso 1, imagen 1 de 1
    • With a J00 Philips head screwdriver, unscrew the two 4mm black screws located at the bottom of the device.

    • Before disassembling your device, be sure it is powered off.

  2. DigiLand DL1010Q Battery Replacement: paso 2, imagen 1 de 2 DigiLand DL1010Q Battery Replacement: paso 2, imagen 2 de 2
    • Using a plastic opening tool, begin softly prying open device by first inserting it in between the front and back panels.

    • Continue prying the edges while moving around the device's perimeter until the back can be easily removed.

  3. DigiLand DL1010Q Battery Replacement: paso 3, imagen 1 de 1
    • Carefully lift back panel away from the body of the device.

    • Speaker wires are connected to both the front and back panel.

  4. DigiLand DL1010Q Battery Replacement, Battery: paso 4, imagen 1 de 2 DigiLand DL1010Q Battery Replacement, Battery: paso 4, imagen 2 de 2
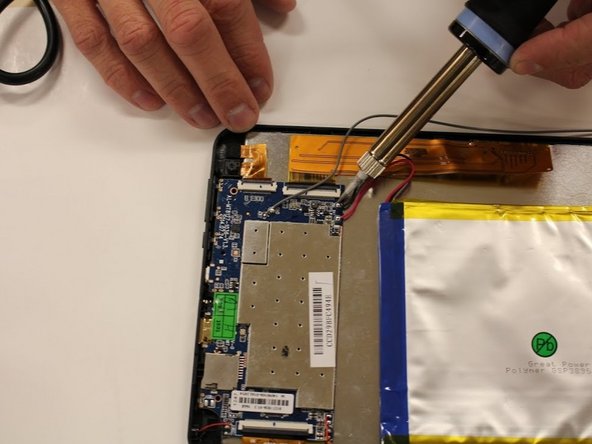
    • Desolder positive and negative, red and black, wires from the mother board that are connected to the battery.

    • The soldering tool is hot, and will burn. For how to use a soldering tool follow the How to Solder Guide

  5. DigiLand DL1010Q Battery Replacement: paso 5, imagen 1 de 2 DigiLand DL1010Q Battery Replacement: paso 5, imagen 2 de 2
    • Using a metal spudger tool, wedge between battery and metal screen.

    • Follow the edge of the battery to loosen the glue.

  6. DigiLand DL1010Q Battery Replacement: paso 6, imagen 1 de 2 DigiLand DL1010Q Battery Replacement: paso 6, imagen 2 de 2
    • Once the glue is loosened, you should be able to pry off the battery from the screen.

    • Using your hands, pull up on the battery to pull battery off.

    • Pulling on the battery causes you to bend the battery. Bending the battery could cause it to break open. Battery fumes are toxic and unsafe.

    • The battery will be completely disconnected and you can set the battery aside in a safe place.

Conclusión

To reassemble your device, follow these instructions in reverse order.

Una persona más ha completado esta guía.

3 comentarios

Agregar Comentario

Ver Estadísticas:

Ultimas 24 horas: 0

Ultimos 7 días: 0

Ultimos 30 días: 16

Todo El Tiempo: 4,558