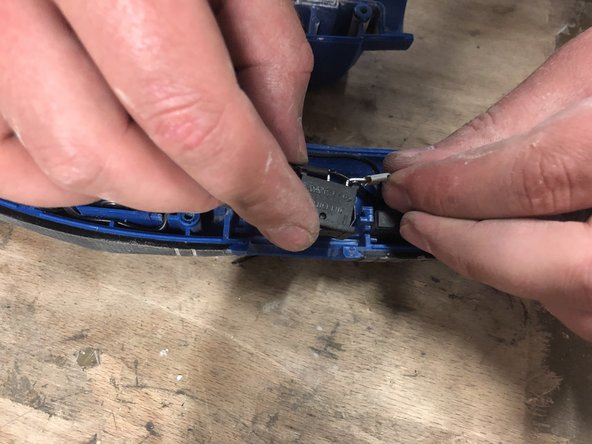
Saltar al contenido principal

Dexter 200W Corded Orbital Sander - 200SHS2.5 Switch Replacement

Qué necesitas

  1. Dexter 200W Corded Orbital Sander - 200SHS2.5 Switch Replacement, Unplug: paso 1, imagen 1 de 1
    • Before you begin, remember to disconnect the mains plug.

  2. Dexter 200W Corded Orbital Sander - 200SHS2.5 Switch Replacement: paso 2, imagen 1 de 2 Dexter 200W Corded Orbital Sander - 200SHS2.5 Switch Replacement: paso 2, imagen 2 de 2
    • Unscrew the four screws from the tray.

    • Then the four screws inside the tray.

  3. Dexter 200W Corded Orbital Sander - 200SHS2.5 Switch Replacement: paso 3, imagen 1 de 2 Dexter 200W Corded Orbital Sander - 200SHS2.5 Switch Replacement: paso 3, imagen 2 de 2
    • Unscrew the screws of the shell to open the machine.

  4. Dexter 200W Corded Orbital Sander - 200SHS2.5 Switch Replacement: paso 4, imagen 1 de 2 Dexter 200W Corded Orbital Sander - 200SHS2.5 Switch Replacement: paso 4, imagen 2 de 2
    • Remove the orange switch cap for more space.

    • Use pliers to disconnect the wires from the switch. Press the tab to extract it.

  5. Dexter 200W Corded Orbital Sander - 200SHS2.5 Switch Replacement: paso 6, imagen 1 de 3 Dexter 200W Corded Orbital Sander - 200SHS2.5 Switch Replacement: paso 6, imagen 2 de 3 Dexter 200W Corded Orbital Sander - 200SHS2.5 Switch Replacement: paso 6, imagen 3 de 3
    • Replace the new switch, then reconnect the wires.

    • Replace the sheath, then check that no cable is blocked and that each part is in its housing.

  6. Dexter 200W Corded Orbital Sander - 200SHS2.5 Switch Replacement: paso 7, imagen 1 de 1
    • Replace the orange cap.

  7. Dexter 200W Corded Orbital Sander - 200SHS2.5 Switch Replacement: paso 8, imagen 1 de 1
    • Before closing, check that no cable is blocked and that each part is in its place.

    • Replace the shell and screws.

  8. Dexter 200W Corded Orbital Sander - 200SHS2.5 Switch Replacement: paso 9, imagen 1 de 2 Dexter 200W Corded Orbital Sander - 200SHS2.5 Switch Replacement: paso 9, imagen 2 de 2
    • Replace the four screws located inside.

    • Then the screws of the plate.

Conclusión

To reassemble perform steps in reverse.

Un agradecimiento especial a estos traductores:

fr en

100%

¡ HelloMacOS nos está ayudando a reparar el mundo! ¿Quieres contribuir?
Empezar a traducir ›

Céline Chemineau

Miembro Desde 01/29/20

16,581 Reputación

95 Guías creadas

Equipo

Leroy Merlin Miembro de Leroy Merlin

Community

36 Miembros

239 Guías creadas

0 comentarios

Agregar Comentario

Ver Estadísticas:

Ultimas 24 horas: 0

Ultimos 7 días: 0

Ultimos 30 días: 5

Todo El Tiempo: 188