Introducción
Una guía general para desmontar tu PlayStation 2 Slimline. Esta guía te dará acceso a una serie de componentes internos como la placa base, la unidad óptica, el ventilador para la refrigeración y el disco duro entre otros.
Qué necesitas
-
-
Sobre una superficie plana, dale la vuelta a tu PlayStation 2 Slimline de forma que la parte inferior esté hacia arriba.
-
Quita las gomas que cubren los tornillos, las que están rodeadas en rojo en la segunda imagen.
-
Con un destornillador Phillips #1 quita los cinco tornillos rodeados en rojo en la segunda imagen.
-
-
-
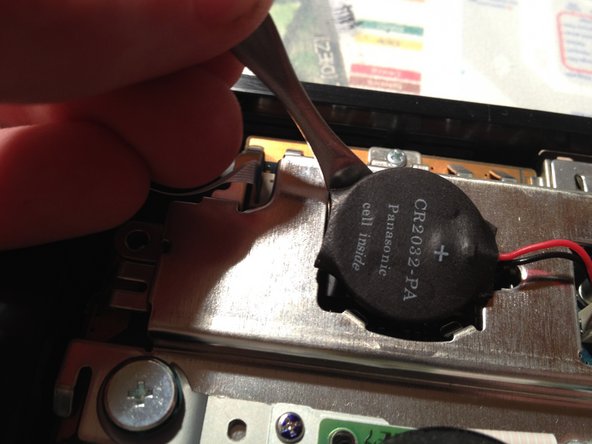
Identifica la batería, y entonces utiliza una espátula para hacer palanca y quitarla (recuerda utilizar espátulas plásticas cuando trabajes con electricidad). Desconecta la batería de la placa base con tus manos.
I guess in 2021 or later there are many people with leaked/not working battery in their system. If you are looking for a replacement, just search any online store for “CMOS battery 2032”. The important thing is to have already attached (soldered?) leads with connector on the end.
Be aware of the polarity! The batteries that I got had switched polarity. You can easily fix that with pulling out the wires from the connector and tucking them in the other way. Just make sure that they will stay in place this time, I used some super glue before putting it in my PS2 (wait until it does not stick anymore!).
If you have excess wiring you can tuck that away anywhere.
-
-
-
-
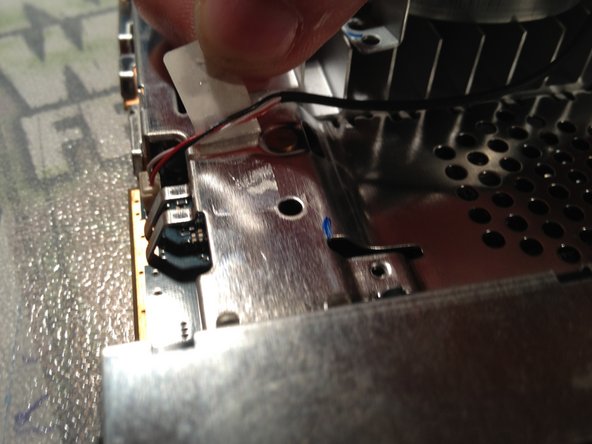
Tira del cable y quítalo de su zócalo.
-
Utilizando un destornillador Phillips #1 para quitar los cuatro tornillos de la unidad óptica.
-
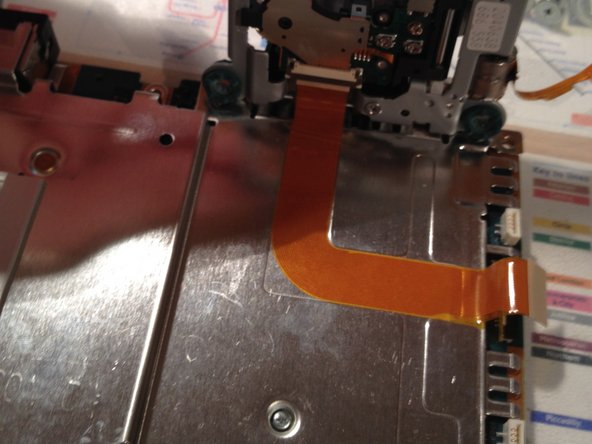
Tira de la unidad óptica y con cuidado despega el cable plano que está debajo de la unidad, pegado a la plancha metálica.
I found it more pleasant not to peel off the ribbon cable. Instead I left the orange ribbon cable connected to the motherboard, and after gently lifting the drive I disconnected that cable from the drive itself. Make sure you do not just pull on these cables, they might have plastic retention parts that you first need to lift gently.
Completely agree with @svidi comment here, much nicer to disconnect the ribbon from the laser than to pull it off the metal plating.
-
-
-
Quita los cuatro tornillos señalados en la fotografía. Estos están en el lado inferior de la placa base.
-
Entonces dale la vuelta de nuevo a la placa base y quita los 2 tornillos de clasificación en la cara superior.
In my case (haha) I was not able to remove the motherboard from the bottom chassis, because there was an additional Phillips #1 screw holding it down between the memory card/controller ports. My system is a SCPH-75004, so I guess this go for all 75xxx models.
-
-
-
Quita la plancha metálica de la parte inferior de la placa base.
Very nice instructions.
my 70004 it's egual than this
ISTRUCTIONS very usefull
-


Un agradecimiento especial a estos traductores:
33%

¡ MemoryOverflow nos está ayudando a reparar el mundo! ¿Quieres contribuir?
Empezar a traducir ›
