Saltar al contenido principal

Dell XPS 15-L502X Front Cover Replacement

Qué necesitas

  1. Dell XPS 15-L502X Front Cover Replacement, Front Cover: paso 1, imagen 1 de 1
    • Before prying up on the cover, you may have to first remove a screw located inside the battery compartment (M2X3) and release the two latches. If you don't release the latches, you may snap the cover.

    • Pry up the top of the cover first by using a spudger to wedge in between the cover and base of the computer.

    • Once the spudger is between the cover and the base of the computer, wedge underneath the remaining border surrounding the keyboard.

    • Cracking sounds are normal. Be careful and take your time removing this panel.

  2. Dell XPS 15-L502X Front Cover Replacement: paso 2, imagen 1 de 1
    • Work your fingers underneath the cover. Then, delicately pull the cover off of the computer.

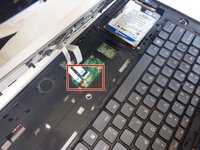
    • The mouse pad is connected to the rest of the computer via two cables underneath the cover. These cables must be unhooked before the cover can be completely removed.

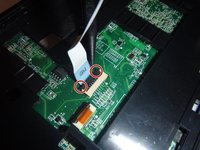
  3. Dell XPS 15-L502X Front Cover Replacement: paso 3, imagen 1 de 2 Dell XPS 15-L502X Front Cover Replacement: paso 3, imagen 2 de 2
    • Unhook the cables connected to the mouse pad by flipping up the black tabs that hold either cable in place.

    • Releasing these cables can be done by hand or by using a spudger.

Conclusión

To reassemble your device, follow these instructions in reverse order.

Una persona más ha completado esta guía.

Kyle Compton

Miembro Desde 09/16/15

380 Reputación

1 Guía escrita

Equipo

IUPUI, Team 2-3, Baechle Fall 2015 Miembro de IUPUI, Team 2-3, Baechle Fall 2015

IUPUI-BAECHLE-F15S2G3

3 Miembros

8 Guías creadas

0 comentarios

Agregar Comentario

Ver Estadísticas:

Ultimas 24 horas: 0

Ultimos 7 días: 0

Ultimos 30 días: 19

Todo El Tiempo: 2,729