Introducción
If you're having distorted or full loss of sound coming from your Dell XPS 10 tablet, and you've ruled out all other issues, follow this guide to replace your speakers. You will need a few tools listed to the right of this to get the job done, but beyond that, this is a relatively simple repair with no special hazards to be aware of.
If you are unsure if you need to replace your speakers, troubleshoot the problem first. To do this, make sure that your device has all of the its software updates current and then restart your device. Go to settings and make sure that the audio is not muted and that the audio output is not connected to another device. If these do not resolve the audio loss or distortion, you should replace the speakers.
In addition, make sure to power off your device and disconnect from the charger before beginning this repair.
Qué necesitas
-
-
Slide one of the plastic opening tools in the crack on the side of the device with the windows button.
-
Slide the other plastic opening tool facing the opposite way in the crack next to the first one and pry the back cover off a little bit at a time or slide them around the edge as necessary.
-
Finally, slide the two plastic opening tools all around the case until it is open.
-
-
-
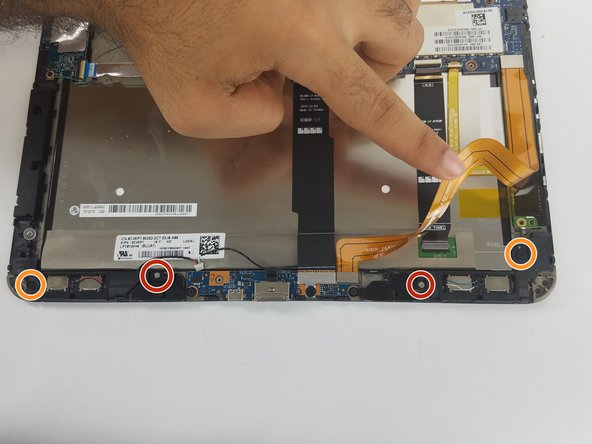
Unscrew the three black, 4mm screws with a phillips screwdriver size PH 0 (one of which is under the gold colored ribbon cable.)
-
Unscrew the three gray, 3mm screws with the same screwdriver (phillips screwdriver size PH 0.)
-
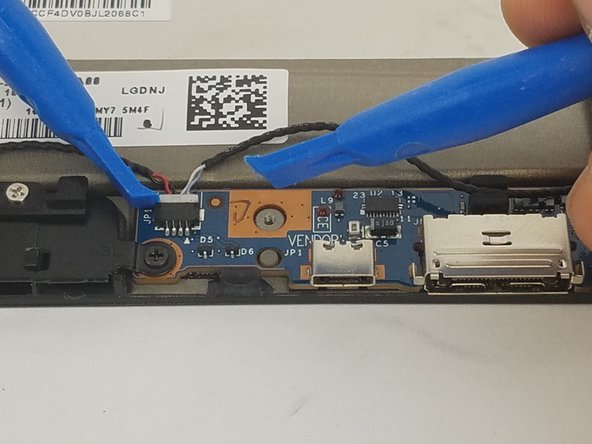
Unplug the connector the connects the battery to the mother board.
-
-
-
-
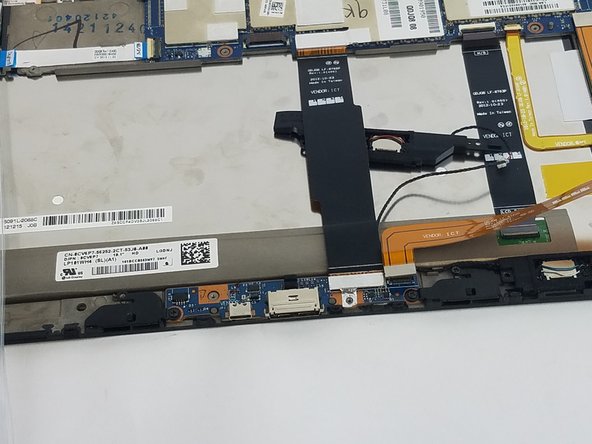
Use the opening tools to unplug the gold/orange ribbon cable.
-
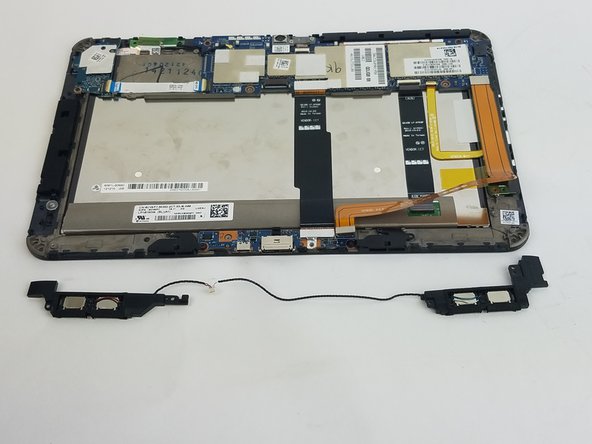
Use the opening tools to unplug the speakers from the motherboard.
-
Use a Phillips #0 screwdriver to remove two 4 mm screws.
-
Use a Phillips #0 screwdriver to remove two 3 mm screws.
-


To reassemble your device, follow these instructions in reverse order.
To reassemble your device, follow these instructions in reverse order.
Cancelar: No complete esta guía.
Una persona más ha completado esta guía.
Equipo

USF Tampa, Team 2-1, Nance Fall 2016 Miembro de USF Tampa, Team 2-1, Nance Fall 2016
USFT-NANCE-F16S2G1
3 Miembros
5 Guías creadas