Saltar al contenido principal

Dell Vostro V13 Keyboard Replacement

Qué necesitas

  1. Dell Vostro V13 Keyboard Replacement, Back Cover: paso 1, imagen 1 de 3 Dell Vostro V13 Keyboard Replacement, Back Cover: paso 1, imagen 2 de 3 Dell Vostro V13 Keyboard Replacement, Back Cover: paso 1, imagen 3 de 3
    • Back up the memory to an external drive and power off the laptop before starting.

    • Flip the laptop over so the vents are facing you.

    • Remove the six 5.0 mm Phillips #1 screws using the magnetic driver.

    • Remove the two 5.0 mm Phillips #1 screws on the back side of the laptop.

  2. Dell Vostro V13 Keyboard Replacement: paso 2, imagen 1 de 3 Dell Vostro V13 Keyboard Replacement: paso 2, imagen 2 de 3 Dell Vostro V13 Keyboard Replacement: paso 2, imagen 3 de 3
    • Slide out the SD and MicroSD holders.

    • If you are having trouble sliding them out, use the plastic opening tool.

  3. Dell Vostro V13 Keyboard Replacement: paso 3, imagen 1 de 3 Dell Vostro V13 Keyboard Replacement: paso 3, imagen 2 de 3 Dell Vostro V13 Keyboard Replacement: paso 3, imagen 3 de 3
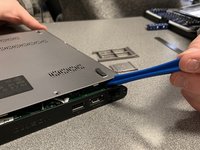
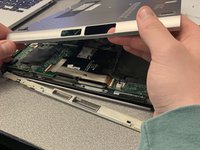
    • Slide the plastic opening tool around the perimeter of the laptop until the cover pops off.

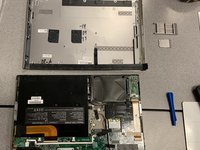
    • Pull the back cover off.

  4. Dell Vostro V13 Keyboard Replacement: paso 4, imagen 1 de 2 Dell Vostro V13 Keyboard Replacement: paso 4, imagen 2 de 2
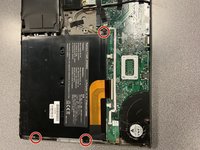
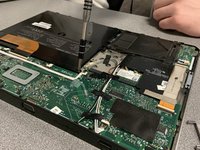
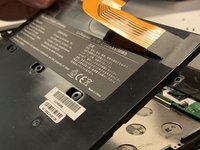
    • Remove the three black 3.9 mm Phillips #1 screws holding the battery in place.

  5. Dell Vostro V13 Keyboard Replacement: paso 5, imagen 1 de 3 Dell Vostro V13 Keyboard Replacement: paso 5, imagen 2 de 3 Dell Vostro V13 Keyboard Replacement: paso 5, imagen 3 de 3
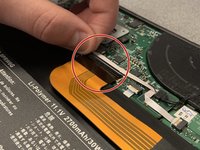
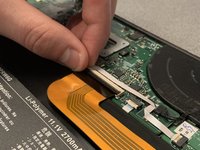
    • Flip up the clip of the ribbon connector.

    • Pull the strip out to disconnect the battery.

  6. Dell Vostro V13 Keyboard Replacement: paso 6, imagen 1 de 2 Dell Vostro V13 Keyboard Replacement: paso 6, imagen 2 de 2
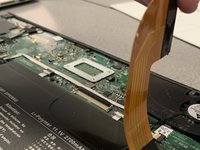
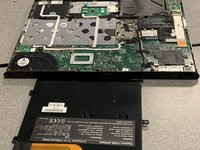
    • Remove the battery.

    • Removing the battery allows you to work safely.

  7. Dell Vostro V13 Keyboard Replacement, Keyboard: paso 7, imagen 1 de 1
    • Open the laptop so the keyboard is visible.

  8. Dell Vostro V13 Keyboard Replacement: paso 8, imagen 1 de 3 Dell Vostro V13 Keyboard Replacement: paso 8, imagen 2 de 3 Dell Vostro V13 Keyboard Replacement: paso 8, imagen 3 de 3
    • Wedge the plastic opening tool around the seam of the notification panel to pop it off.

  9. Dell Vostro V13 Keyboard Replacement: paso 9, imagen 1 de 3 Dell Vostro V13 Keyboard Replacement: paso 9, imagen 2 de 3 Dell Vostro V13 Keyboard Replacement: paso 9, imagen 3 de 3
    • Disconnect the ribbon connector on the panel.

    • Remove the panel.

  10. Dell Vostro V13 Keyboard Replacement: paso 10, imagen 1 de 2 Dell Vostro V13 Keyboard Replacement: paso 10, imagen 2 de 2
    • Remove the two silver 3.1 mm Phillips #1 screws.

  11. Dell Vostro V13 Keyboard Replacement: paso 11, imagen 1 de 2 Dell Vostro V13 Keyboard Replacement: paso 11, imagen 2 de 2
    • Use the plastic opening tool to pry the keyboard out of the laptop.

    • Do not pull the keyboard all the way out yet.

  12. Dell Vostro V13 Keyboard Replacement: paso 12, imagen 1 de 2 Dell Vostro V13 Keyboard Replacement: paso 12, imagen 2 de 2
    • Disconnect the ribbon cable that connects the keyboard to the laptop by flipping up the white locking tab on the ZIF connector.

    • If you're having trouble, use the plastic opening tool to help.

  13. Dell Vostro V13 Keyboard Replacement: paso 13, imagen 1 de 3 Dell Vostro V13 Keyboard Replacement: paso 13, imagen 2 de 3 Dell Vostro V13 Keyboard Replacement: paso 13, imagen 3 de 3
    • Remove the keyboard.

Conclusión

To reassemble your device, follow these instructions in reverse order.

0 comentarios

Agregar Comentario

Ver Estadísticas:

Ultimas 24 horas: 0

Ultimos 7 días: 0

Ultimos 30 días: 3

Todo El Tiempo: 350