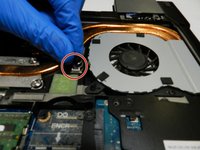
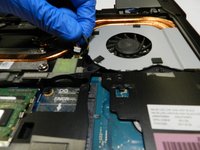
Saltar al contenido principal

Dell Latitude EG6510 Fan Replacement

  1. Dell Latitude EG6510 Fan Replacement, Fan: paso 1, imagen 1 de 3 Dell Latitude EG6510 Fan Replacement, Fan: paso 1, imagen 2 de 3 Dell Latitude EG6510 Fan Replacement, Fan: paso 1, imagen 3 de 3
    • Push the two tabs in and pull out the battery pack.

  2. Dell Latitude EG6510 Fan Replacement: paso 2, imagen 1 de 3 Dell Latitude EG6510 Fan Replacement: paso 2, imagen 2 de 3 Dell Latitude EG6510 Fan Replacement: paso 2, imagen 3 de 3
    • Remove the 5 screws from the back panel of the laptop using a Type 0 Phillips Head screwdriver.

    • Slide the back panel off of the computer.

  3. Dell Latitude EG6510 Fan Replacement: paso 3, imagen 1 de 2 Dell Latitude EG6510 Fan Replacement: paso 3, imagen 2 de 2
    • Carefully detach the fan power supply cable.

  4. Dell Latitude EG6510 Fan Replacement: paso 4, imagen 1 de 1
    • Remove the two screws connecting the fan to the laptop using a type 0 head Phillips screwdriver.

  5. Dell Latitude EG6510 Fan Replacement: paso 5, imagen 1 de 2 Dell Latitude EG6510 Fan Replacement: paso 5, imagen 2 de 2
    • Remove the fan from the laptop.

Conclusión

To reassemble your device, follow these instructions in reverse order.

Una persona más ha completado esta guía.

0 comentarios

Agregar Comentario

Ver Estadísticas:

Ultimas 24 horas: 0

Ultimos 7 días: 4

Ultimos 30 días: 5

Todo El Tiempo: 111