Saltar al contenido principal

Dell Latitude E6510 Fan Replacement

Qué necesitas

  1. Dell Latitude E6510 Fan Replacement, Fan: paso 1, imagen 1 de 3 Dell Latitude E6510 Fan Replacement, Fan: paso 1, imagen 2 de 3 Dell Latitude E6510 Fan Replacement, Fan: paso 1, imagen 3 de 3
    • Remove the battery.

    • Remove the five strews that are holding the back cover down.

    • Firmly grasp the laptop and slide the cover to the front, then lift.

  2. Dell Latitude E6510 Fan Replacement: paso 2, imagen 1 de 3 Dell Latitude E6510 Fan Replacement: paso 2, imagen 2 de 3 Dell Latitude E6510 Fan Replacement: paso 2, imagen 3 de 3
    • Unscrew the 7 gray screws.

    • They will not disconnect from the gray plates.

    • Remove the 2 black screws that hold the fan in place.

  3. Dell Latitude E6510 Fan Replacement: paso 3, imagen 1 de 1
    • Wiggle the fan in the direction of the arrows until the end of the fan comes out.

  4. Dell Latitude E6510 Fan Replacement: paso 4, imagen 1 de 1
    • Pick up and pull the heat sink out in the direction of the arrow.

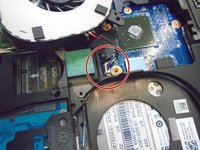
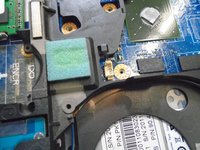
  5. Dell Latitude E6510 Fan Replacement: paso 5, imagen 1 de 2 Dell Latitude E6510 Fan Replacement: paso 5, imagen 2 de 2
    • Firmly grasp the fan cord close to the plug, and pull straight up.

Conclusión

To reassemble your device, follow these instructions in reverse order.

2 personas más completaron esta guía.

0 comentarios

Agregar Comentario

Ver Estadísticas:

Ultimas 24 horas: 0

Ultimos 7 días: 7

Ultimos 30 días: 14

Todo El Tiempo: 1,774