Qué necesitas
-
-
Turn the device over so that the back (white side) of the device is facing up.
-
Remove battery from laptop by pushing the two tabs outward and pull the battery outward. The tabs are highlighted in blue. Place the battery off to the side.
-
Remove the 3 screws highlighted in red that secure the keyboard to the case using the screw driver with largest phillips head in the box.
-
Make sure to keep the screws separated by step to ensure that they can be put back in the correct location when reversing the steps.
-
-
-
-
Orient the device so that the back (white side) is facing upward again.
-
Remove the screws highlighted in light blue in the picture using the same screw driver size as before.
-
-
-
Orient the device so that it is facing top side up with the device open.
-
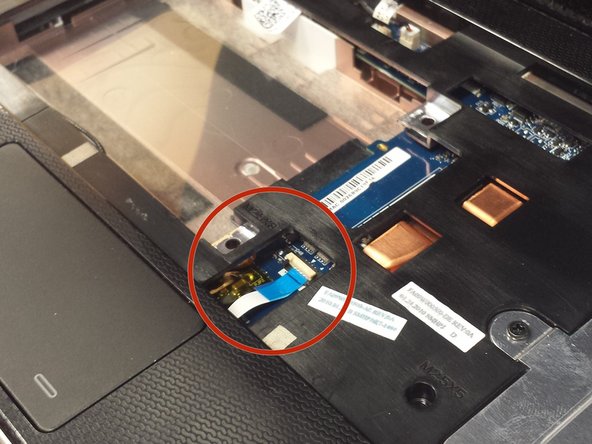
Lift up the lock tab that holds in the ribbon connecting the track pad to the computer using your finger nail or the plastic spudger.
-
Pull ribbon to disconnect the blue half but leave the ribbon connected to the device at the other end.
-
-
-
Remove the three screws remaining underneath the keyboard using the same screw driver as before. (Not the black screw highlighted in yellow).
-
The screws are different sizes, be sure to make note of where each screw goes.
-
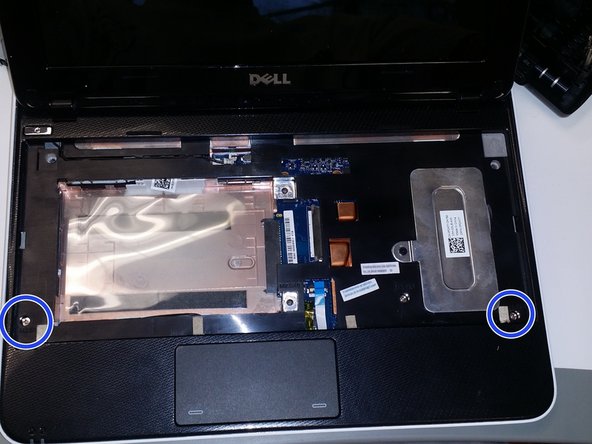
Remove the two screws at the front corners of the keyboard. They are highlighted in light blue.
-
-
-
Use a plastic spudger to remove the outer frame of the laptop. Once the spudger is between the outer frame and the laptop slide it along this seam all the way to the screen in both directions.
-
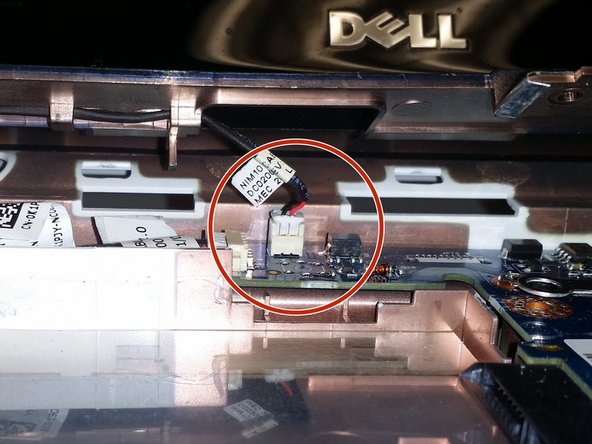
Once the outer frame is loose it will still be attached by a wire connection. To detach the outer frame completely, set the frame back in place and pull gently on the wires while using your finger nail to pop the white upper section of the tan box upward until it comes out.
-
-
-
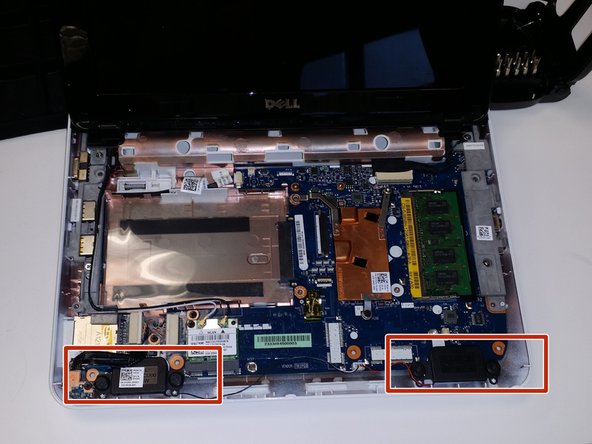
Remove the speakers by pulling them upward gently. There are speaker wires that will still be attached to the circuit board.
-
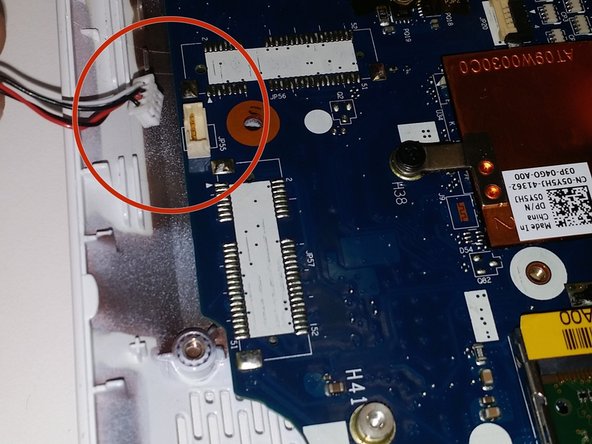
To remove the speaker wires from the circuit board trace the wires to where they connect to the tan box. Using your finger nail or the plastic spudger pull gently on the wires and lift the white upper section of the tan box upward until it pops out.
-


Perform these steps in reverse order with your new speakers to finish installation.
Perform these steps in reverse order with your new speakers to finish installation.
Cancelar: No complete esta guía.
3 personas más completaron esta guía.
Equipo

Ohio State, Team 1-1, Buehl Fall 2014 Miembro de Ohio State, Team 1-1, Buehl Fall 2014
OSU-BUEHL-F14S1G1
4 Miembros
4 Guías creadas