Saltar al contenido principal

Dell Inspiron E1705 Optical Drive Replacement

Qué necesitas

  1. Dell Inspiron E1705 Optical Drive Replacement, Battery: paso 1, imagen 1 de 1
    • Make sure that the computer is turned off and is disconnected from external power source.

    • Turn it upside down and locate the battery release switch.

  2. Dell Inspiron E1705 Optical Drive Replacement: paso 2, imagen 1 de 2 Dell Inspiron E1705 Optical Drive Replacement: paso 2, imagen 2 de 2
    • While holding the switch in the open position, lift out the battery.

    • If you plan to work on any internal laptop components, press and hold the power button for 5 seconds. This will dissipate any residual charge on the motherboard to prevent electrical shock when you begin to handle it.

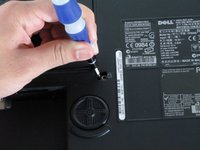
  3. Dell Inspiron E1705 Optical Drive Replacement, Optical Drive: paso 3, imagen 1 de 1
    • Locate and remove the screw shown

    • It is labeled with a lock symbol

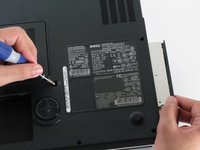
  4. Dell Inspiron E1705 Optical Drive Replacement: paso 4, imagen 1 de 2 Dell Inspiron E1705 Optical Drive Replacement: paso 4, imagen 2 de 2
    • Use the screwdriver to gently push the optical drive out

Conclusión

To reassemble your device, follow these instructions in reverse order.

3 personas más completaron esta guía.

Equipo

Cal Poly, Team 22-5, Maness Fall 2010 Miembro de Cal Poly, Team 22-5, Maness Fall 2010

CPSU-MANESS-F10S22G5

4 Miembros

11 Guías creadas

0 comentarios

Agregar Comentario

Ver Estadísticas:

Ultimas 24 horas: 0

Ultimos 7 días: 0

Ultimos 30 días: 1

Todo El Tiempo: 3,901