Esta versión puede contener ediciones incorrectas. Cambie a la última instantánea verificada.
Qué necesitas
-
Este paso está sin traducir. Ayuda a traducirlo
-
Push the switch next to the battery.
-
At the same time, lift the battery away from the laptop.
-
-
Este paso está sin traducir. Ayuda a traducirlo
-
Place the laptop on flat surface.
-
Carefully open the laptop at far as it will go so that the back of screen is touching the flat surface.
-
Carefully take a spudger and separate part of the cover at the red circle.
-
-
Este paso está sin traducir. Ayuda a traducirlo
-
Gently lift the keyboard away from the laptop without harming the cord that is located at the bottom of the keyboard.
-
-
-
Este paso está sin traducir. Ayuda a traducirlo
-
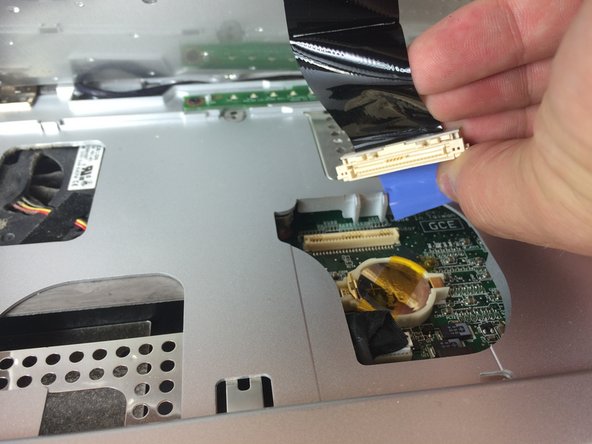
Gently pull the blue tab up until it comes away from computer.
-
-
Este paso está sin traducir. Ayuda a traducirlo
-
Remove one 4mm Philips #00 screw to completely disengage blue tab.
-
-
Este paso está sin traducir. Ayuda a traducirlo
-
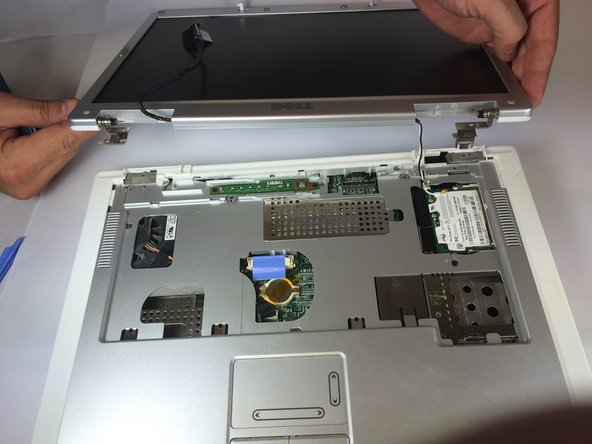
Remove four 4mm Philips #00 screws at the hinges for the screen.
-
-
Este paso está sin traducir. Ayuda a traducirlo
-
Separate the top panel of the laptop from the bottom panel.
-
-
Este paso está sin traducir. Ayuda a traducirlo
-
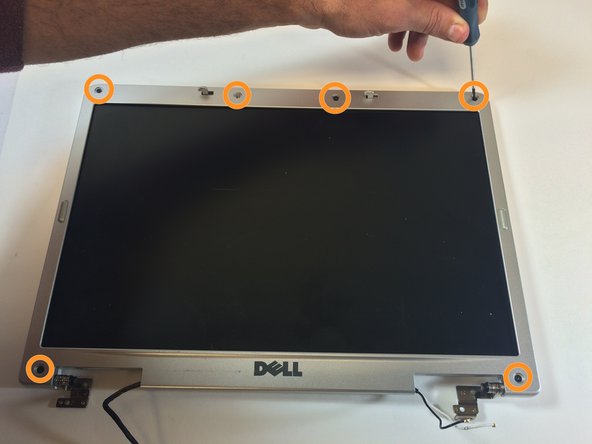
Use the plastic opening tools to remove the six rubber screw covers in the corners.
-
Remove six 4 mm #00 Philips screws located in the corners.
-
-
Este paso está sin traducir. Ayuda a traducirlo
-
Insert the plastic opening tools between the screen holders.
-
Go completely around the screen, separating the screen holders with the plastic opening tools.
-
-
Este paso está sin traducir. Ayuda a traducirlo
-
Remove 12 4mm #00 Philips screws at the perimeter of the screen.
-


Cancelar: No complete esta guía.
3 personas más completaron esta guía.

Equipo

USF Tampa, Team 11-1, Blackwell Fall 2014 Miembro de USF Tampa, Team 11-1, Blackwell Fall 2014
USFT-BLACKWELL-F14S11G1
5 Miembros
7 Guías creadas