Saltar al contenido principal

Dell Inspiron 1526 Heat Sink Replacement

Qué necesitas

  1. Dell Inspiron 1526 Heat Sink Replacement, Battery: paso 1, imagen 1 de 3 Dell Inspiron 1526 Heat Sink Replacement, Battery: paso 1, imagen 2 de 3 Dell Inspiron 1526 Heat Sink Replacement, Battery: paso 1, imagen 3 de 3
    • Slide the unlock button to the left to release the battery.

    • Slide the battery away from the laptop to remove.

    • The unlock button is located on the bottom of the laptop.

  2. Dell Inspiron 1526 Heat Sink Replacement, Heat Sink: paso 2, imagen 1 de 2 Dell Inspiron 1526 Heat Sink Replacement, Heat Sink: paso 2, imagen 2 de 2
    • Use a Phillips #0 screwdriver to remove the eight 3mm screws from the rear casing of the laptop.

  3. Dell Inspiron 1526 Heat Sink Replacement: paso 3, imagen 1 de 2 Dell Inspiron 1526 Heat Sink Replacement: paso 3, imagen 2 de 2
    • Loosen the five captive Phillips #0 screws from the heat sink.

    • Lift the heat sink from the motherboard.

  4. Dell Inspiron 1526 Heat Sink Replacement: paso 4, imagen 1 de 2 Dell Inspiron 1526 Heat Sink Replacement: paso 4, imagen 2 de 2
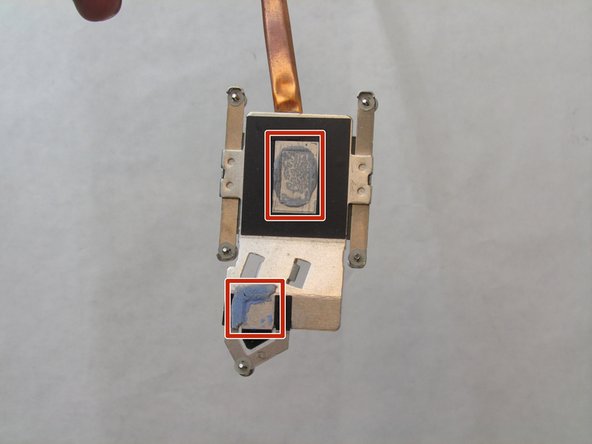
    • Apply a pea-sized amount of new thermal paste to the CPU and GPU.

Conclusión

To reassemble your device, follow these instructions in reverse order.

0 comentarios

Agregar Comentario

Ver Estadísticas:

Ultimas 24 horas: 0

Ultimos 7 días: 0

Ultimos 30 días: 1

Todo El Tiempo: 158