Saltar al contenido principal

Dell Inspiron 1521 Bottom Panel Replacement

Qué necesitas

  1. Dell Inspiron 1521 Bottom Panel Replacement, Battery: paso 1, imagen 1 de 1
    • Rotate the laptop so its bottom is facing up.

  2. Dell Inspiron 1521 Bottom Panel Replacement: paso 2, imagen 1 de 3 Dell Inspiron 1521 Bottom Panel Replacement: paso 2, imagen 2 de 3 Dell Inspiron 1521 Bottom Panel Replacement: paso 2, imagen 3 de 3
    • Identify the lock mechanisms holding the battery in place.

    • Slide each button outward with your fingers to disengage the battery.

    • Pull the battery off with your hand to separate it from the laptop.

  3. Dell Inspiron 1521 Bottom Panel Replacement, Bottom Panel: paso 3, imagen 1 de 2 Dell Inspiron 1521 Bottom Panel Replacement, Bottom Panel: paso 3, imagen 2 de 2
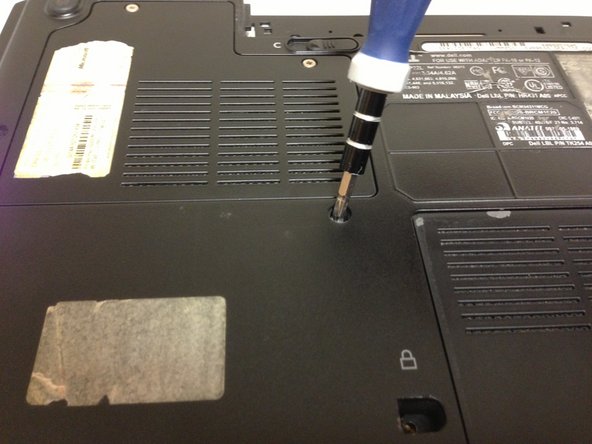
    • Locate the thirteen 10 mm Phillips #1 screws securing the bottom panel of the laptop.

    • Remove the thirteen indicated screws with a Phillips #1 screwdriver.

    • With the screws removed you can now remove the panel underneath keyboard.

Conclusión

To reassemble your device, follow these instructions in reverse order.

2 personas más completaron esta guía.

Erik Sanchez

Miembro Desde 09/26/12

21 Reputación

1 Guía escrita

Equipo

Cal Poly, Team 15-47, Forte Fall 2012 Miembro de Cal Poly, Team 15-47, Forte Fall 2012

CPSU-FORTE-F12S15G47

5 Miembros

9 Guías creadas

0 comentarios

Agregar Comentario

Ver Estadísticas:

Ultimas 24 horas: 0

Ultimos 7 días: 0

Ultimos 30 días: 1

Todo El Tiempo: 1,161