Saltar al contenido principal

Dell Inspiron 14-5447 Fan Replacement

Qué necesitas

  1. Dell Inspiron 14-5447 Fan Replacement, Battery: paso 1, imagen 1 de 1
    • Flip the laptop upside down to access the battery.

  2. Dell Inspiron 14-5447 Fan Replacement: paso 2, imagen 1 de 2 Dell Inspiron 14-5447 Fan Replacement: paso 2, imagen 2 de 2
    • Remove the two black 5.70mm Phillips#0 screws on the case's back.

    • Insert a plastic opening tool into the small slit, centered between the removed screws, and pry open the back cover

  3. Dell Inspiron 14-5447 Fan Replacement: paso 3, imagen 1 de 2 Dell Inspiron 14-5447 Fan Replacement: paso 3, imagen 2 de 2
    • Remove the two 5.70mm Phillips #0 screws that secure the battery in place on its left side .

    • Treat the battery with care - puncturing or bending may cause damage to the battery and may result in fire or injury.

  4. Dell Inspiron 14-5447 Fan Replacement: paso 4, imagen 1 de 2 Dell Inspiron 14-5447 Fan Replacement: paso 4, imagen 2 de 2
    • Use the black, plastic flap on the left side to pull the battery out.

    • Slowly lift the flap up and the battery should slide out.

  5. Dell Inspiron 14-5447 Fan Replacement, Fan: paso 5, imagen 1 de 1
    • Locate the fan system in the top right corner.

  6. Dell Inspiron 14-5447 Fan Replacement: paso 6, imagen 1 de 2 Dell Inspiron 14-5447 Fan Replacement: paso 6, imagen 2 de 2
    • Look along the wide line of white cable until you find the tab insert.

    • Remove the thick white cable crossing over the fan, using the blue spudger shown, to flip the securing flap holding down the cable.

  7. Dell Inspiron 14-5447 Fan Replacement: paso 7, imagen 1 de 2 Dell Inspiron 14-5447 Fan Replacement: paso 7, imagen 2 de 2
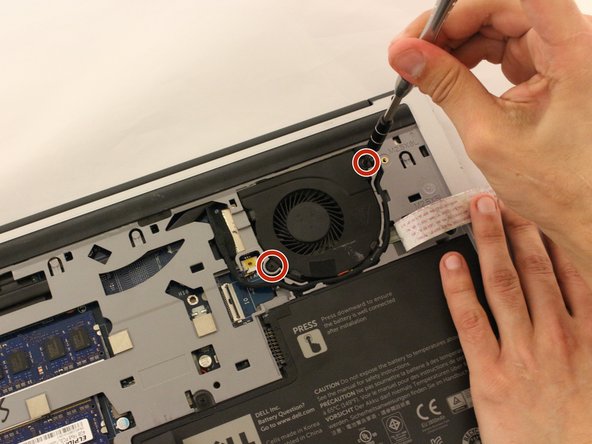
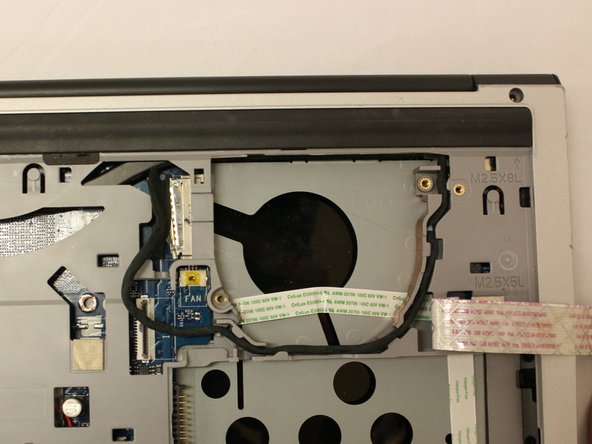
    • Move the cable over to the side to reveal the fan screws.

    • Remove the two black 5.70 mm screws from the fan.

  8. Dell Inspiron 14-5447 Fan Replacement: paso 8, imagen 1 de 2 Dell Inspiron 14-5447 Fan Replacement: paso 8, imagen 2 de 2
    • Use tweezers to remove the small cable attached to the fan.

  9. Dell Inspiron 14-5447 Fan Replacement: paso 9, imagen 1 de 2 Dell Inspiron 14-5447 Fan Replacement: paso 9, imagen 2 de 2
    • Using the opening tool, pry the fan out.

    • Remove the fan slowly to prevent damage to any wires or cables connected to the device.

  10. Dell Inspiron 14-5447 Fan Replacement: paso 10, imagen 1 de 1
    • Now that the fan is removed, be sure to clean the area under the fan to prevent overheating.

Conclusión

To reassemble your device, follow these instructions in reverse order.

0 comentarios

Agregar Comentario

Ver Estadísticas:

Ultimas 24 horas: 0

Ultimos 7 días: 0

Ultimos 30 días: 3

Todo El Tiempo: 806