Saltar al contenido principal

Dell Inspiron 11-3162 LCD Screen Replacement

Qué necesitas

  1. Dell Inspiron 11-3162 LCD Screen Replacement, Back Cover Removal: paso 1, imagen 1 de 2 Dell Inspiron 11-3162 LCD Screen Replacement, Back Cover Removal: paso 1, imagen 2 de 2
    • Before you begin, be sure to turn off your laptop and unplug it from the outlet.

    • Use tweezers to pry and remove the center screw cover on the back cover.

  2. Dell Inspiron 11-3162 LCD Screen Replacement: paso 2, imagen 1 de 2 Dell Inspiron 11-3162 LCD Screen Replacement: paso 2, imagen 2 de 2
    • Use a Phillips screwdriver to unscrew the nine 6.8 mm screws securing the back cover.

  3. Dell Inspiron 11-3162 LCD Screen Replacement: paso 3, imagen 1 de 1
    • Use a spudger to pry around the base edges of the back cover to loosen it from the laptop.

    • Do not fully remove the cover, as it is still attached to the laptop with cables.

  4. Dell Inspiron 11-3162 LCD Screen Replacement: paso 4, imagen 1 de 3 Dell Inspiron 11-3162 LCD Screen Replacement: paso 4, imagen 2 de 3 Dell Inspiron 11-3162 LCD Screen Replacement: paso 4, imagen 3 de 3
    • If you are only replacing the battery, you can skip this step. Be careful not to strain the still-connected cable as you work.

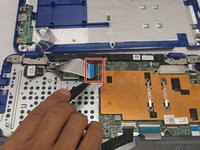
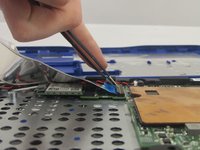
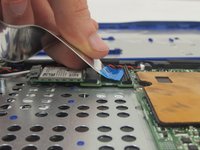
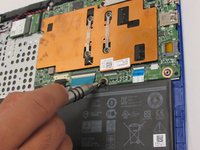
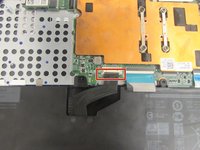
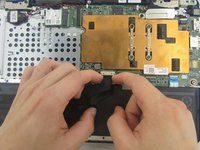
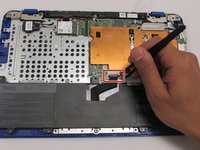
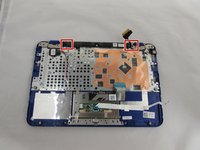
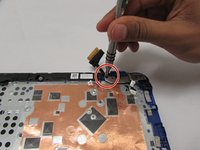
    • Unlock the wide ZIF connector securing the flex cable.

    • To unlock a ZIF connector, use the tip of a spudger or your fingernail to flip up the small, hinged locking flap.

    • Pull the ribbon cable outwards to disconnect the back cover from the motherboard.

  5. Dell Inspiron 11-3162 LCD Screen Replacement, Battery: paso 5, imagen 1 de 2 Dell Inspiron 11-3162 LCD Screen Replacement, Battery: paso 5, imagen 2 de 2
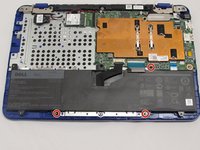
    • Use a Phillips screwdriver to unscrew the three 4 mm screws securing the battery.

  6. Dell Inspiron 11-3162 LCD Screen Replacement: paso 6, imagen 1 de 3 Dell Inspiron 11-3162 LCD Screen Replacement: paso 6, imagen 2 de 3 Dell Inspiron 11-3162 LCD Screen Replacement: paso 6, imagen 3 de 3
    • Use your fingers (or a set of tweezers) to disconnect the battery cable from the motherboard by gently pulling it towards the battery.

    • Pull parallel to the battery, not straight up.

    • Lift and remove the battery from its recess.

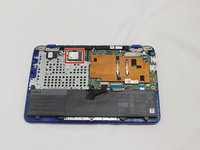
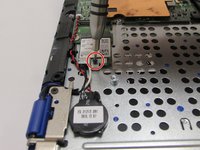
  7. Dell Inspiron 11-3162 LCD Screen Replacement, Wireless WLAN Card: paso 7, imagen 1 de 2 Dell Inspiron 11-3162 LCD Screen Replacement, Wireless WLAN Card: paso 7, imagen 2 de 2
    • Use the phillips screwdriver with the PH000 head to unscrew the 3.8mm screw.

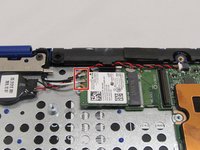
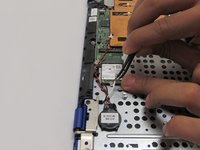
  8. Dell Inspiron 11-3162 LCD Screen Replacement: paso 8, imagen 1 de 2 Dell Inspiron 11-3162 LCD Screen Replacement: paso 8, imagen 2 de 2
    • Using the tweezers, pull the white and black wires off of the WiFi Chip.

  9. Dell Inspiron 11-3162 LCD Screen Replacement: paso 9, imagen 1 de 1
    • Pull out the WiFi Chip.

  10. Dell Inspiron 11-3162 LCD Screen Replacement, LCD Screen: paso 10, imagen 1 de 2 Dell Inspiron 11-3162 LCD Screen Replacement, LCD Screen: paso 10, imagen 2 de 2
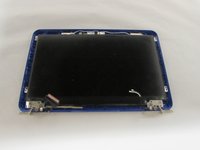
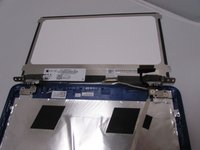
    • Remove the two screws that hold down the LCD hinges.

  11. Dell Inspiron 11-3162 LCD Screen Replacement: paso 11, imagen 1 de 1
    • Pull the hinges back and remove the screen.

  12. Dell Inspiron 11-3162 LCD Screen Replacement: paso 12, imagen 1 de 2 Dell Inspiron 11-3162 LCD Screen Replacement: paso 12, imagen 2 de 2
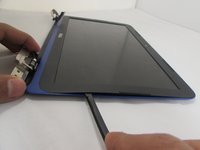
    • Remove the hinge covers with your spudger tool.

  13. Dell Inspiron 11-3162 LCD Screen Replacement: paso 13, imagen 1 de 2 Dell Inspiron 11-3162 LCD Screen Replacement: paso 13, imagen 2 de 2
    • Carefully remove the LCD Bezel with your regular black nylon spudger tool by bringing it all the way around the outer edges of your screen.

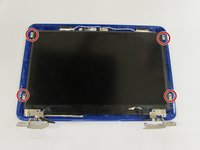
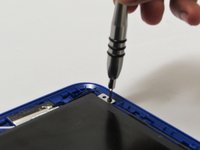
  14. Dell Inspiron 11-3162 LCD Screen Replacement: paso 14, imagen 1 de 3 Dell Inspiron 11-3162 LCD Screen Replacement: paso 14, imagen 2 de 3 Dell Inspiron 11-3162 LCD Screen Replacement: paso 14, imagen 3 de 3
    • Remove the four screws with a PH00 sized bit.

    • Flip the screen over.

  15. Dell Inspiron 11-3162 LCD Screen Replacement: paso 15, imagen 1 de 1
    • Loosen the tape, and remove the LCD Cable.

    • Remove the screen.

Conclusión

To reassemble your device, follow these instructions in reverse order.

5 personas más completaron esta guía.

2 comentarios

Between steps 9 and 10, the motherboard is removed and no description photos are provided for this. I undid the cable on the right hinge and then removed the hinges and screen with the motherboard in place, but the pictures definitely show it removed. Otherwise a very easy to follow process.

Philip Blakemore - Contestar

I agree with Philip’s comment re: the missing step between 9 and 10. I successfully followed these very clear instructions to repair my daughter’s Chromebook. Thank you!

Katrina Dalrymple - Contestar

Agregar Comentario

Ver Estadísticas:

Ultimas 24 horas: 0

Ultimos 7 días: 1

Ultimos 30 días: 2

Todo El Tiempo: 1,647