Esta versión puede contener ediciones incorrectas. Cambie a la última instantánea verificada.
Qué necesitas
-
Este paso está sin traducir. Ayuda a traducirlo
-
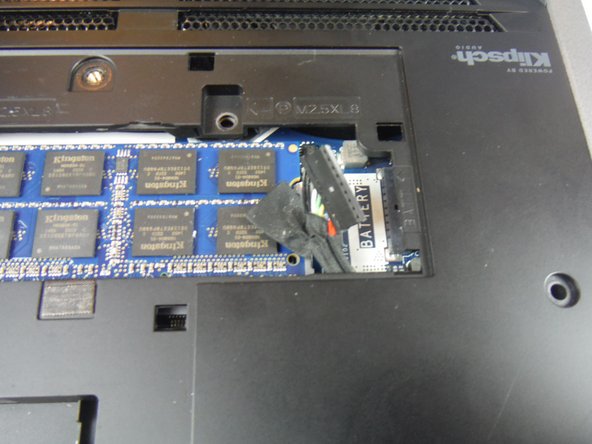
Disconnect the battery cable from the battery cable terminal.
-
-
Este paso está sin traducir. Ayuda a traducirlo
-
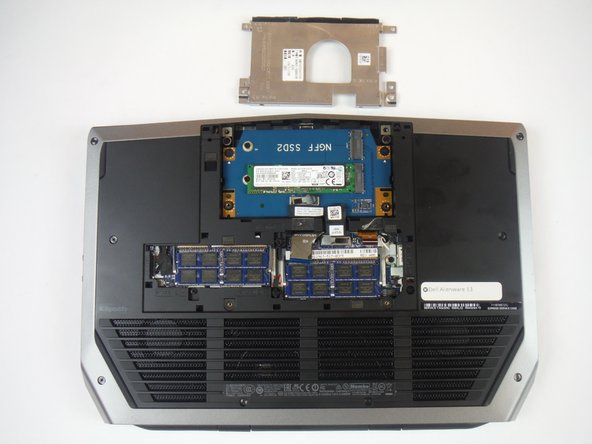
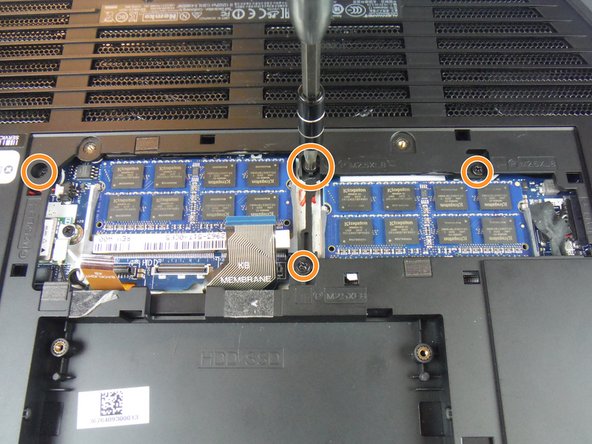
Remove (4) 6 mm Phillips head screws from the solid-state metal drive bracket, using a Phillips # 1 screwdriver.
-
-
Este paso está sin traducir. Ayuda a traducirlo
-
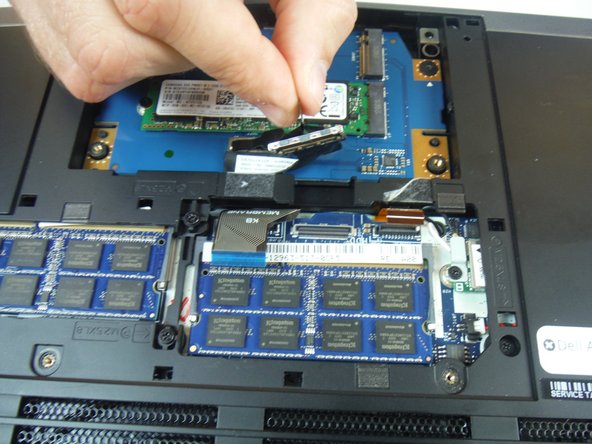
Grab the pull tab to pivot the solid-state drive bracket upwards. Remove the bracket from the computer base.
-
-
-
Este paso está sin traducir. Ayuda a traducirlo
-
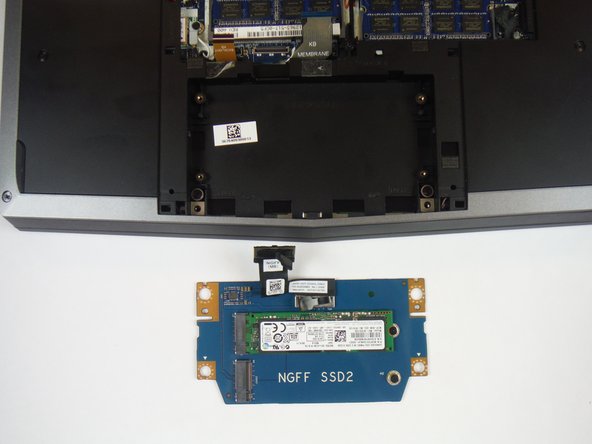
Using the pull tab, disconnect the black solid-state drive cable from the system board.
-
-
Este paso está sin traducir. Ayuda a traducirlo
-
Remove (2) 3 mm Phillips head screws, using a Phillips # 0 screwdriver, that connect the solid-state drive assembly to the computer base.
-
-
Este paso está sin traducir. Ayuda a traducirlo
-
Lift up on the solid-state drive assembly to remove it from the computer base.
-
-
Este paso está sin traducir. Ayuda a traducirlo
-
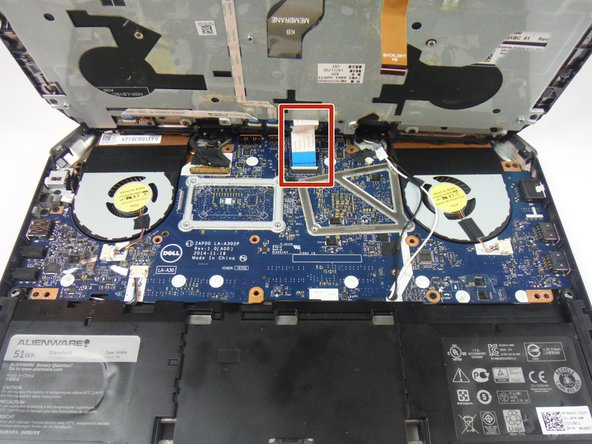
Locate two cables labeled, "KB Backlight" (orange) and "KB Membrane" (black). Lift up on the latches to disconnect the cables from the system board.
-
-
Este paso está sin traducir. Ayuda a traducirlo
-
Remove (8) 9 mm Phillips head screws using a Phillips # 1 screwdriver, that secures the palm-rest assembly to the computer base.
-
Remove (4) 8 mm Phillips head screws using a Phillips # 1 screwdriver.
-
Remove (2) 7 mm Phillips head screws using a Phillips # 1 screwdriver.
-
-
Este paso está sin traducir. Ayuda a traducirlo
-
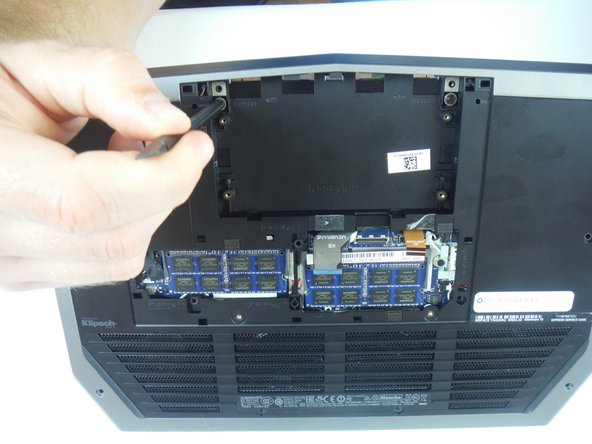
Lift the computer base slightly towards you and push the release tabs on the palm-rest assembly until it pops out using a spudger.
-
-
Este paso está sin traducir. Ayuda a traducirlo
-
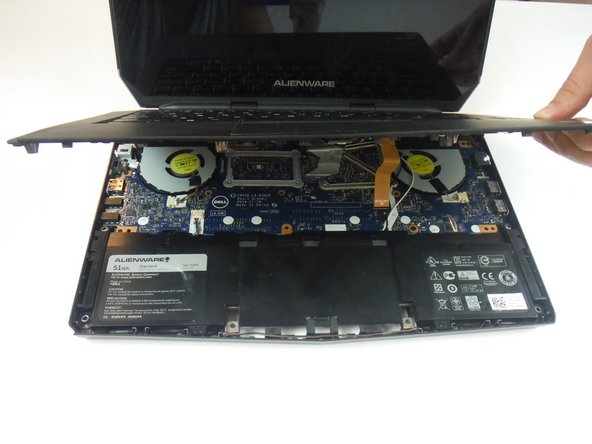
Turn the computer over and open the display as far as possible.
-
Using a plastic spudger, pry up along the edges of the palm-rest assembly.
-
Gently lift the palm-rest assembly.
-
-
Este paso está sin traducir. Ayuda a traducirlo
-
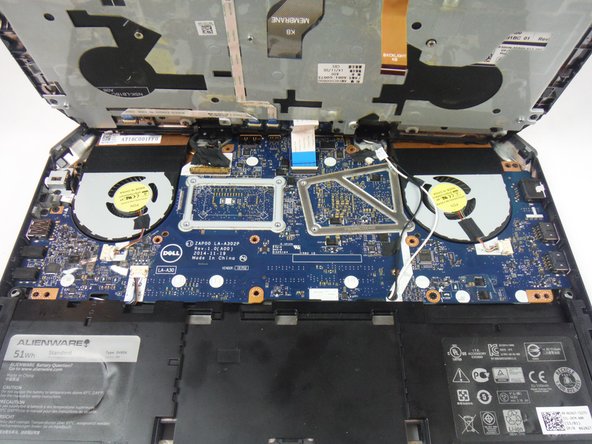
Lift the connector latch and disconnect the power-button board cable from the system board. Identified as a cable with a blue tab.
-
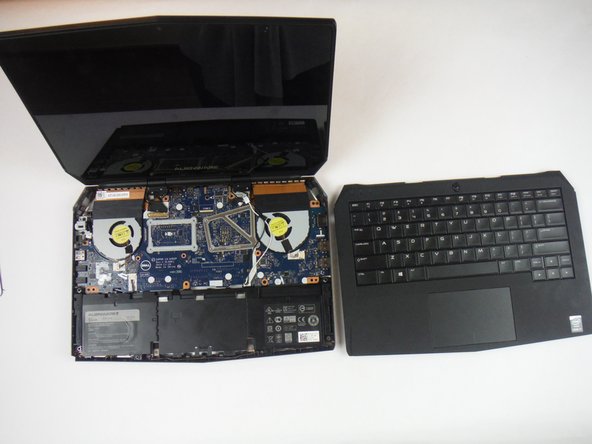
Lift the palm-rest assembly off the computer base.
-
-
Este paso está sin traducir. Ayuda a traducirlo
-
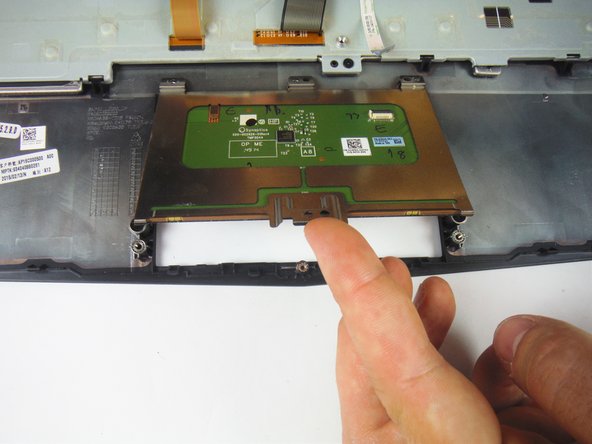
Remove (4) 3 mm Phillips head screws securing the touch pad to the palm rest assembly using a Phillips # 0 screwdriver.
-
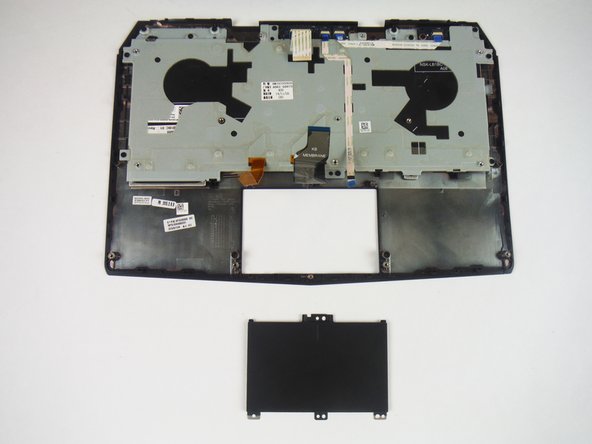
Lift up and remove the touch pad from the palm rest assembly.
-


Equipo

USF Tampa, Team 14-2, Eyestone Fall 2016 Miembro de USF Tampa, Team 14-2, Eyestone Fall 2016
USFT-EYESTONE-F16S14G2
3 Miembros
7 Guías creadas