Esta versión puede contener ediciones incorrectas. Cambiar a la última instantánea verificada.
Qué necesitas
-
Este paso está sin traducir. Ayuda a traducirlo
-
The antistatic coating for the table is cut with a cutter according to the length and width of the table.
-
The anti-static coating on the shelves is cut with a notch according to the length and width of the shelf.
-
-
Este paso está sin traducir. Ayuda a traducirlo
-
A hole is punched in the middle of the table cover.
-
The clip is pressed with a button.
-
A hole is punched in the left edge of the shelf cover.
-
The button and shelves are clamped with clamps.
-
-
Este paso está sin traducir. Ayuda a traducirlo
-
Cut a 30 cm long cord (for a table).
-
Cut cable 1.3 m long cable (shelves).
-
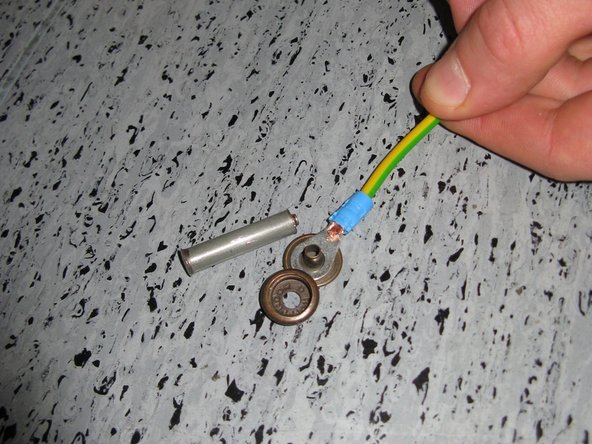
The wire is insulated at both ends. Setting the insulation pliers at the 10 mm mark.
-
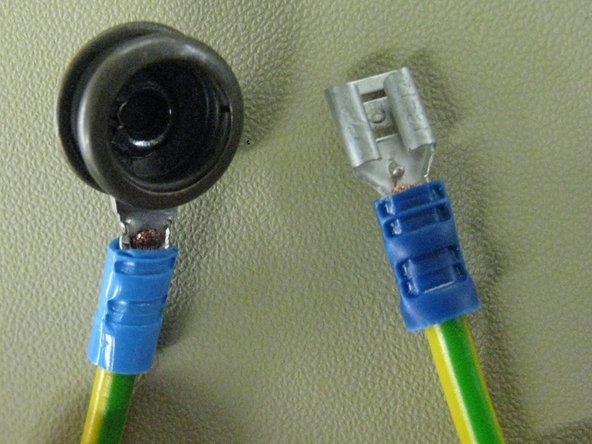
A quick-connect contact is clamped to one end of the cord.
-
The loop contact is pressed onto the other end and a pin with a hammer is hammered onto it.
-
For both wires, one end is terminated with a quick-connect contact, the other end with a pin with a head.
-
-
-
Este paso está sin traducir. Ayuda a traducirlo
-
A 2.5 m long cable is cut (between the pole and the table).
-
The wire is insulated at both ends. Setting the insulation pliers at the 10 mm mark.
-
Quick-connect contacts are clamped at both ends.
-
-
Este paso está sin traducir. Ayuda a traducirlo
-
A bracelet grounding socket is attached to the front of the table, 50 cm from the left edge.
-
Socket screwed 2 pcs. with hexagonal self-tapping screws.
-
-
Este paso está sin traducir. Ayuda a traducirlo
-
The cord runs through the inside of the table and the cord is wrapped around the left leg of the table from the inside.
-
The cord is then routed straight to the left rear leg of the table. From the inside, the cord is wrapped around the leg and routed as close to the center of the table as possible.
-
After this self-tapping screw 1 pcs. the contact block is placed first on the head and the contact of the loop is placed under the block.
-
A block with a socket and a self-tapping screw is placed from below under a metal table beam.
-
The table construction is drilled with a self-tapping screw and a block with a socket loop is screwed on.
-
-
Este paso está sin traducir. Ayuda a traducirlo
-
A contact pad is screwed horizontally onto the ground pole with a self-tapping screw.
-
-
Este paso está sin traducir. Ayuda a traducirlo
-
The prepared table and shelf coverings are placed on the table.
-
The table cover is connected to the contact pad.
-
The shelf cover is connected to the contact pad.
-
The table contact pad is connected with a wire to the ground tube contact pad.
-


Cancelar: No complete esta guía.
2 personas más completaron esta guía.