Esta versión puede contener ediciones incorrectas. Cambie a la última instantánea verificada.
Qué necesitas
-
Este paso está sin traducir. Ayuda a traducirlo
-
Remove the four (9 mm) screws with a PH2 screwdriver.
-
Remove the two (7 mm) located with a PH2 screwdriver.
-
-
Este paso está sin traducir. Ayuda a traducirlo
-
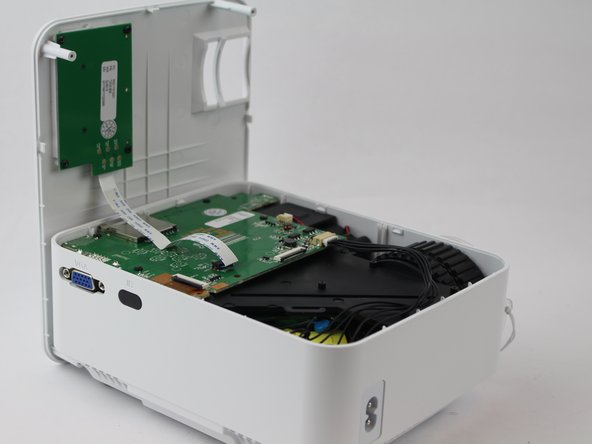
Flip the device over and pry the top off with a plastic opening tool.
-
-
Este paso está sin traducir. Ayuda a traducirlo
-
Remove the ribbon cable connecting the motherboard to the button control board by gently pulling it from its connector.
-
-
-
Este paso está sin traducir. Ayuda a traducirlo
-
Remove four (6 mm) screws connecting the motherboard using a J0 screwdriver.
-
-
Este paso está sin traducir. Ayuda a traducirlo
-
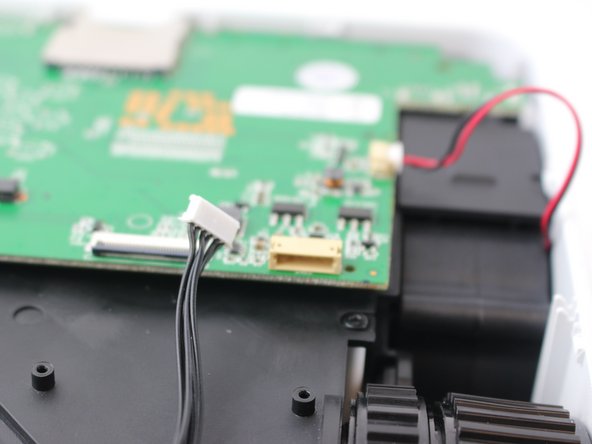
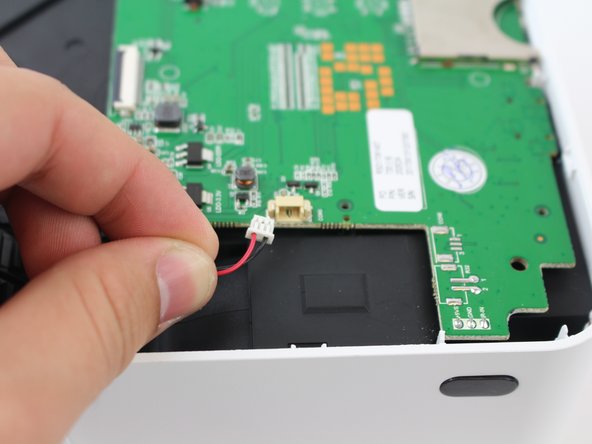
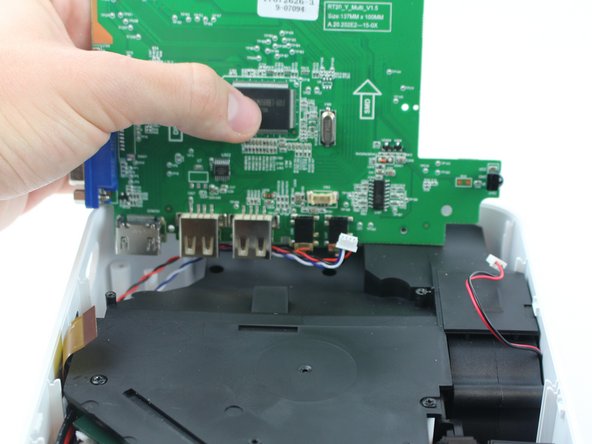
Remove the two cables connected to the motherboard: black power cable and the red/black fan cable.
-
-
Este paso está sin traducir. Ayuda a traducirlo
-
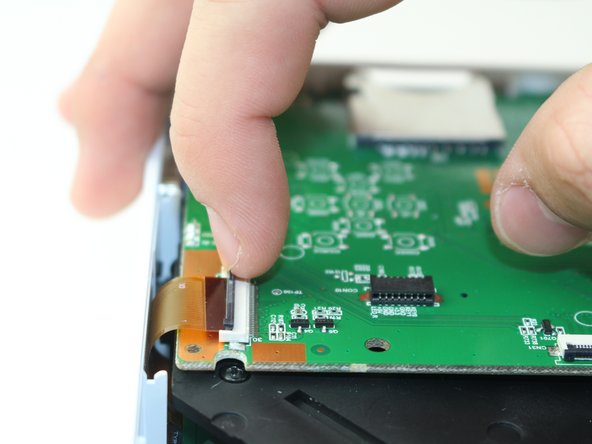
Lift the black latch on the ZIF connector and remove the ribbon cable that attaches the digitizer to the motherboard.
-
-
Este paso está sin traducir. Ayuda a traducirlo
-
Raise motherboard by lifting sideways and then up to avoid the ports.
-
-
Este paso está sin traducir. Ayuda a traducirlo
-
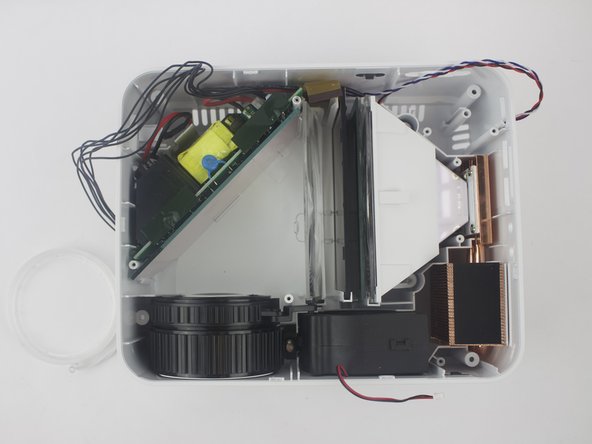
Remove wires attaching the piezoelectric speakers to the motherboard.
-
-
Este paso está sin traducir. Ayuda a traducirlo
-
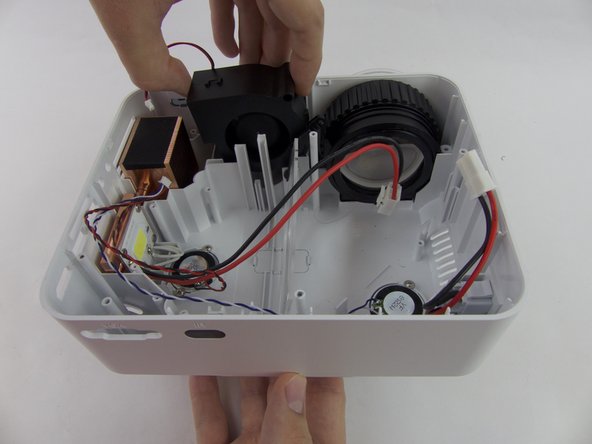
Remove the five screws securing the black plastic cover with a J0 screwdriver.
-
Lift up and out to remove.
-


Cancelar: No complete esta guía.
7 personas más completaron esta guía.
Equipo

USF Tampa, Team S16-G2, Boczar Spring 2018 Miembro de USF Tampa, Team S16-G2, Boczar Spring 2018
USFT-BOCZAR-S18S16G2
5 Miembros
5 Guías creadas
2 comentarios
Any idea of the specifications of the fan? 12v, 24v? I want to change it for another more quiet… but not sure about its voltage. It is 50x50x20mm right? Thanks!
Hola! También querria sustituirlo por otro más silencioso. ¿Alguna idea de sus especificaciones?