Saltar al contenido principal

Curtain Rod Bracket Replacement

Qué necesitas

  1. Curtain Rod Bracket Replacement, Bracket: paso 1, imagen 1 de 2 Curtain Rod Bracket Replacement, Bracket: paso 1, imagen 2 de 2
    • If the bracket is still partially attached, use a screwdriver to remove the remaining screw(s), then remove the bracket from the wall completely.

  2. Curtain Rod Bracket Replacement: paso 2, imagen 1 de 2 Curtain Rod Bracket Replacement: paso 2, imagen 2 de 2
    • Observe the hole of the screw(s) that was ripped out of the wall.

    • Determine whether the plastic anchor will fit in the current size of the hole.

    • If the hole is smaller than the anchor, continue to Step 3. If the hole is bigger, complete this guide on patching a hole in dry wall.

  3. Curtain Rod Bracket Replacement: paso 3, imagen 1 de 2 Curtain Rod Bracket Replacement: paso 3, imagen 2 de 2
    • Use a ¼ inch drill bit to drill the hole(s) that the anchor will be placed into. Drill into the wall and continue drilling as you pull out of the wall.

    • Avoid placing hands near the drill bit while in use. If you have medium to long-length hair, tie your hair back to avoid possible injury.

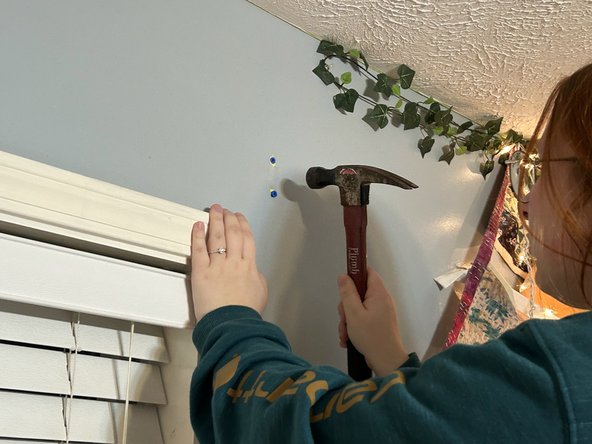
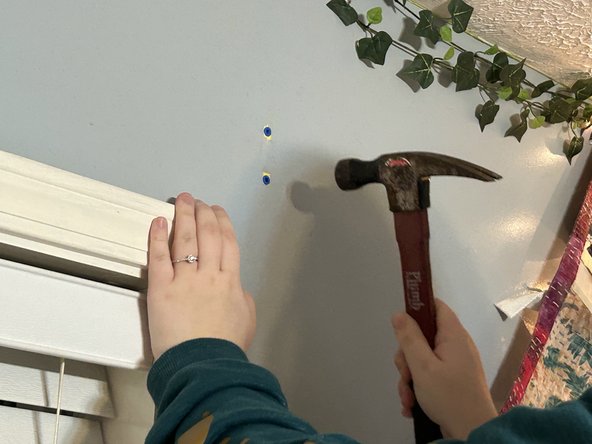
  4. Curtain Rod Bracket Replacement: paso 4, imagen 1 de 3 Curtain Rod Bracket Replacement: paso 4, imagen 2 de 3 Curtain Rod Bracket Replacement: paso 4, imagen 3 de 3
    • Hammer the hollow wall anchor(s) into the hole until flush with the drywall.

  5. Curtain Rod Bracket Replacement: paso 5, imagen 1 de 1
    • Paint the wall anchor and any surrounding area that has been damaged so that it matches the wall.

  6. Curtain Rod Bracket Replacement: paso 6, imagen 1 de 2 Curtain Rod Bracket Replacement: paso 6, imagen 2 de 2
    • Screw the bracket into the anchor(s) with a screwdriver. The bracket will be secured to the wall.

  7. Curtain Rod Bracket Replacement: paso 7, imagen 1 de 2 Curtain Rod Bracket Replacement: paso 7, imagen 2 de 2
    • Touch up with paint if necessary.

  8. Curtain Rod Bracket Replacement: paso 8, imagen 1 de 2 Curtain Rod Bracket Replacement: paso 8, imagen 2 de 2
    • Rehang your curtain rod and curtains by placing the rod onto the bracket.

Conclusión

Enjoy your renewed privacy!

Ashtyn Drake

Miembro Desde 10/14/22

157 Reputación

1 Guía escrita

0 comentarios

Agregar Comentario

Ver Estadísticas:

Ultimas 24 horas: 2

Ultimos 7 días: 10

Ultimos 30 días: 45

Todo El Tiempo: 688