Saltar al contenido principal

Creative Ziio 7" Motherboard Replacement

Qué necesitas

  1. Creative Ziio 7" Motherboard Replacement, Back Panel: paso 1, imagen 1 de 3 Creative Ziio 7" Motherboard Replacement, Back Panel: paso 1, imagen 2 de 3 Creative Ziio 7" Motherboard Replacement, Back Panel: paso 1, imagen 3 de 3
    • Remove the back panel by using the plastic opening tool to carefully pry around the panel's edges.

    • The volume control button and the top power button may fall out during this step.

  2. Creative Ziio 7" Motherboard Replacement, Motherboard: paso 2, imagen 1 de 3 Creative Ziio 7" Motherboard Replacement, Motherboard: paso 2, imagen 2 de 3 Creative Ziio 7" Motherboard Replacement, Motherboard: paso 2, imagen 3 de 3
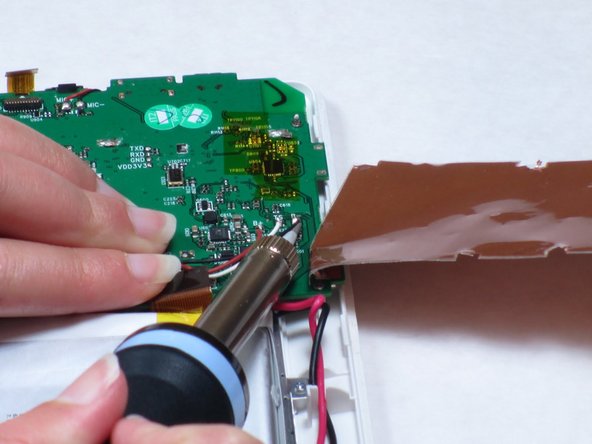
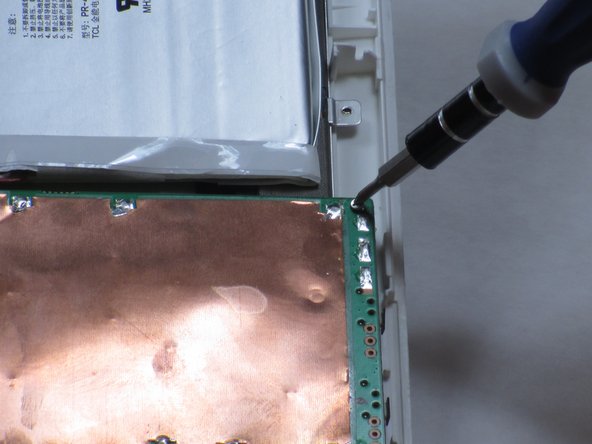
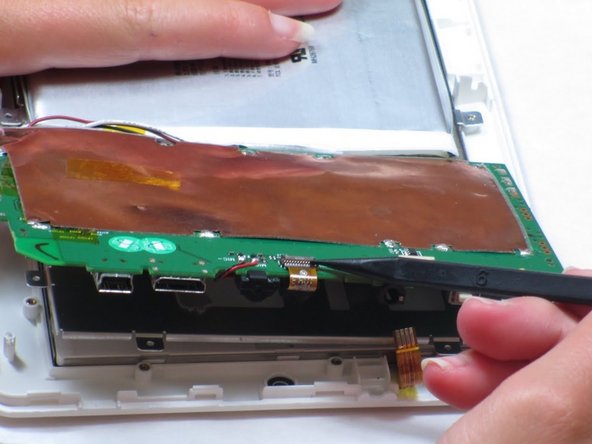
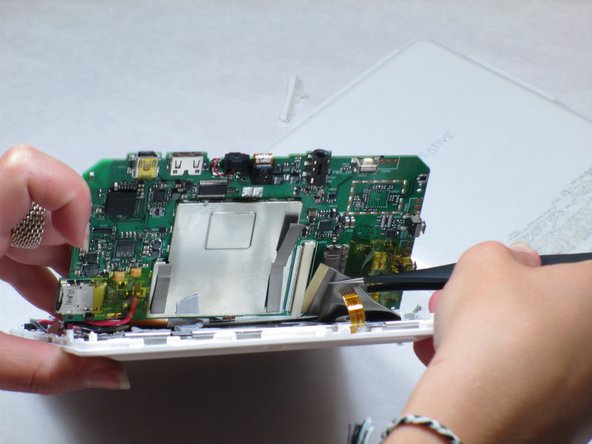
    • Remove the copper plate covering the motherboard by desoldering the ten solder points.

    • The solder point in the bottom right corner is marked but hidden by the soldering iron.

  3. Creative Ziio 7" Motherboard Replacement: paso 3, imagen 1 de 2 Creative Ziio 7" Motherboard Replacement: paso 3, imagen 2 de 2
    • Remove the adhesive tape covering the three wires connected to the motherboard.

    • Desolder the solder points connecting the wires to the motherboard.

  4. Creative Ziio 7" Motherboard Replacement: paso 4, imagen 1 de 3 Creative Ziio 7" Motherboard Replacement: paso 4, imagen 2 de 3 Creative Ziio 7" Motherboard Replacement: paso 4, imagen 3 de 3
    • Disconnect the ribbon cable that is attached underneath the copper plate.

    • Disconnect the other ribbon cable that is connected next the copper plate in the corner of the circuit board.

  5. Creative Ziio 7" Motherboard Replacement: paso 5, imagen 1 de 2 Creative Ziio 7" Motherboard Replacement: paso 5, imagen 2 de 2
    • Remove the four 4mm Philips #00 screws holding the motherboard to the casing.

    • The copper plate will be removed by now. However, the picture does not show this.

  6. Creative Ziio 7" Motherboard Replacement: paso 6, imagen 1 de 2 Creative Ziio 7" Motherboard Replacement: paso 6, imagen 2 de 2
    • Lift up the motherboard.

    • A mesh-looking strip on the left side will be connected to the bottom of the motherboard.

    • Remove the tape on top of the strip and use tweezers or pliers to pull on the strip to unplug it.

  7. Creative Ziio 7" Motherboard Replacement: paso 7, imagen 1 de 1
    • Remove the red and black wires with a soldering iron that are located underneath the motherboard.

    • Do not cut or damage the wires in the process. They will be needed for the new motherboard.

  8. Creative Ziio 7" Motherboard Replacement: paso 8, imagen 1 de 1
    • Remove the old motherboard and dispose of it resposibly.

Conclusión

To reassemble your device, follow these instructions in reverse order.

2 personas más completaron esta guía.

Equipo

Cal Poly, Team 14-10, Maness Spring 2013 Miembro de Cal Poly, Team 14-10, Maness Spring 2013

CPSU-MANESS-S13S14G10

4 Miembros

13 Guías creadas

0 comentarios

Agregar Comentario

Ver Estadísticas:

Ultimas 24 horas: 0

Ultimos 7 días: 2

Ultimos 30 días: 2

Todo El Tiempo: 1,191