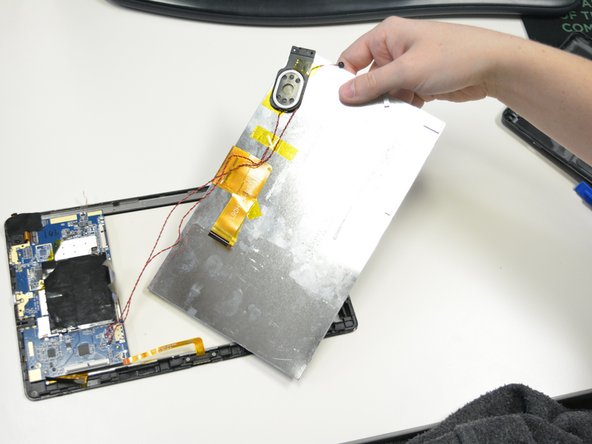
Saltar al contenido principal

Craig CMP801 LCD Screen Replacement

Qué necesitas

  1. Craig CMP801 LCD Screen Replacement, Back Cover: paso 1, imagen 1 de 2 Craig CMP801 LCD Screen Replacement, Back Cover: paso 1, imagen 2 de 2
    • Locate the opening line between the cover and the device. Then locate the groove near the charging port.

  2. Craig CMP801 LCD Screen Replacement: paso 2, imagen 1 de 2 Craig CMP801 LCD Screen Replacement: paso 2, imagen 2 de 2
    • Use a metal spudger to separate the back cover from the front touch screen.

    • To do this, place the metal spudger in between the groove near the charging port of the device to unlatch the first clip.

  3. Craig CMP801 LCD Screen Replacement: paso 3, imagen 1 de 2 Craig CMP801 LCD Screen Replacement: paso 3, imagen 2 de 2
    • Continue to separate all of the clips around the device until the back cover comes off completely.

  4. Craig CMP801 LCD Screen Replacement, Volume Controls: paso 4, imagen 1 de 2 Craig CMP801 LCD Screen Replacement, Volume Controls: paso 4, imagen 2 de 2
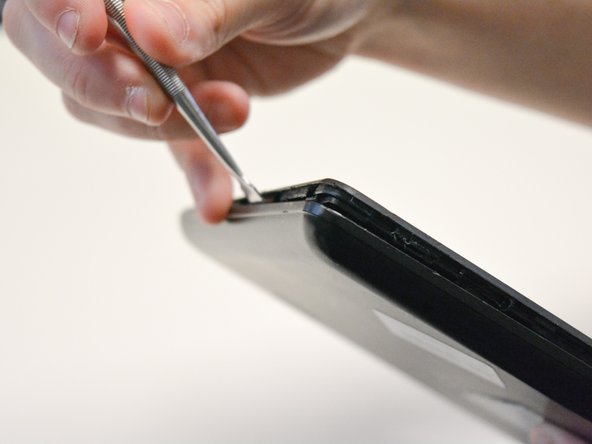
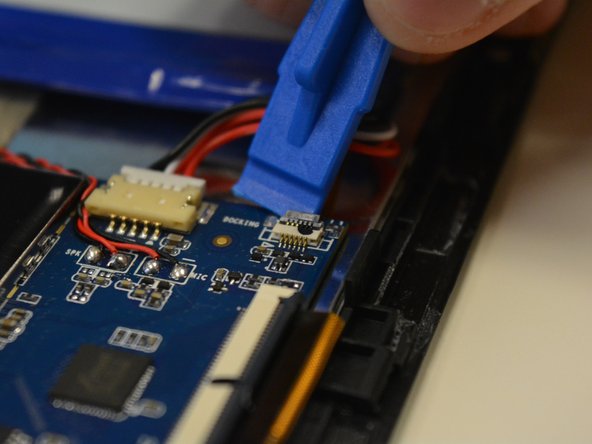
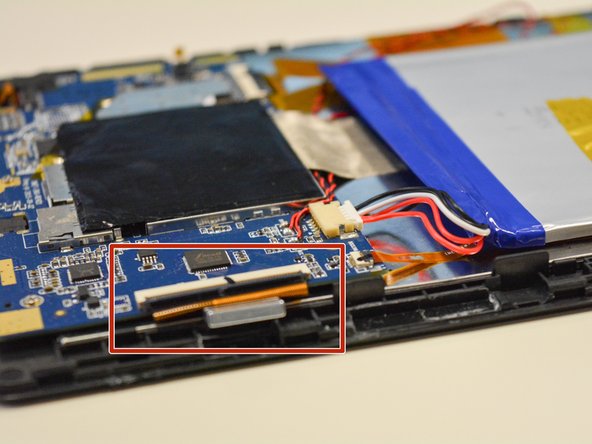
    • After taking out the back cover, locate the black flap.

    • Open the black flap with the plastic opening tools.

    • Be careful not to break the flap when you open it.

  5. Craig CMP801 LCD Screen Replacement: paso 5, imagen 1 de 2 Craig CMP801 LCD Screen Replacement: paso 5, imagen 2 de 2
    Herramienta utilizada en este paso:
    Tweezers
    $4.99
    Comprar
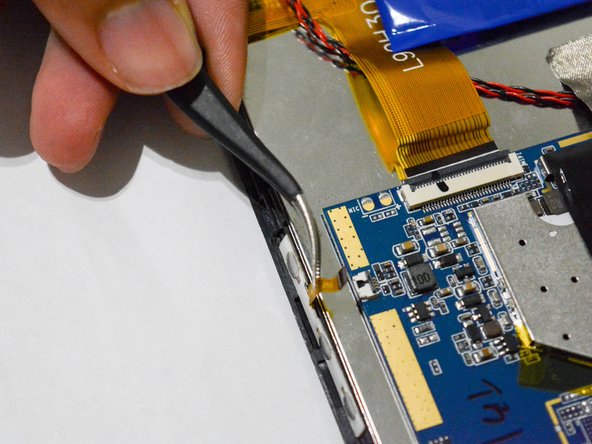
    • Once the tab is released, use the angled tweezers to take out the tab.

    • Be careful not to scratch the tab.

  6. Craig CMP801 LCD Screen Replacement: paso 6, imagen 1 de 2 Craig CMP801 LCD Screen Replacement: paso 6, imagen 2 de 2
    • Use the angled tweezers to pull the volume controls out and replace it with a new one.

  7. Craig CMP801 LCD Screen Replacement, Battery: paso 7, imagen 1 de 3 Craig CMP801 LCD Screen Replacement, Battery: paso 7, imagen 2 de 3 Craig CMP801 LCD Screen Replacement, Battery: paso 7, imagen 3 de 3
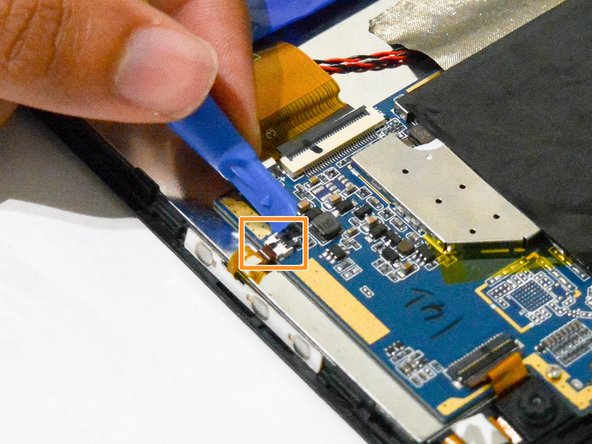
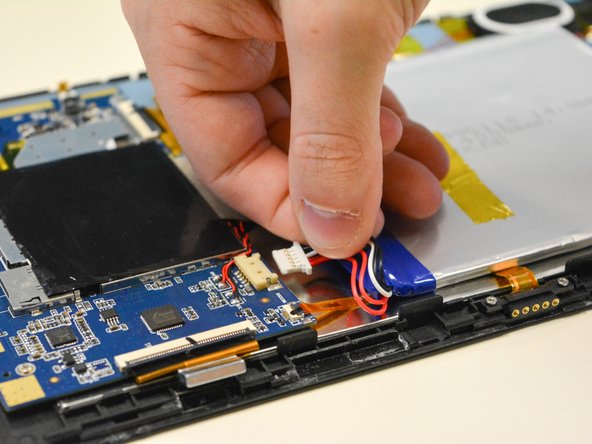
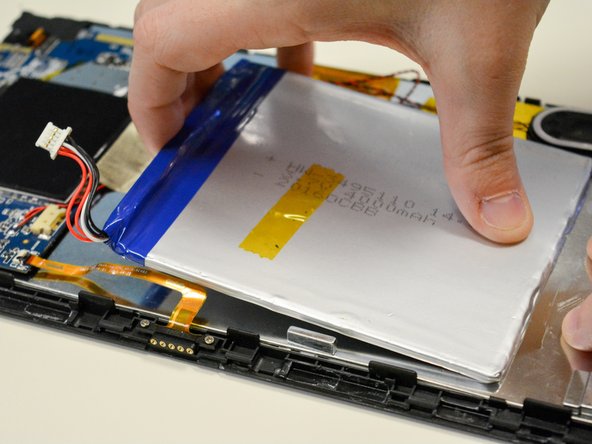
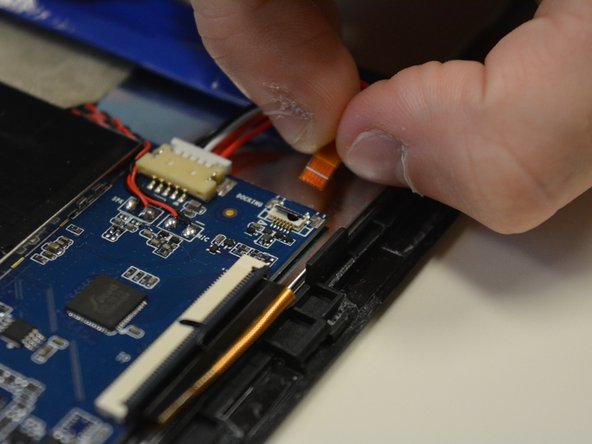
    • Locate the white plug next to the battery.

    • Use your fingers to pull off white plug that connected to the battery.

    • Be careful not to pull or break the wires on the bottom.

  8. Craig CMP801 LCD Screen Replacement: paso 8, imagen 1 de 3 Craig CMP801 LCD Screen Replacement: paso 8, imagen 2 de 3 Craig CMP801 LCD Screen Replacement: paso 8, imagen 3 de 3
    • The battery should only be connected to the LCD by adhesive tape.

    • Using force, carefully remove the battery while holding the LCD in place.

  9. Craig CMP801 LCD Screen Replacement, LCD Screen: paso 9, imagen 1 de 3 Craig CMP801 LCD Screen Replacement, LCD Screen: paso 9, imagen 2 de 3 Craig CMP801 LCD Screen Replacement, LCD Screen: paso 9, imagen 3 de 3
    • Open the three black flaps located on each side of the motherboard.

  10. Craig CMP801 LCD Screen Replacement: paso 10, imagen 1 de 2 Craig CMP801 LCD Screen Replacement: paso 10, imagen 2 de 2
    • Then detach each of the three tabs from the LCD screen.

  11. Craig CMP801 LCD Screen Replacement: paso 11, imagen 1 de 2 Craig CMP801 LCD Screen Replacement: paso 11, imagen 2 de 2
    • Using a Philips 0 Screwdriver, remove the screws connecting the speaker to the motherboard.

    • Remove black plastic speaker holder.

  12. Craig CMP801 LCD Screen Replacement: paso 12, imagen 1 de 1
    • Remove the gray tape connecting the motherboard to the metal slate.

    • Use a spudger to separate the metal slate from the front touch screen.

  13. Craig CMP801 LCD Screen Replacement: paso 13, imagen 1 de 2 Craig CMP801 LCD Screen Replacement: paso 13, imagen 2 de 2
    • Carefully slide out the metal slate and LCD screen from underneath the motherboard.

  14. Craig CMP801 LCD Screen Replacement: paso 14, imagen 1 de 1
    • Flip over the metal slate and separate the LCD screen from it.

Conclusión

To reassemble your device, follow these instructions in reverse order.

Una persona más ha completado esta guía.

0 comentarios

Agregar Comentario

Ver Estadísticas:

Ultimas 24 horas: 0

Ultimos 7 días: 1

Ultimos 30 días: 10

Todo El Tiempo: 1,094