Saltar al contenido principal

Corsair Vengeance M65 Mouse Cable Replacement

Qué necesitas

  1. Corsair Vengeance M65 Mouse Cable Replacement, Disassembling Corsair Vengeance M65 Mouse Body: paso 1, imagen 1 de 2 Corsair Vengeance M65 Mouse Cable Replacement, Disassembling Corsair Vengeance M65 Mouse Body: paso 1, imagen 2 de 2
    • Let's begin!

    • First, flip it over.

    • Find two Torx screws. Use a T6 Torx driver to unscrew these. I used a small flat head screw driver to unscrew these because I did not have a T6 Torx driver.

  2. Corsair Vengeance M65 Mouse Cable Replacement: paso 2, imagen 1 de 2 Corsair Vengeance M65 Mouse Cable Replacement: paso 2, imagen 2 de 2
    • BE CAREFUL WITH FLAT-HEAD SCREWDRIVER! Alternatively open it bare handed.

    • DO NOT SEPARATE THE TWO HALVES TOO WIDE YET AS THERE ARE DELICATE RIBBON CABLES CONNECTING THE TWO HALVES!

    • Push down where I am pointing out here. It should come apart fairly easily.

    • To open it bare handed, hold M65 with USB cord running straight downwards and force top surface of M65 upwards with your palm then pull M65's rear edge upwardly with your "hooked" fingers of the same hand.

  3. Corsair Vengeance M65 Mouse Cable Replacement: paso 3, imagen 1 de 3 Corsair Vengeance M65 Mouse Cable Replacement: paso 3, imagen 2 de 3 Corsair Vengeance M65 Mouse Cable Replacement: paso 3, imagen 3 de 3
    • BE GENTLE!

    • Wiggle the front of the mouse and gently pull the top half towards the back.

    • SLIGHTLY LIFT THE TOP HALF ABOUT 5mm!

    • There is a ribbon cable and a power cable attached to the top and bottom.

    • SLOWLY! Wiggle the top ribbon cable out of its slot.

    • On the power cable, grip the plug itself and not the wires. Pull the power cable from the bottom.

    • YAY! You got them apart!

  4. Corsair Vengeance M65 Mouse Cable Replacement: paso 4, imagen 1 de 3 Corsair Vengeance M65 Mouse Cable Replacement: paso 4, imagen 2 de 3 Corsair Vengeance M65 Mouse Cable Replacement: paso 4, imagen 3 de 3
    • If you wish to go any further, please do so at your own risk. I have not gone further than this.

    • There are two screws that hold the PCB in place. One is longer than the other. The SHORT one goes to where I am pointing. The long screw holds down a grounding wire. Move the wire out of the way as you take out the board.

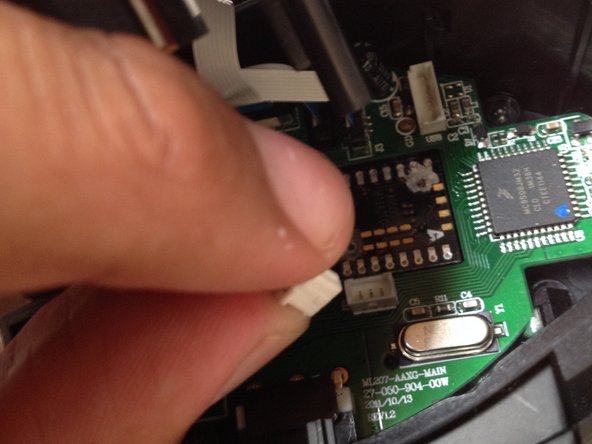
    • There is a ribbon cable that I am pointing at which you can pull out. There are some multi-colored wires that are plugged into the board. Wiggle it out. Move it to the side when you take the board out.

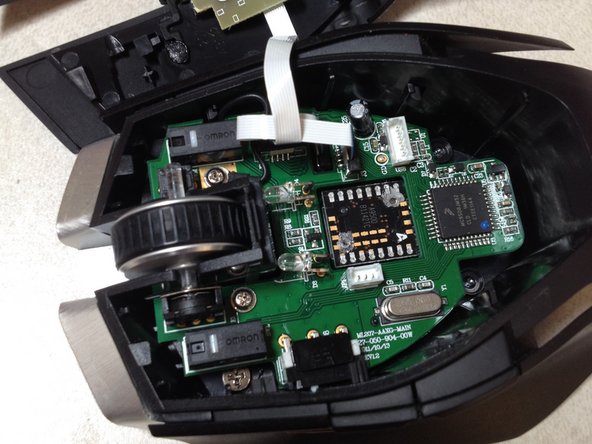
    • Now lift the PCB out along with the scroll wheel. There should be some more screws which hold the metal to the plastic. Undo those if you want to.

    • The sides come apart. You must take the mainboard out in order to take the sides off. There are two latches for the left side and four on the right side. The left side also has two screws securing it to the rest of the body.

  5. Corsair Vengeance M65 Mouse Cable Replacement, Opening that mouse! and removing connections: paso 5, imagen 1 de 3 Corsair Vengeance M65 Mouse Cable Replacement, Opening that mouse! and removing connections: paso 5, imagen 2 de 3 Corsair Vengeance M65 Mouse Cable Replacement, Opening that mouse! and removing connections: paso 5, imagen 3 de 3
    • Once you've opened the mouse remove the power connector.

    • Remove the other connector present gently, as they're fragile.

    • Be aware of the very long ribbon still cable in place.

  6. Corsair Vengeance M65 Mouse Cable Replacement, Wire Stripping: paso 6, imagen 1 de 3 Corsair Vengeance M65 Mouse Cable Replacement, Wire Stripping: paso 6, imagen 2 de 3 Corsair Vengeance M65 Mouse Cable Replacement, Wire Stripping: paso 6, imagen 3 de 3
    • When I first opened this, I found my power connector in this sorry state but I guess it could have been worse.

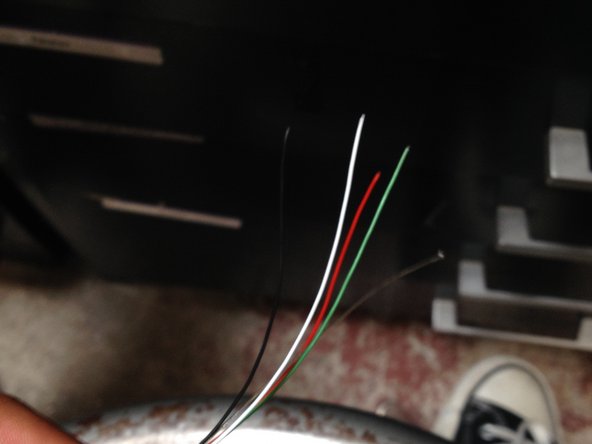
    • Start stripping the wires so that you can solder them, then run the wires through the hole.

    • Begin soldering the wires: Red+red,white+ white, green+green, black+black, and that really thick black cable+plus the other thick cable or the silver one

    • Don't forget to wrap the exposed wires in electrical tape (Will post pictures of repaired mouse later)

    • Hopefully you have done everything you could and now your mouse is working again!

Conclusión

To reassemble your device, follow these instructions in reverse order.

4 personas más completaron esta guía.

Alexis Corres

Miembro Desde 08/16/14

209 Reputación

1 Guía escrita

Un comentario

Would the PCB boards for the M65 work for the M45 Raptor? My scroll wheel is currently hindering the left and right buttons to work properly. figured I could find a replacement PCB board and swap it out.

Kendrick Ting - Contestar

Agregar Comentario

Ver Estadísticas:

Ultimas 24 horas: 0

Ultimos 7 días: 1

Ultimos 30 días: 16

Todo El Tiempo: 7,211