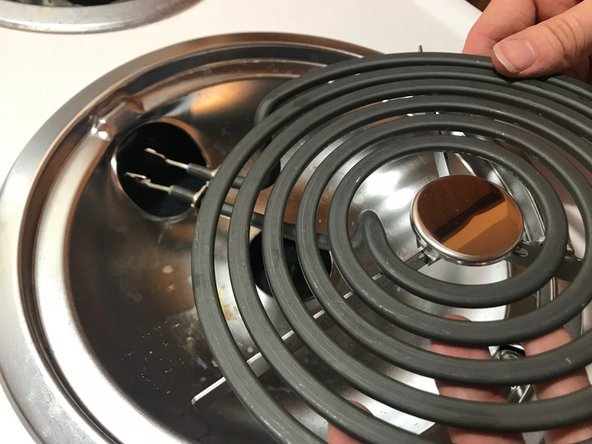
Saltar al contenido principal

Conventional Electric Stovetop Plug-in Burner Replacement

Qué necesitas

  1. Conventional Electric Stovetop Plug-in Burner Replacement, Plug-in Burner: paso 1, imagen 1 de 1
    • Check that the burner is turned off or your stove is unplugged.

  2. Conventional Electric Stovetop Plug-in Burner Replacement: paso 2, imagen 1 de 1
    • Detach the stove burner by gently lifting it up (you can use a flat head screwdriver to lift the burner if it is stuck).

  3. Conventional Electric Stovetop Plug-in Burner Replacement: paso 3, imagen 1 de 2 Conventional Electric Stovetop Plug-in Burner Replacement: paso 3, imagen 2 de 2
    • Gently pull the burner from the plug in (straight back towards you). The plug in is better depicted in the second picture of this step.

  4. Conventional Electric Stovetop Plug-in Burner Replacement: paso 4, imagen 1 de 1
    • Dispose of your old burner and take your new burner out of its packaging. It is ready to attach.

  5. Conventional Electric Stovetop Plug-in Burner Replacement: paso 5, imagen 1 de 1
    • Gently insert the burner into the plug in, you should feel it click into place.

  6. Conventional Electric Stovetop Plug-in Burner Replacement: paso 6, imagen 1 de 1
    • Gently set the burner back onto the stovetop.

  7. Conventional Electric Stovetop Plug-in Burner Replacement: paso 7, imagen 1 de 1
    • Now the stove is ready to be plugged back into the wall (if you detached it) and the burner is ready to be tested to see if it is working.

Conclusión

To reassemble your device, follow these instructions in reverse order.

Una persona más ha completado esta guía.

Chloe Martin

Miembro Desde 10/29/18

172 Reputación

1 Guía escrita

0 comentarios

Agregar Comentario

Ver Estadísticas:

Ultimas 24 horas: 0

Ultimos 7 días: 14

Ultimos 30 días: 58

Todo El Tiempo: 2,107