Introducción
If your Connect Four Electronic Handheld does not make any sound, you may need to replace the speaker. This replacement guide will show you how to remove the back casing and remove the speaker. In addition, this guide will also show you how to re-solder the speaker wires.
Qué necesitas
-
-
Make sure the Connect Four Electronic Handheld is off by allowing it to shut off automatically.
-
-
-
Using a Phillips head screwdriver, remove the (9.1mm length) #2 screw in the middle of the battery casing.
-
Slide the cover off and remove the battery.
-
-
-
-
Using a Phillips head screwdriver, remove the four (7.1mm- length) #3 screws that hold the back casing in place.
-
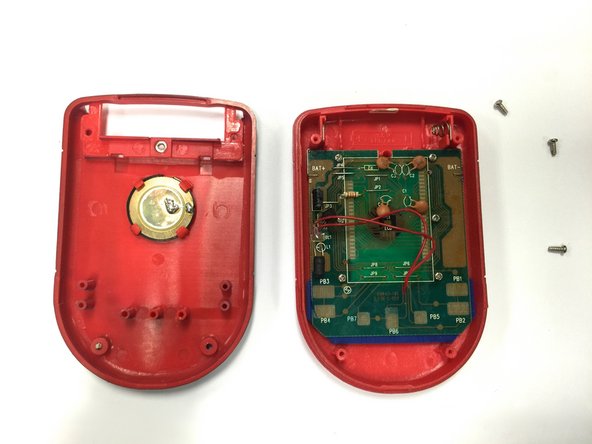
Carefully remove the back casing.
-
-
-
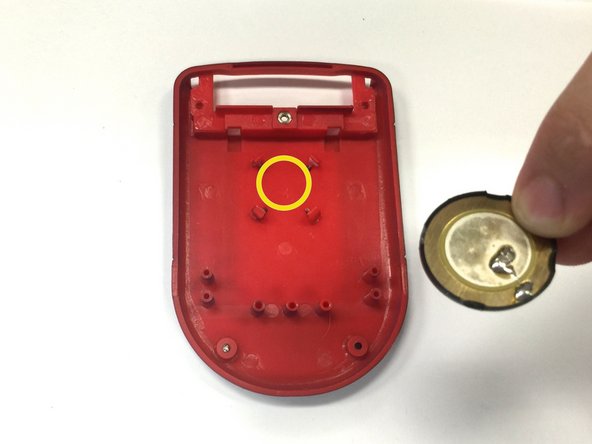
Locate the speaker on the back casing.
-
Using a spudger, wedge the speaker out of its place until it slides out.
-
Take the replacement speaker and wedge it back into its space.
-
-
-
Using a soldering iron, solder both red wires to their appropriate connections.
-


To reassemble your device, follow these instructions in reverse order.
To reassemble your device, follow these instructions in reverse order.
Cancelar: No complete esta guía.
Una persona más ha completado esta guía.
Equipo

Baylor, Team 8-11, Williams Fall 2014 Miembro de Baylor, Team 8-11, Williams Fall 2014
BU-WILLIAMS-F14S8G11
3 Miembros
12 Guías creadas