Introducción
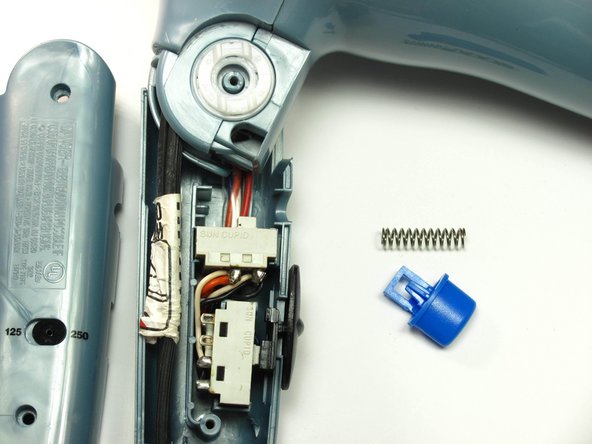
If when you hold down the cool down button and the air is still hot, the spring behind the button may be broken. Another possibility is that the other parts of the button inside the dryer that engage that setting may be broken.
Qué necesitas
-
-
Unscrew the two 18 mm long Phillips #2 screws on the side of the hair dryer.
-
-
-
-
Take out the cool down button and the spring behind it by gently lifting the button up toward you and pushing it to the right out of its groove.
-


To reassemble your device, follow these instructions in reverse order.
To reassemble your device, follow these instructions in reverse order.
Cancelar: No complete esta guía.
Una persona más ha completado esta guía.
Equipo

Cal Poly, Team 10-33, Maness Winter 2014 Miembro de Cal Poly, Team 10-33, Maness Winter 2014
CPSU-MANESS-W14S10G33
3 Miembros
7 Guías creadas