Introducción
This guide is provided to those who may need assistance on replacing their camera for a "Coby Kyros MID9042" tablet. Replacing the camera on a Coby Kyros MID9042 can be challenging but before you begin, make sure you have the necessary tools, a replacement camera, and a clean, well-lit workspace. Here's a step-by-step guide to help you through the process. Remember to exercise caution throughout the process, and if you encounter any difficulties, consult the device's user manual or seek assistance.
Qué necesitas
-
-
After powering off device, remove the anti-slip pads from all 4 corners on the back of the device.
-
Once slip pads are removed, proceed to unscrewing the four 3.2 mm Phillips #0 screws from the back cover.
-
-
-
-
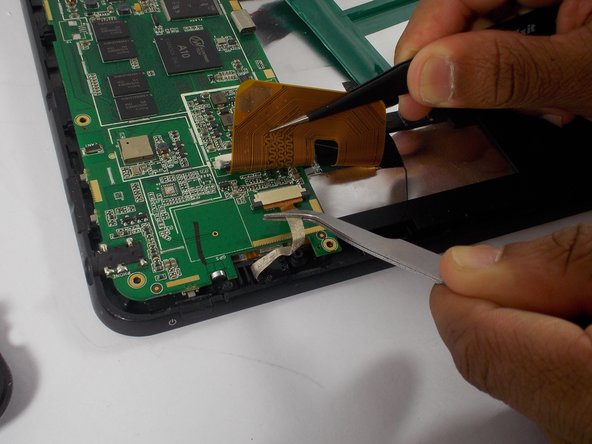
Locate the gold flap and use tweezers to lift the flap up.
-
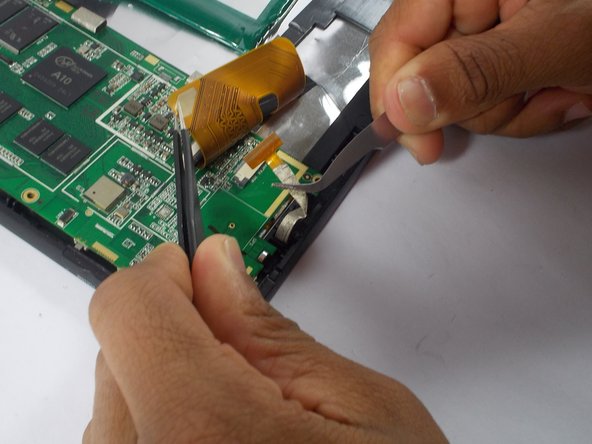
Use a second pair of tweezers to pull the gold tab connected to the camera out of the circuit board.
-
Once the tab is removed from the circuit board, pull the camera out of the tablet.
-


To reassemble your device, follow these instructions in reverse order.
To reassemble your device, follow these instructions in reverse order.
Equipo

UMass Dartmouth, Team 2-6, Shastany Spring 2015 Miembro de UMass Dartmouth, Team 2-6, Shastany Spring 2015
UMASSD-SHASTANY-S15S2G6
4 Miembros
6 Guías creadas