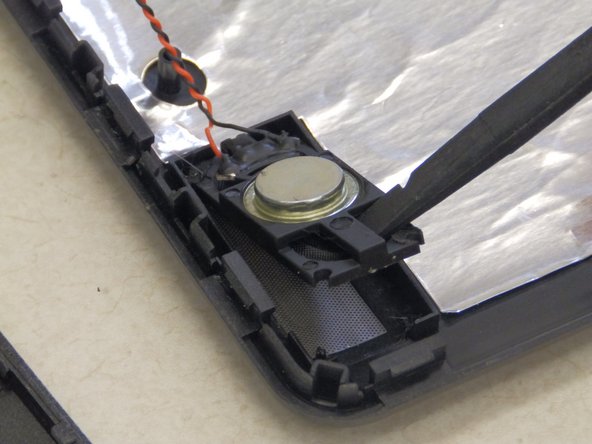
Saltar al contenido principal

Coby Kyros MID7024 Speakers Replacement

Qué necesitas

  1. Coby Kyros MID7024 Speakers Replacement, Back Cover: paso 1, imagen 1 de 2 Coby Kyros MID7024 Speakers Replacement, Back Cover: paso 1, imagen 2 de 2
    • Begin by ensuring that the device is powered off.

    • To replace the back cover of the device you must pry it open using the access points. One is located on the top of the device above the camera and the other is on the bottom left hand side.

    • Use the spudger to pry at the access points to open the device.

  2. Coby Kyros MID7024 Speakers Replacement: paso 2, imagen 1 de 3 Coby Kyros MID7024 Speakers Replacement: paso 2, imagen 2 de 3 Coby Kyros MID7024 Speakers Replacement: paso 2, imagen 3 de 3
    • Once the back cover begins to separate from the body of the device continue working the spudger around the perimeter of the device until the back cover is free.

    • You will hear some popping and cracking noises as you pry open the device. These sounds are the internal clips coming apart.

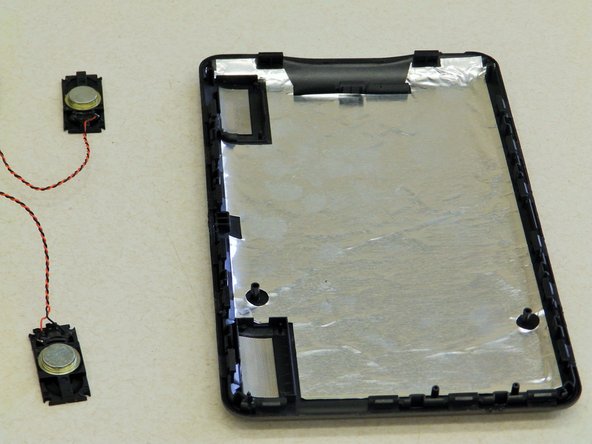
    • Once the back cover is free from the body of the device, open both sides like a book, placing them flat on the table as shown. Be sure to pay attention to the speaker wires that hold the two pieces together.

  3. Coby Kyros MID7024 Speakers Replacement: paso 3, imagen 1 de 3 Coby Kyros MID7024 Speakers Replacement: paso 3, imagen 2 de 3 Coby Kyros MID7024 Speakers Replacement: paso 3, imagen 3 de 3
    • This step is only necessary if you intend to repair or replace the back cover and/or speakers of the device.

    • In order to replace the back cover you must remove the speakers. Place the Spudger under the plastic frame of the speaker as shown. Pry up, popping the corners of the speakers out of of their bracket and lift the speaker out.

    • Be sure not to pull on the speaker's wires or body too hard as you may damage them.

  4. Coby Kyros MID7024 Speakers Replacement, Speakers: paso 4, imagen 1 de 1
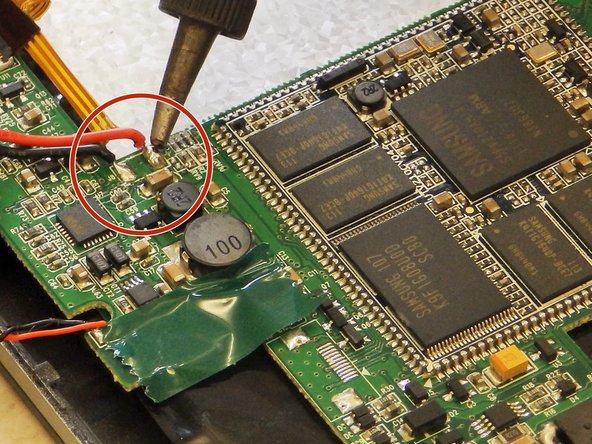
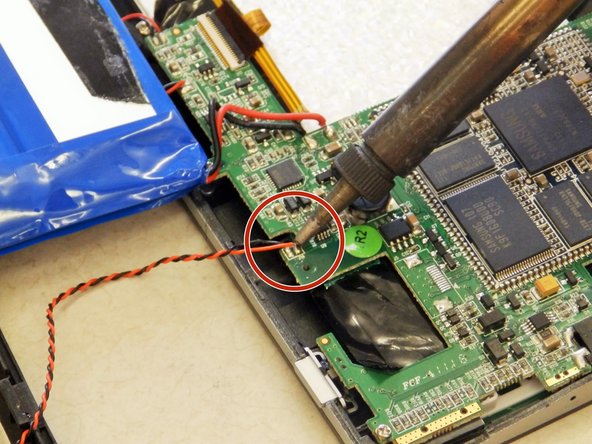
    • With the speakers now free from the back cover trace their wires back to the area where they connect to the motherboard.

  5. Coby Kyros MID7024 Speakers Replacement: paso 5, imagen 1 de 2 Coby Kyros MID7024 Speakers Replacement: paso 5, imagen 2 de 2
    • Use a soldering gun to remove the positive and negative wires connecting the battery to the motherboard.

    • Follow the guide on soldering to assist you in removing the battery.

  6. Coby Kyros MID7024 Speakers Replacement: paso 6, imagen 1 de 2 Coby Kyros MID7024 Speakers Replacement: paso 6, imagen 2 de 2
    • To completely remove the speakers from the device use a soldering iron to unsolder the connection points located at the end of each wire.

    • Follow this guide on soldering to help you with unsoldering the wire from the motherboard.

Conclusión

To reassemble your device, follow these instructions in reverse order.

Jacob Bartell

Miembro Desde 03/21/16

351 Reputación

2 Guías creadas

Equipo

Clemson, Team 6-3, Benson Spring 2016 Miembro de Clemson, Team 6-3, Benson Spring 2016

CLEM-BENSON-S16S6G3

4 Miembros

16 Guías creadas

0 comentarios

Agregar Comentario

Ver Estadísticas:

Ultimas 24 horas: 0

Ultimos 7 días: 5

Ultimos 30 días: 6

Todo El Tiempo: 179