Saltar al contenido principal

Cobra MR HH350 FLT Screen Replacement

Qué necesitas

  1. Cobra MR HH350 FLT Screen Replacement, Battery: paso 1, imagen 1 de 1
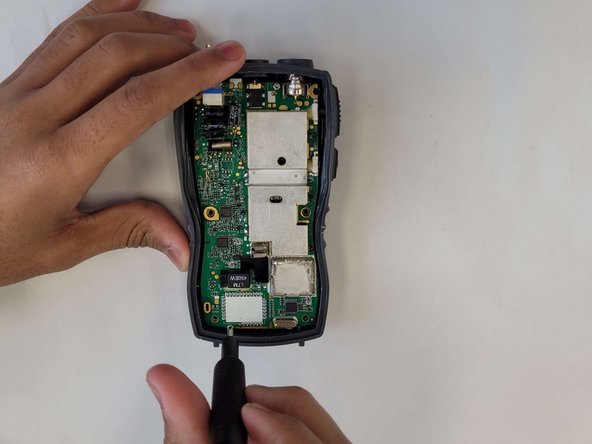
    • Remove the 11mm screw at the bottom of the radio with a #4 flathead screwdriver.

  2. Cobra MR HH350 FLT Screen Replacement: paso 2, imagen 1 de 1
    • Remove the battery from the radio.

  3. Cobra MR HH350 FLT Screen Replacement, Motherboard: paso 3, imagen 1 de 2 Cobra MR HH350 FLT Screen Replacement, Motherboard: paso 3, imagen 2 de 2
    Herramienta utilizada en este paso:
    Tweezers
    $4.99
    Comprar
    • Remove the 6 rubber stoppers using tweezers to reveal screws.

  4. Cobra MR HH350 FLT Screen Replacement: paso 4, imagen 1 de 1
    • Remove the 6 10mm screws that were behind the rubber stoppers with a #0 Phillips screwdriver.

  5. Cobra MR HH350 FLT Screen Replacement: paso 5, imagen 1 de 1
    • Remove the cover to expose the motherboard.

    • Pull off the power nob at the top of the radio.

  6. Cobra MR HH350 FLT Screen Replacement: paso 6, imagen 1 de 2 Cobra MR HH350 FLT Screen Replacement: paso 6, imagen 2 de 2
    • Remove the 2 6mm screws on the motherboard with a #0 Phillips screwdriver.

  7. Cobra MR HH350 FLT Screen Replacement: paso 7, imagen 1 de 1
    • Remove the motherboard.

  8. Cobra MR HH350 FLT Screen Replacement, Screen: paso 8, imagen 1 de 2 Cobra MR HH350 FLT Screen Replacement, Screen: paso 8, imagen 2 de 2
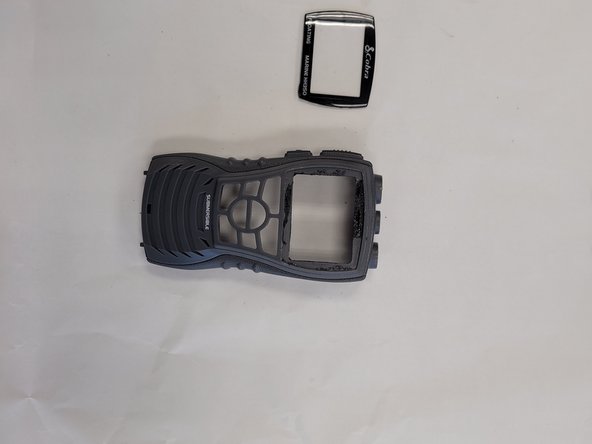
    • Now that the motherboard is gone, the back of the screen is now accessible.

    • To remove the screen, you need to use the Jimmy in the IFIXIT tool kit. It may take some time due to the epoxy used to keep water from entering the device.

Conclusión

To reassemble your device, follow these instructions in reverse order.

Rajahn Lewis

Miembro Desde 09/15/23

145 Reputación

2 Guías creadas

0 comentarios

Agregar Comentario

Ver Estadísticas:

Ultimas 24 horas: 0

Ultimos 7 días: 0

Ultimos 30 días: 7

Todo El Tiempo: 49