Saltar al contenido principal

Chromo Noria Camera Replacement

Qué necesitas

  1. Chromo Noria Camera  Replacement, Back Panel: paso 1, imagen 1 de 3 Chromo Noria Camera  Replacement, Back Panel: paso 1, imagen 2 de 3 Chromo Noria Camera  Replacement, Back Panel: paso 1, imagen 3 de 3
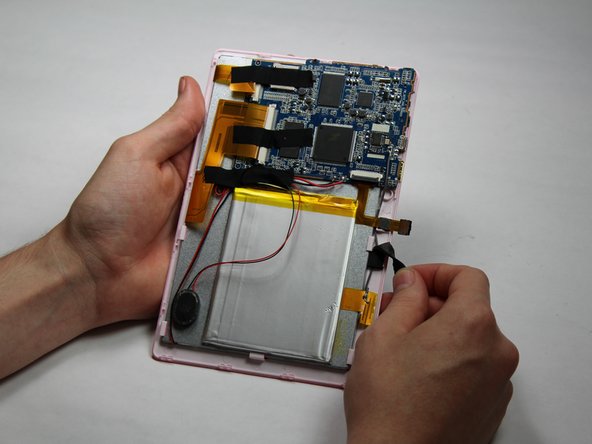
    • Insert your Plastic Opening Tool into the crease between the front panel and back panel.

    • Slide the Opening Tool around the entire device. As you progress, you should see the device open.

  2. Chromo Noria Camera  Replacement: paso 2, imagen 1 de 1
    • Carefully turn the device over.

    • Lay the back panel aside so you can see the device's parts.

  3. Chromo Noria Camera  Replacement, Camera: paso 3, imagen 1 de 2 Chromo Noria Camera  Replacement, Camera: paso 3, imagen 2 de 2
    • Carefully detach one side of the black tape from the board.

  4. Chromo Noria Camera  Replacement: paso 4, imagen 1 de 2 Chromo Noria Camera  Replacement: paso 4, imagen 2 de 2
    • Using a small plastic opening tool, flip the black connector up until it makes "tick" sound.

    • Now, the flexing cable is ready to be removed.

  5. Chromo Noria Camera  Replacement: paso 5, imagen 1 de 2 Chromo Noria Camera  Replacement: paso 5, imagen 2 de 2
    Herramienta utilizada en este paso:
    Tweezers
    $4.99
    Comprar
    • Using a pair of tweezers, hold the flexing cable right below the black connector.

    • Gently pull the flexing cable out of the connector while balancing the other side of the device with another hand.

Conclusión

To reassemble your device, follow these instructions in reverse order.

Ryan Rho

Miembro Desde 10/31/16

201 Reputación

2 Guías creadas

Equipo

Baylor, Team 5-6, Williams Fall 2016 Miembro de Baylor, Team 5-6, Williams Fall 2016

BU-WILLIAMS-F16S5G6

3 Miembros

12 Guías creadas

0 comentarios

Agregar Comentario

Ver Estadísticas:

Ultimas 24 horas: 0

Ultimos 7 días: 0

Ultimos 30 días: 5

Todo El Tiempo: 120