Saltar al contenido principal

Charging Component on the Base Replacement

Qué necesitas

  1. Charging Component on the Base Replacement, Base: paso 1, imagen 1 de 1
    • Turn the base over. You will see four 11mm Phillips #0 screws, one in each corner.

    • Use a screwdriver to remove all four 11mm Phillips #0 screws.

  2. Charging Component on the Base Replacement: paso 2, imagen 1 de 2 Charging Component on the Base Replacement: paso 2, imagen 2 de 2
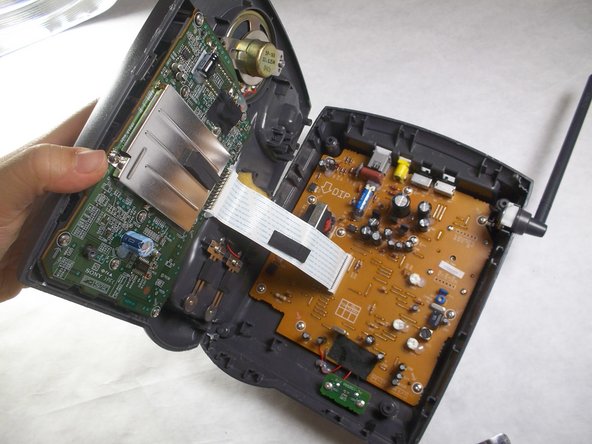
    • Locate an easy seam for entry and insert the metal spudger to separate the plastic. Use the spudger in multiple places if necessary.

    • Opening the base may require exerting significant force as it is bound together tightly. This step can be dangerous.

    • The spudger is designed to make this step easier.

  3. Charging Component on the Base Replacement, Charging Component on the Base: paso 3, imagen 1 de 2 Charging Component on the Base Replacement, Charging Component on the Base: paso 3, imagen 2 de 2
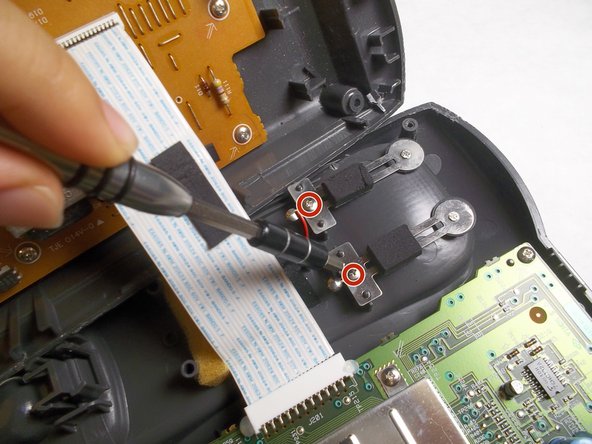
    • Locate the charging component towards the bottom of the grey, plastic, phone-shaped extrusion. It is composed of two metal pieces; each is fastened by a 5mm Phillips #0 screw.

    • Remove both 5mm Phillips #0 screws to release the metal pieces.

  4. Charging Component on the Base Replacement: paso 4, imagen 1 de 1
    • Cut the black and red wires to finish removal, and then solder your new replacement component.

    • For more help on soldering, please refer to the iFixit Solder and Desolder Guide.

Conclusión

To reassemble your device, follow these instructions in reverse order.

Una persona más ha completado esta guía.

Han Shih

Miembro Desde 09/29/16

361 Reputación

4 Guías creadas

Equipo

IUPUI, Team 3-3, Harley Fall 2016 Miembro de IUPUI, Team 3-3, Harley Fall 2016

IUPUI-HARLEY-F16S3G3

4 Miembros

17 Guías creadas

0 comentarios

Agregar Comentario

Ver Estadísticas:

Ultimas 24 horas: 0

Ultimos 7 días: 0

Ultimos 30 días: 1

Todo El Tiempo: 300