Esta versión puede contener ediciones incorrectas. Cambiar a la última instantánea verificada.
Qué necesitas
-
Este paso está sin traducir. Ayuda a traducirlo
-
Use a Phillips #00 Screwdriver to remove all four of the screws on the right side of the camera with the lens facing you.
-
-
Este paso está sin traducir. Ayuda a traducirlo
-
Use a Phillips #00 screwdriver, unscrew all four screws on the left side of the camera.
-
-
Este paso está sin traducir. Ayuda a traducirlo
-
Use the Phillips #00 screwdriver to remove all four of the screws on the bottom of the camera.
-
-
Este paso está sin traducir. Ayuda a traducirlo
-
Once all screws have been removed, slowly pry open the back casing of the camera.
-
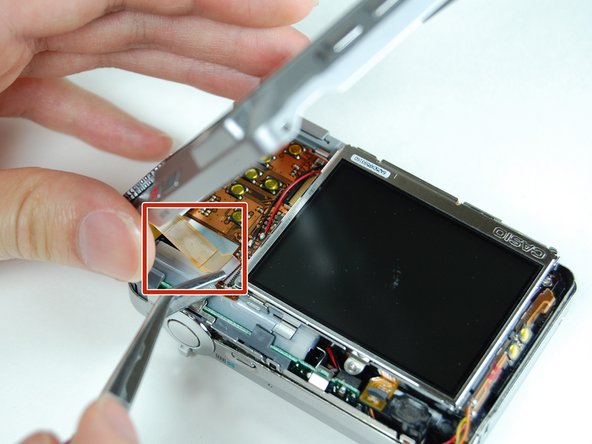
Gently remove the ribbon cable from the LCD with tweezers.
-
Set aside back casing of the camera.
-
-
Este paso está sin traducir. Ayuda a traducirlo
-
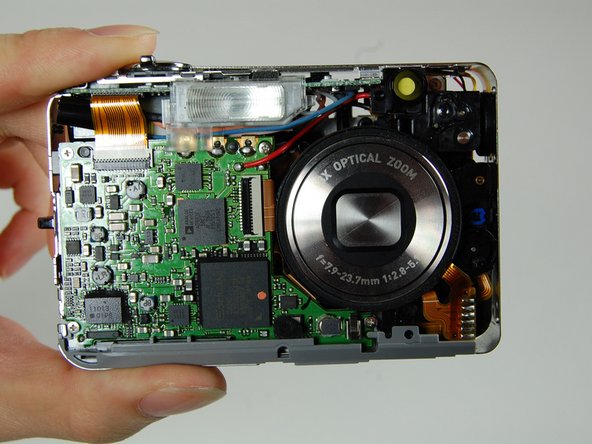
Use your tweezers to hold the camera secure, while you pull the front cover off of the camera.
-
-
-
Este paso está sin traducir. Ayuda a traducirlo
-
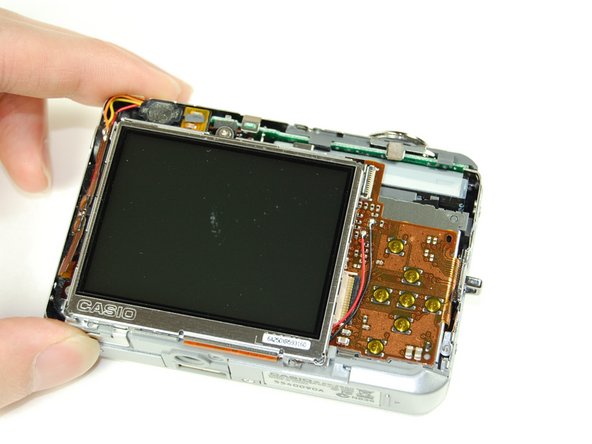
Use your tweezers to lift the LCD screen from the frame.
-
-
Este paso está sin traducir. Ayuda a traducirlo
-
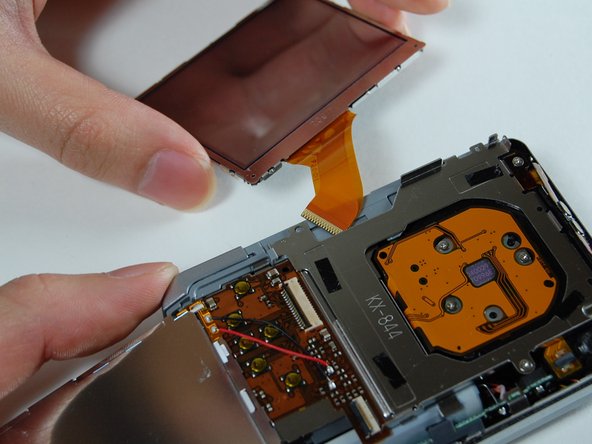
Lift screen away from the camera with your tweezers.
-
Flip screen over gently with your fingers once it is lifted far away enough from the camera.
-
-
Este paso está sin traducir. Ayuda a traducirlo
-
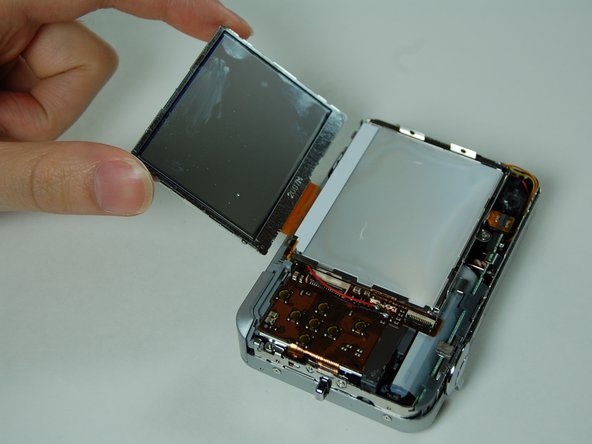
Use your tweezers to lift the LCD frame from the camera.
-
-
Este paso está sin traducir. Ayuda a traducirlo
-
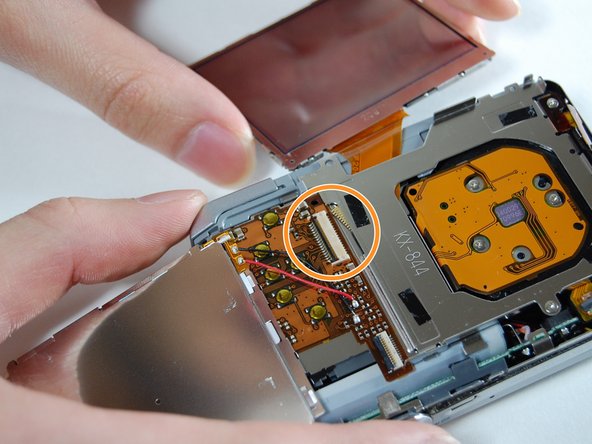
Use your tweezers to lift the bar holding the ribbon off.
-
Disconnect the ribbon to release the LCD screen.
-
Use your fingers to pull the LCD screen with the attached ribbon from the camera.
-
-
Este paso está sin traducir. Ayuda a traducirlo
-
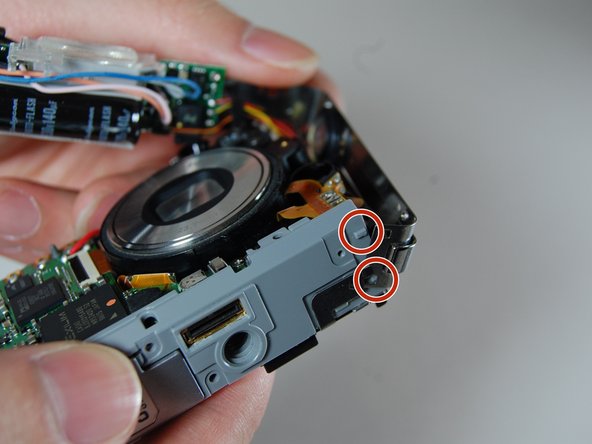
Use a Phillips #00 screwdriver to remove the two screws from the side of the camera that has the strap mount.
-
Remove strap mount by slowly pulling the side of the case so it will dislocate from the top of the camera.
-
-
Este paso está sin traducir. Ayuda a traducirlo
-
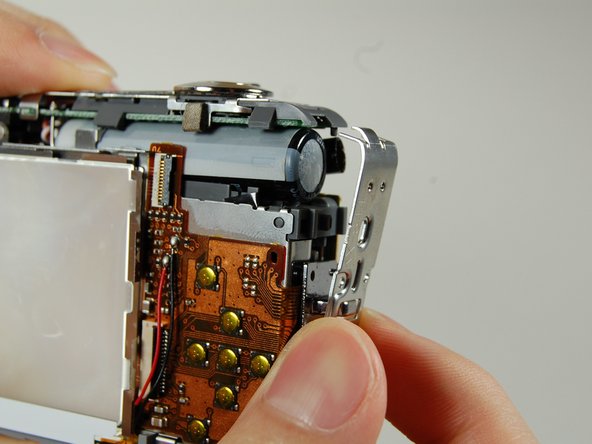
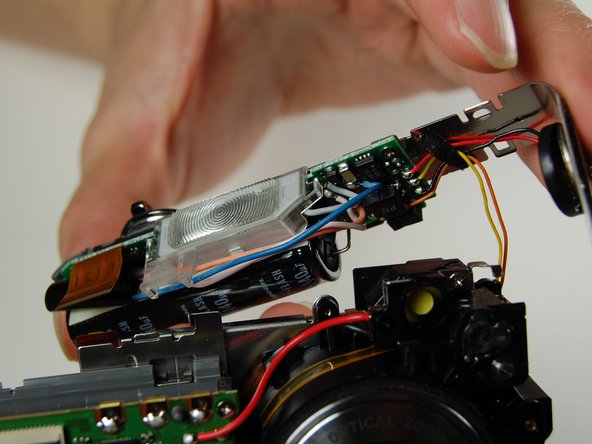
Hold the camera facing toward you. Pull up the bar that is securing the ribbon located to the left of the flash.
-
Disconnect the ribbon by prying it off with your fingers.
-
-
Este paso está sin traducir. Ayuda a traducirlo
-
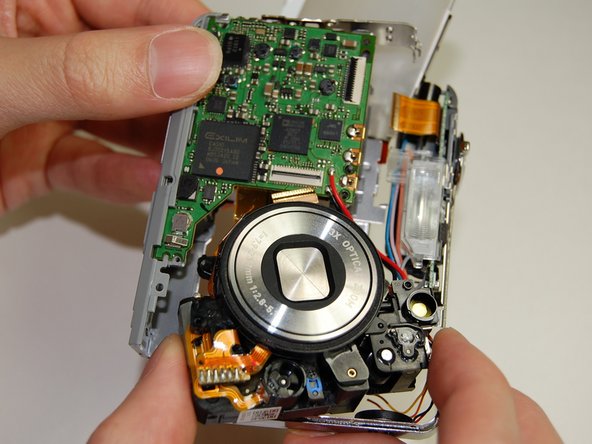
With the lens facing towards you, pull the L-shaped frame away from the camera.
-
Remove the frame from the two studs and metal tabs keeping it in place at the bottom of the camera.
-
-
Este paso está sin traducir. Ayuda a traducirlo
-
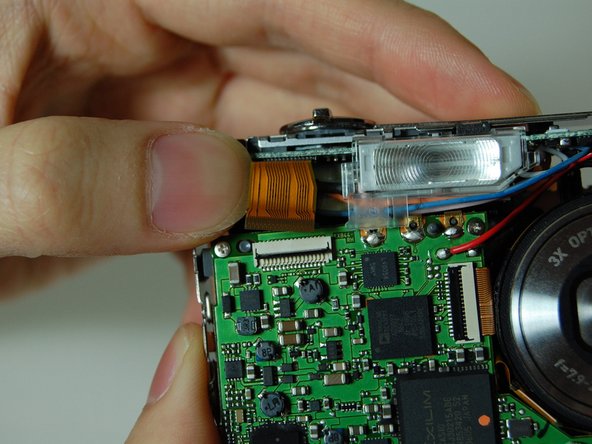
Locate the logic board to the left of the lens. You will see a bar securing a ribbon. Flip the bar up to release the ribbon.
-
Disconnect the ribbon.
-
-
Este paso está sin traducir. Ayuda a traducirlo
-
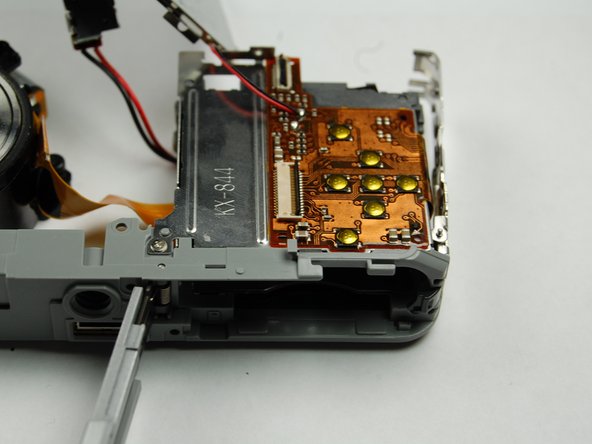
Use your Phillips #00 screwdriver to remove the two screws connecting the frame to the back of the camera.
-
Lift the frame away on the LCD screen side of the camera.
-
-
Este paso está sin traducir. Ayuda a traducirlo
-
This is what your camera should look like now that you have the battery casing isolated.
-


Equipo

Cal Poly, Team 4-38, Regan Winter 2011 Miembro de Cal Poly, Team 4-38, Regan Winter 2011
CPSU-REGAN-W11S4G38
4 Miembros
13 Guías creadas