Saltar al contenido principal

Casio Exilim EX-Z850 Battery Casing Disassembly

Qué necesitas

  1. Casio Exilim EX-Z850 Battery Casing Disassembly, Casio Exilim EX-Z850 Battery Casing Disassembly: paso 1, imagen 1 de 1
    • Remove battery before you begin disassembly.

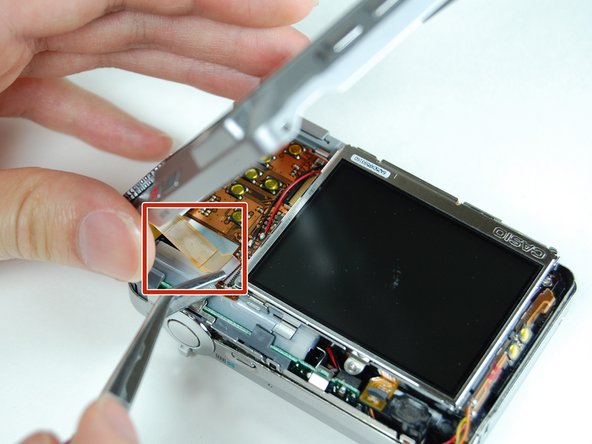
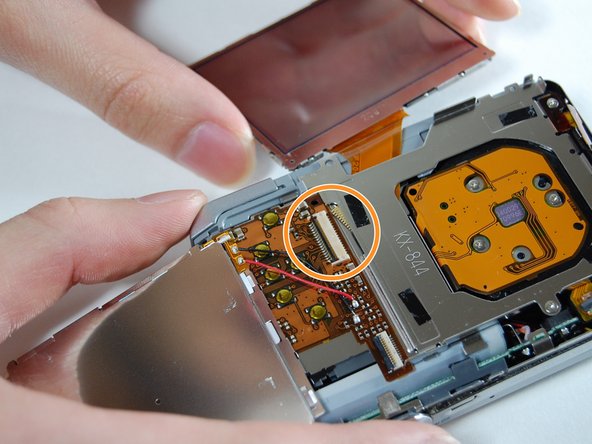
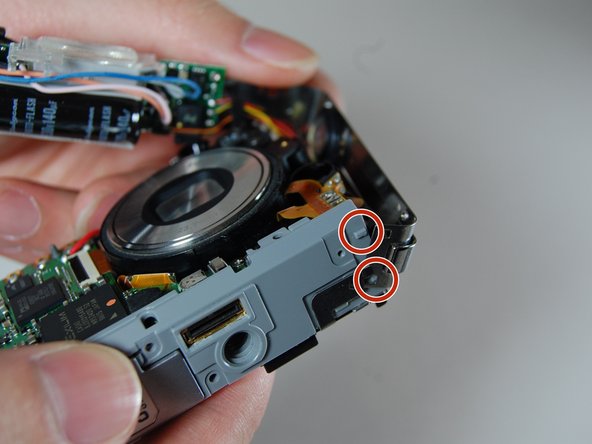
    • Use a Phillips #00 Screwdriver to remove all four of the screws on the right side of the camera with the lens facing you.

  2. Casio Exilim EX-Z850 Battery Casing Disassembly: paso 2, imagen 1 de 1
    • Use a Phillips #00 screwdriver, unscrew all four screws on the left side of the camera.

  3. Casio Exilim EX-Z850 Battery Casing Disassembly: paso 3, imagen 1 de 1
    • Use the Phillips #00 screwdriver to remove all four of the screws on the bottom of the camera.

    • Bottom screws are longer than the top screws, so label accordingly for easy reassembly.

  4. Casio Exilim EX-Z850 Battery Casing Disassembly: paso 4, imagen 1 de 3 Casio Exilim EX-Z850 Battery Casing Disassembly: paso 4, imagen 2 de 3 Casio Exilim EX-Z850 Battery Casing Disassembly: paso 4, imagen 3 de 3
    • Once all screws have been removed, slowly pry open the back casing of the camera.

    • Gently remove the ribbon cable from the LCD with tweezers.

    • Set aside back casing of the camera.

  5. Casio Exilim EX-Z850 Battery Casing Disassembly: paso 5, imagen 1 de 2 Casio Exilim EX-Z850 Battery Casing Disassembly: paso 5, imagen 2 de 2
    • Use your tweezers to hold the camera secure, while you pull the front cover off of the camera.

  6. Casio Exilim EX-Z850 Battery Casing Disassembly: paso 6, imagen 1 de 2 Casio Exilim EX-Z850 Battery Casing Disassembly: paso 6, imagen 2 de 2
    • The bottom of the LCD screen is secured to the frame by small pieces of black tape. You will need to peel the tape away to release the LCD screen.

    • Use your tweezers to lift the LCD screen from the frame.

  7. Casio Exilim EX-Z850 Battery Casing Disassembly: paso 7, imagen 1 de 2 Casio Exilim EX-Z850 Battery Casing Disassembly: paso 7, imagen 2 de 2
    • Lift screen away from the camera with your tweezers.

    • Flip screen over gently with your fingers once it is lifted far away enough from the camera.

  8. Casio Exilim EX-Z850 Battery Casing Disassembly: paso 8, imagen 1 de 1
    • Use your tweezers to lift the LCD frame from the camera.

  9. Casio Exilim EX-Z850 Battery Casing Disassembly: paso 9, imagen 1 de 3 Casio Exilim EX-Z850 Battery Casing Disassembly: paso 9, imagen 2 de 3 Casio Exilim EX-Z850 Battery Casing Disassembly: paso 9, imagen 3 de 3
    • Use your tweezers to lift the bar holding the ribbon off.

    • Disconnect the ribbon to release the LCD screen.

    • Use your fingers to pull the LCD screen with the attached ribbon from the camera.

  10. Casio Exilim EX-Z850 Battery Casing Disassembly: paso 10, imagen 1 de 2 Casio Exilim EX-Z850 Battery Casing Disassembly: paso 10, imagen 2 de 2
    • Use a Phillips #00 screwdriver to remove the two screws from the side of the camera that has the strap mount.

    • Remove strap mount by slowly pulling the side of the case so it will dislocate from the top of the camera.

  11. Casio Exilim EX-Z850 Battery Casing Disassembly: paso 11, imagen 1 de 2 Casio Exilim EX-Z850 Battery Casing Disassembly: paso 11, imagen 2 de 2
    • Hold the camera facing toward you. Pull up the bar that is securing the ribbon located to the left of the flash.

    • Disconnect the ribbon by prying it off with your fingers.

  12. Casio Exilim EX-Z850 Battery Casing Disassembly: paso 12, imagen 1 de 3 Casio Exilim EX-Z850 Battery Casing Disassembly: paso 12, imagen 2 de 3 Casio Exilim EX-Z850 Battery Casing Disassembly: paso 12, imagen 3 de 3
    • With the lens facing towards you, pull the L-shaped frame away from the camera.

    • Do not disconnect any of the wires from the camera when pulling the frame.

    • Remove the frame from the two studs and metal tabs keeping it in place at the bottom of the camera.

  13. Casio Exilim EX-Z850 Battery Casing Disassembly: paso 13, imagen 1 de 2 Casio Exilim EX-Z850 Battery Casing Disassembly: paso 13, imagen 2 de 2
    • Locate the logic board to the left of the lens. You will see a bar securing a ribbon. Flip the bar up to release the ribbon.

    • Disconnect the ribbon.

  14. Casio Exilim EX-Z850 Battery Casing Disassembly: paso 14, imagen 1 de 2 Casio Exilim EX-Z850 Battery Casing Disassembly: paso 14, imagen 2 de 2
    • Use your Phillips #00 screwdriver to remove the two screws connecting the frame to the back of the camera.

    • Lift the frame away on the LCD screen side of the camera.

  15. Casio Exilim EX-Z850 Battery Casing Disassembly: paso 15, imagen 1 de 2 Casio Exilim EX-Z850 Battery Casing Disassembly: paso 15, imagen 2 de 2
    • This is what your camera should look like now that you have the battery casing isolated.

Conclusión

To reassemble your device, follow these instructions in reverse order.

Logan

Miembro Desde 01/10/11

313 Reputación

2 Guías creadas

Equipo

Cal Poly, Team 4-38, Regan Winter 2011 Miembro de Cal Poly, Team 4-38, Regan Winter 2011

CPSU-REGAN-W11S4G38

4 Miembros

13 Guías creadas

0 comentarios

Agregar Comentario

Ver Estadísticas:

Ultimas 24 horas: 0

Ultimos 7 días: 1

Ultimos 30 días: 3

Todo El Tiempo: 3,794