Saltar al contenido principal

Casio Exilim EX Z55 LCD Screen Replacement

Qué necesitas

  1. Casio Exilim EX Z55 LCD Screen Replacement, Front Case: paso 1, imagen 1 de 3 Casio Exilim EX Z55 LCD Screen Replacement, Front Case: paso 1, imagen 2 de 3 Casio Exilim EX Z55 LCD Screen Replacement, Front Case: paso 1, imagen 3 de 3
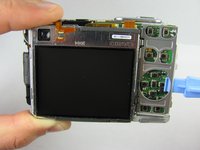
    • Remove eight 1.8 mm screws from the left and right sides of the camera using a Phillips #00 screwdriver

  2. Casio Exilim EX Z55 LCD Screen Replacement: paso 2, imagen 1 de 1
    • Remove the four 3.7 mm screws from the bottom of the camera using a Phillips #00 screwdriver.

  3. Casio Exilim EX Z55 LCD Screen Replacement: paso 3, imagen 1 de 1
    • Separate the front case from the body of the camera.

  4. Casio Exilim EX Z55 LCD Screen Replacement, Back Case: paso 4, imagen 1 de 1
    • Separate the back case from the body of the camera.

  5. Casio Exilim EX Z55 LCD Screen Replacement, LCD Screen: paso 5, imagen 1 de 3 Casio Exilim EX Z55 LCD Screen Replacement, LCD Screen: paso 5, imagen 2 de 3 Casio Exilim EX Z55 LCD Screen Replacement, LCD Screen: paso 5, imagen 3 de 3
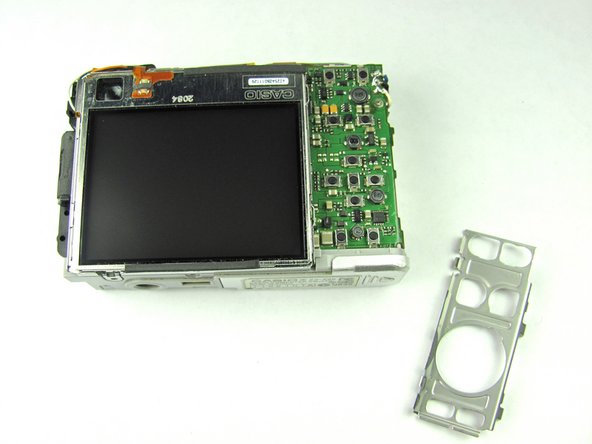
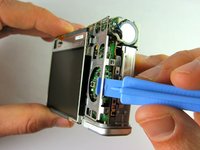
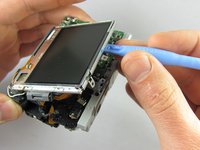
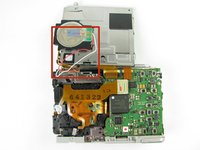
    • Remove the metal grating located to the right of the LCD screen by inserting the plastic opening tool under the grating and pulling up.

  6. Casio Exilim EX Z55 LCD Screen Replacement: paso 6, imagen 1 de 1
    • Before removing the side metal bracket, first remove the attached strap knob by twisting it off.

    • Then, remove the side metal bracket by inserting the plastic opening tool under the bracket and pulling up.

  7. Casio Exilim EX Z55 LCD Screen Replacement: paso 7, imagen 1 de 1
    • Using the plastic opening tool, pry up the LCD screen starting at one of the corners. Insert the tool under one of the corners and lift up.

  8. Casio Exilim EX Z55 LCD Screen Replacement: paso 8, imagen 1 de 2 Casio Exilim EX Z55 LCD Screen Replacement: paso 8, imagen 2 de 2
    • Continue to lift the LCD screen all the way up.

    • Be careful not to rip any wires connecting the LCD screen to the top of the camera.

Conclusión

To reassemble your device, follow these instructions in reverse order.

Laura

Miembro Desde 04/19/12

31 Reputación

2 Guías creadas

Equipo

Cal Poly, Team 9-45, Regan Spring 2012 Miembro de Cal Poly, Team 9-45, Regan Spring 2012

CPSU-REGAN-S12S9G45

7 Miembros

12 Guías creadas

0 comentarios

Agregar Comentario

Ver Estadísticas:

Ultimas 24 horas: 0

Ultimos 7 días: 1

Ultimos 30 días: 14

Todo El Tiempo: 1,851