Introducción
Follow this guide to learn how to replace the motherboard for the Canon PowerShot SD750. Prerequisites for this guide include disassembling the casing and removing the LCD screen.
Qué necesitas
-
-
Turn the camera to the side that has the attachment for the wrist strap.
-
Unscrew the two black 3.4 mm screws with a #00 Phillips screwdriver.
-
-
-
Flip the camera right side up.
-
Remove the silver 3.5 mm screw (located on top of the camera) with a #00 Phillips screwdriver.
-
Grip the corner of the A/V digital port and pull up and outward.
-
-
-
Herramienta utilizada en este paso:Tweezers$4.99
-
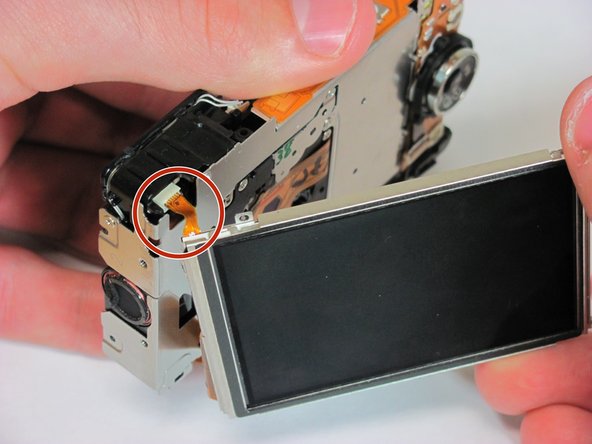
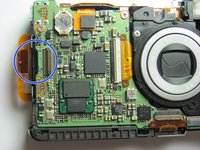
Locate the two ribbons connected to the camera and the LCD screen. (One is red and small and the other is wide and orange)
-
Remove the top left red ribbon by gripping the connector on the camera and sliding it straight out.
-
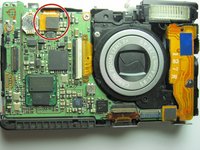
Remove the side orange ribbon by gripping the connector on the camera and sliding it straight out.
-
-
-
Place the camera forward so that the LCD screen side is facing up.
-
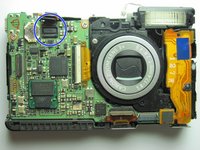
Remove the circular plastic button from the back of the camera.
-
-
Herramienta utilizada en este paso:Tweezers$4.99
-
Place the camera backward so that the lens is facing up.
-
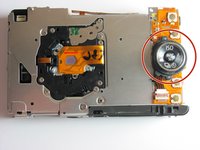
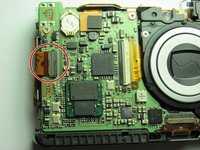
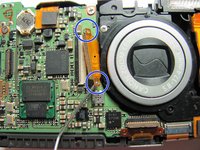
Disconnect the ribbon at the bottom of the main board by flipping up the brown ZIF connector and sliding the ribbon out.
-
Remove the right most square connector at the bottom of the camera by flipping up the connector with two fingers until it detaches.
-
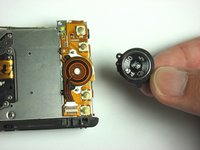
Locate and remove the white rubber cover on the microphone.
-


To reassemble your device, follow these instructions in reverse order.
To reassemble your device, follow these instructions in reverse order.
Cancelar: No complete esta guía.
2 personas más completaron esta guía.

Equipo

Cal Poly, Team 14-37, Forte Fall 2010 Miembro de Cal Poly, Team 14-37, Forte Fall 2010
CPSU-FORTE-F10S14G37
4 Miembros
6 Guías creadas