Saltar al contenido principal

Esta versión puede contener ediciones incorrectas. Cambiar a la última instantánea verificada.

Qué necesitas

  1. Este paso está sin traducir. Ayuda a traducirlo

    : paso 1, imagen 1 de 1
    • Remove the battery and SD card from the camera.

  2. Este paso está sin traducir. Ayuda a traducirlo

    : paso 2, imagen 1 de 1
    • Remove the three 3.8 mm screws from the underside of the camera.

    • Each of the screws is slightly different, so it is important that you note the original location of each screw.

  3. Este paso está sin traducir. Ayuda a traducirlo

    : paso 3, imagen 1 de 3 : paso 3, imagen 2 de 3 : paso 3, imagen 3 de 3
    • Remove the 3.2 mm screw from the right side of the camera.

    • Remove the 2.2 mm screw from the right side of the camera.

    • One of these screws is hidden under the USB port cover.

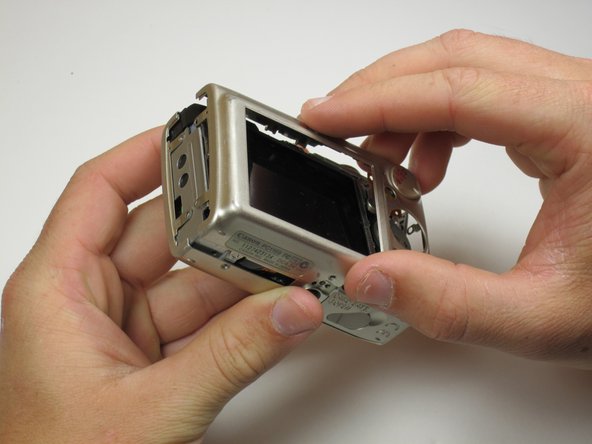
    • Lift the side panel off.

    • Remove the 1.8 mm screw from underneath the side panel.

  4. Este paso está sin traducir. Ayuda a traducirlo

    : paso 4, imagen 1 de 3 : paso 4, imagen 2 de 3 : paso 4, imagen 3 de 3
    • Remove the two 2.2 mm screws from the left side of the camera.

    • Lift the plate from the camera.

  5. Este paso está sin traducir. Ayuda a traducirlo

    : paso 5, imagen 1 de 3 : paso 5, imagen 2 de 3 : paso 5, imagen 3 de 3
    • Gently lift the rear of the case to remove it from the camera.

  6. Este paso está sin traducir. Ayuda a traducirlo

    : paso 6, imagen 1 de 3 : paso 6, imagen 2 de 3 : paso 6, imagen 3 de 3
    • Remove the front of the camera body.

    • Be sure to keep track of the rubber ring.

Linea de Meta

Matthew Theiss

Miembro Desde 04/14/11

176 Reputación

3 Guías creadas

Equipo

Cal Poly, Team 18-23, Garner Spring 2011 Miembro de Cal Poly, Team 18-23, Garner Spring 2011

CPSU-GARNER-S11S18G23

5 Miembros

7 Guías creadas

0 comentarios

Agregar Comentario

Ver Estadísticas:

Ultimas 24 horas: 2

Ultimos 7 días: 2

Ultimos 30 días: 6

Todo El Tiempo: 1,562