Introducción
This guide provides a breakdown that shows how to replace the function wheel on your Canon PowerShot SX160 IS by disassembling a portion of the camera to access the function wheel.
Qué necesitas
-
-
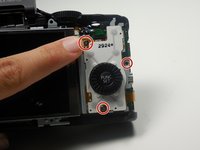
Unscrew the 2-4.8mm black Phillips head screws from the front of the camera using a #0 Phillips screwdriver.
-
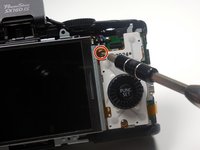
Unscrew the 2-4.8mm black Phillips head screws from the side of the camera using a #0 Phillips screwdriver.
-
Unscrew the 3-4.8mm black Phillips head screws from the bottom of the camera using a #0 Phillips screwdriver.
-
-


Congratulations, you have successfully replaced your function wheel. To reassemble your device, follow these instructions in reverse order.
Congratulations, you have successfully replaced your function wheel. To reassemble your device, follow these instructions in reverse order.
Equipo

Colorado Springs, Team 2-3, Panko Spring 2015 Miembro de Colorado Springs, Team 2-3, Panko Spring 2015
UCCS-PANKO-S15S2G3
3 Miembros
6 Guías creadas
Un comentario
Hi, I replaced the LCD screen but now my function wheel and panel don’t work. I think the ribbon got disconnected , but I can’t figure out where to attach it. Can you help?