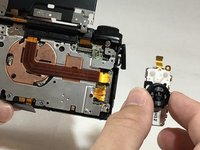
Saltar al contenido principal

Canon PowerShot G7X Dial Replacement

Qué necesitas

  1. Canon PowerShot G7X Dial Replacement, Dial: paso 1, imagen 1 de 1
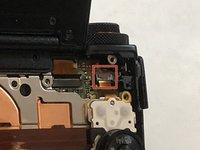
    • Remove the five 2mm Phillips #000 screws that are under the screen of the camera.

  2. Canon PowerShot G7X Dial Replacement: paso 2, imagen 1 de 1
    • Remove the two 3mm Phillips #000 screws under the AV-out digital flap.

    • Remove the two 3 mm Phillips #000 screws from the side of the camera.

  3. Canon PowerShot G7X Dial Replacement: paso 3, imagen 1 de 1
    • Remove the two 3 mm Phillips #000 screws on the side of camera with the flash toggle.

  4. Canon PowerShot G7X Dial Replacement: paso 4, imagen 1 de 1
    • Remove the four 4 mm Phillips #000 screws from the plate on the bottom of the camera.

  5. Canon PowerShot G7X Dial Replacement: paso 5, imagen 1 de 1
    • Remove the back plate.

  6. Canon PowerShot G7X Dial Replacement: paso 6, imagen 1 de 1
    • Remove the three 3 mm Phillips #000 screws around the dial.

  7. Canon PowerShot G7X Dial Replacement: paso 7, imagen 1 de 2 Canon PowerShot G7X Dial Replacement: paso 7, imagen 2 de 2
    • Using the nylon spudger, gently lift the ZIF tab.

    • Disconnect the ribbon cable that connects the dial to the motherboard.

    • Remove the dial from the device.

Conclusión

To reassemble your device, follow these instructions in reverse order.

Un comentario

Good guide. If you need to repair the jog dial, check this video for an excellent guide: https://www.youtube.com/watch?v=amuCb5ko...

jnbruin - Contestar

Agregar Comentario

Ver Estadísticas:

Ultimas 24 horas: 1

Ultimos 7 días: 7

Ultimos 30 días: 13

Todo El Tiempo: 598