Introducción
Before you get started, make sure you are working in a dust-free environment.
It is also advisable that you have adequate space around you as there are a lot of small parts.
You will not need any special skills for this guide, as everything is done using basic tools.
Qué necesitas
-
-
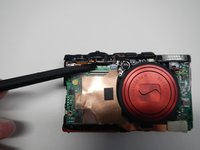
Turn off your camera by pressing the power button, located on the top-center of the device.
-
Locate the battery door on the bottom right area of the camera case.
-
Place your finger firmly on the black rubber pad on the battery door and slide the door to the right to open it.
-
Locate the orange battery release button beneath the battery door.
-
Slide the battery release button downward to release the battery.
-
-
-
Remove the two screws located on the left side of the camera case, using the Phillips screwdriver #00 (2.0 mm).
-
-
-
Remove the two screws on the bottom of the camera located near the battery door (Phillips #00 screwdriver) (4.0 mm).
-
-
-
Remove the screw located on the lower right side of the camera case (Phillips #00 screwdriver) (4.0 mm).
-
Remove the HDMI A/V out port cover located on the upper right side of the camera.
-
Remove the screw located just beneath the port cover removed in step 2. (Phillips #00 screwdriver) (2.0 mm).
-
-
-
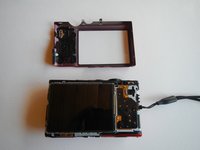
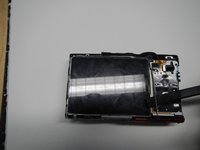
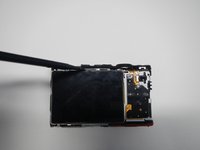
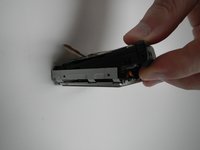
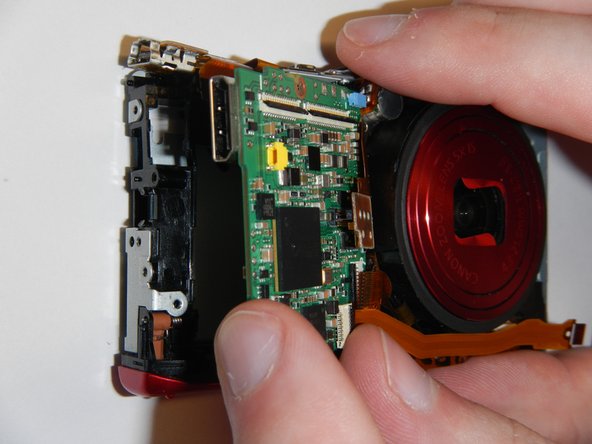
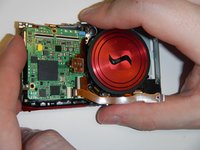
Carefully pry the case apart at the seem, using your fingers.
-
-
-
-
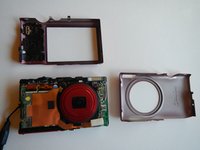
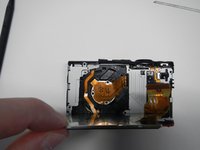
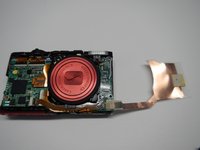
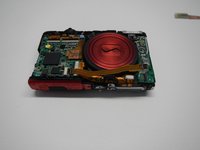
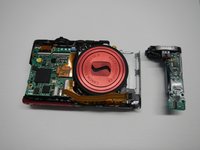
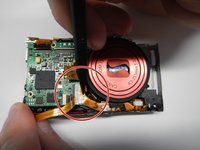
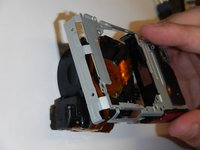
Carefully remove the large copper ribbon on the front of the camera (attached with adhesive pads)
-
-
-
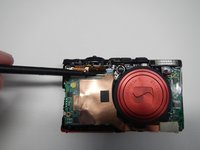
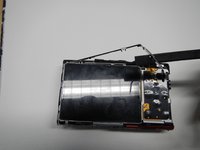
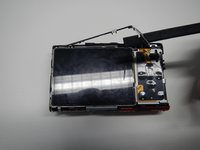
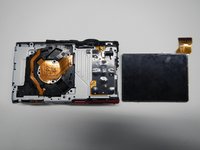
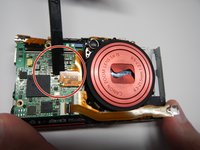
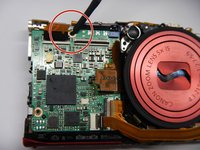
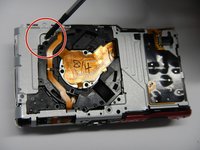
Remove the top copper ribbon (for USB port) by gently prying it from the motherboard with the spudger.
-
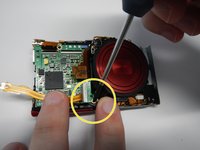
Remove the center copper ribbon (for CCD) using the same method as above.
-
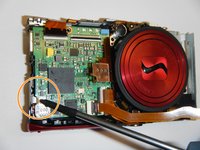
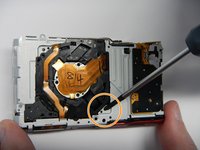
Remove the lower right copper ribbon as in step one.
-


To reassemble your device, follow these instructions in reverse order.
To reassemble your device, follow these instructions in reverse order.
Cancelar: No complete esta guía.
6 personas más completaron esta guía.
Equipo

Michigan Tech, Team 5-6, Lauer Spring 2014 Miembro de Michigan Tech, Team 5-6, Lauer Spring 2014
MTU-LAUER-S14S5G6
3 Miembros
6 Guías creadas
4 comentarios
There is a step missing between step 19 and step 20. The guide doesn't mention disconnecting the yellow and blue connectors at the top that are connected to the top control panel (with shutter release, power button, and zoom ring), then to remove the top control panel. The blue connector pulls out toward the top (use a small flat screwdriver) and the yellow connector pulls out toward the side (use an even smaller flat screwdriver). There is a small piece of plastic that holds the top control panel to the aluminum frame.
Exactly, the title offers the access to the sensor to clean it, yet we only get the instructions to replace the entire zoom lens which comes with the sensor assembled. There are no further steps on how to disassemble the lens unit to get to the sensor itself. By the way, the article refers to the sensor as "CCD", however this camera uses BSI-CMOS sensor (not CCD, which is a different technology).
The sensor is behind the metal plate held by 3 screws on the rear of the lens assy. Remove the screws to access the sensor and the IR filter. Is is very unlikely that dust has entered here because it is sealed on the inside by a rubber gasket and clamped on the other side. Mine had dust below the IR filter that was blown out by extending the lens (with the lens assy removed) There are several openings around the lens that allow air to enter and dust to exit. The 3 screws on the sensor plate must be torqued well to make the camera focus at infinity with the zoom at minimum. (Found out the hard way) <grin>