Saltar al contenido principal

Canon PowerShot A630 Back Panel Replacement

Qué necesitas

  1. Canon PowerShot A630 Back Panel Replacement, Front Panel: paso 1, imagen 1 de 2 Canon PowerShot A630 Back Panel Replacement, Front Panel: paso 1, imagen 2 de 2
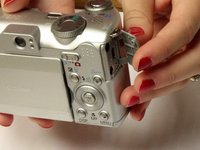
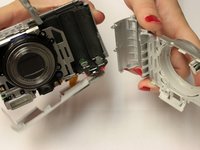
    • Open the battery door by sliding the tab on the battery door while pushing the battery door away from the camera.

    • Remove batteries.

  2. Canon PowerShot A630 Back Panel Replacement: paso 2, imagen 1 de 2 Canon PowerShot A630 Back Panel Replacement: paso 2, imagen 2 de 2
    • Remove the three indicated .2mm screws using a Phillips #00 screwdriver.

    • Gently pull off side-panel to remove it.

  3. Canon PowerShot A630 Back Panel Replacement: paso 3, imagen 1 de 1
    • Remove the two indicated .2mm screws using a Phillips #00 screwdriver.

  4. Canon PowerShot A630 Back Panel Replacement: paso 4, imagen 1 de 2 Canon PowerShot A630 Back Panel Replacement: paso 4, imagen 2 de 2
    • Remove the indicated .2mm screw using a Phillips #00 screwdriver.

    • Remove the three .2mm screws located on the internal side of the top panel within the battery chamber using a Phillips #00 screwdriver.

  5. Canon PowerShot A630 Back Panel Replacement: paso 5, imagen 1 de 2 Canon PowerShot A630 Back Panel Replacement: paso 5, imagen 2 de 2
    • Open 'DIGITAL A/V OUT' door on camera.

    • Remove the two indicated .2mm screws using a Phillips #00 screwdriver.

  6. Canon PowerShot A630 Back Panel Replacement: paso 6, imagen 1 de 1
    • Grip the sides of the top panel and gently pull to separate the top panel from the camera body.

    • The top panel will not completely detach.

  7. Canon PowerShot A630 Back Panel Replacement: paso 7, imagen 1 de 2 Canon PowerShot A630 Back Panel Replacement: paso 7, imagen 2 de 2
    • Gently pull the front and back panels apart, and use a Phillips #00 screwdriver to remove the screw connecting the panels.

    • Gripping the top and bottom, gently pull the front panel away from the camera body to remove it.

  8. Canon PowerShot A630 Back Panel Replacement, Back Panel: paso 8, imagen 1 de 2 Canon PowerShot A630 Back Panel Replacement, Back Panel: paso 8, imagen 2 de 2
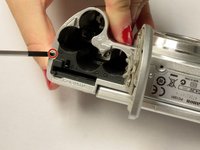
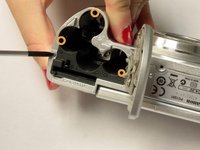
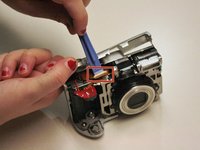
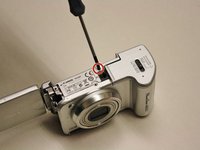
    • Use the spudger to gently pull back the retaining clip and pull the ribbon out.

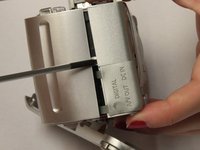
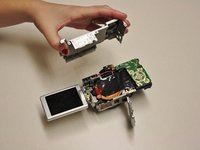
    • The top panel should now be completely detached from the camera.

    • Applying too much force to the spudger may damage the retaining clip.

  9. Canon PowerShot A630 Back Panel Replacement: paso 9, imagen 1 de 2 Canon PowerShot A630 Back Panel Replacement: paso 9, imagen 2 de 2
    • Remove .2 mm screw using a #00 Philips screwdriver.

    • Gently pry off back panel to remove it.

Conclusión

To reassemble your device, follow these instructions in reverse order.

Una persona más ha completado esta guía.

Alicia Burns

Miembro Desde 10/13/14

574 Reputación

5 Guías creadas

Equipo

Clemson, Team 2-5, Benson Fall 2014 Miembro de Clemson, Team 2-5, Benson Fall 2014

CLEM-BENSON-F14S2G5

4 Miembros

18 Guías creadas

0 comentarios

Agregar Comentario

Ver Estadísticas:

Ultimas 24 horas: 0

Ultimos 7 días: 9

Ultimos 30 días: 24

Todo El Tiempo: 1,190