Introducción
We will take out the broken motherboard and replace it with a new one.
Qué necesitas
-
-
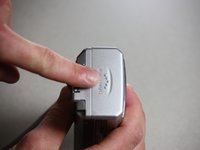
Use a Phillips #00 screwdriver to remove the two screws located at the bottom of the camera.
-
-
-
-
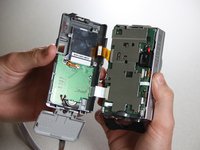
Remove the camera case. Refer to the prerequisite guide ''Disassembling the Canon PowerShot A200 Case'' as needed.
-
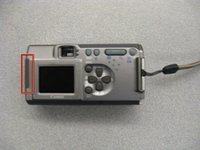
Locate the LCD Display. It is the thin, rectangular panel adjacent to the view finder.
-
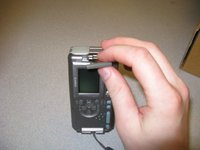
Use the Phillips head screwdriver, rotating counter clockwise, to remove the four screws in each corner of the LCD Display.
-
Set the screws aside.
-
-
-
Begin reassembling the camera with the orange strip with the yellow edge.
-
Align the orange strip on the back half of the camera with its slot on the front part of the camera.
-
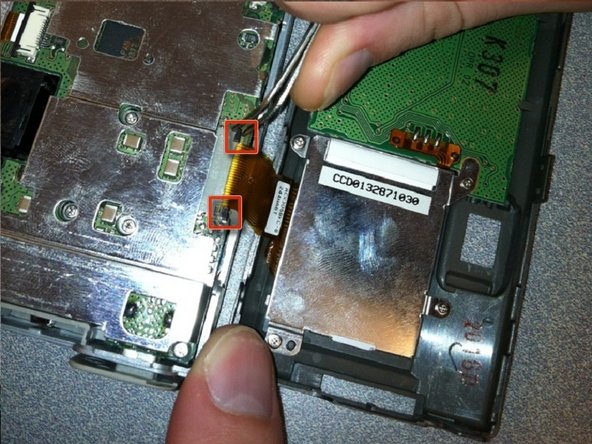
Use the metal tweezers to push the black tabs at each side of the slot toward the center. The tabs will hold the orange ribbon in place.
-
-
-
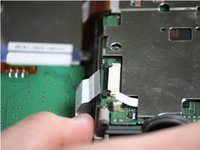
Align the white strip on the back half of the camera with its slot on the front part of the camera.
-
Use the metal tweezers to insert the white strip into the slot. Push the strip in as far as it can go into the slot.
-
Use the metal tweezers to push the black tabs at each side of the slot toward the center. The tabs will hold the white strip in place.
-
-
-
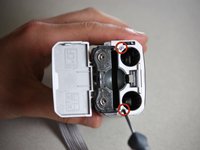
Open the outer battery cover.
-
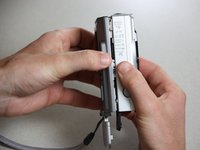
Use the Phillips head screwdriver, turning clockwise, to fasten two screws on each side of the battery case and two on each side of the memory card slot.
-
Flip the black battery cover down. Press until it is secured by the gray tab.
-
Shut the outer battery cover.
-
-
-
Follow the prerequisite instructions for Disassembling the Canon PowerShot A200 Case and for the Canon PowerShot A200 LCD Display Replacement.
-
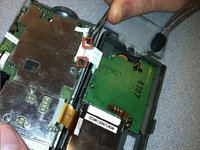
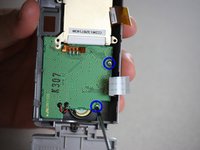
Once the LCD Display has been removed, use the soldering kit to desolder the red and black connections attached to the green motherboard.
-
Use the Phillips head screwdriver to remove the two screws in the motherboard. Set the screws aside.
-
-
-
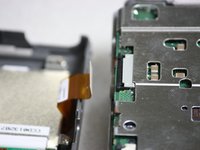
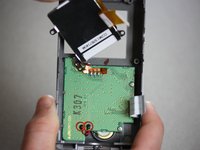
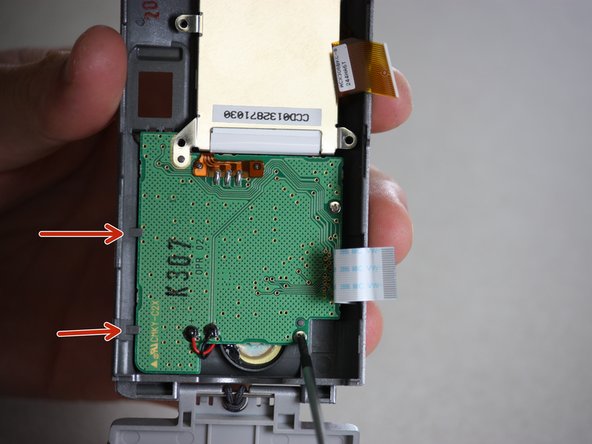
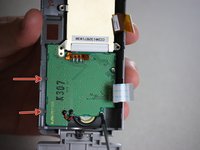
Use the plastic opening tool to carefully pry the motherboard out of its place, proceeding from the indicated points. Pull gently, as to not destroy any of the other internal parts of the camera.
-
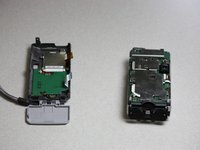
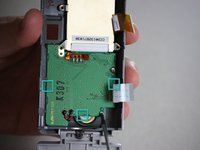
Insert the new green motherboard in place, making sure it fits snugly under the grey tabs at the edge of the camera case.
-
Reassemble the camera following these instructions in reverse order, as well as the instructions in the prerequisite guides.
-


To reassemble your device, follow these instructions in reverse order.
To reassemble your device, follow these instructions in reverse order.
Equipo

Cal Poly, Team 7-37, Regan Winter 2011 Miembro de Cal Poly, Team 7-37, Regan Winter 2011
CPSU-REGAN-W11S7G37
4 Miembros
10 Guías creadas