Saltar al contenido principal

Canon MF4700n Laser Toner Cartridge Replacement

Qué necesitas

  1. Canon MF4700n Laser Toner Cartridge Replacement, Laser Toner Cartridge: paso 1, imagen 1 de 3 Canon MF4700n Laser Toner Cartridge Replacement, Laser Toner Cartridge: paso 1, imagen 2 de 3 Canon MF4700n Laser Toner Cartridge Replacement, Laser Toner Cartridge: paso 1, imagen 3 de 3
    • Turn off the printer.

    • Make sure that the energy saver button is not lit up. If it is, the printer needs to be turned off.

  2. Canon MF4700n Laser Toner Cartridge Replacement: paso 2, imagen 1 de 2 Canon MF4700n Laser Toner Cartridge Replacement: paso 2, imagen 2 de 2
    • Grab the operation panel and lift it up to reveal the toner cover.

    • Make sure there is nothing on top of the printer.

    • Potential for Device Damage: Forcing the operation panel to open may cause damage to the printer.

  3. Canon MF4700n Laser Toner Cartridge Replacement: paso 3, imagen 1 de 3 Canon MF4700n Laser Toner Cartridge Replacement: paso 3, imagen 2 de 3 Canon MF4700n Laser Toner Cartridge Replacement: paso 3, imagen 3 de 3
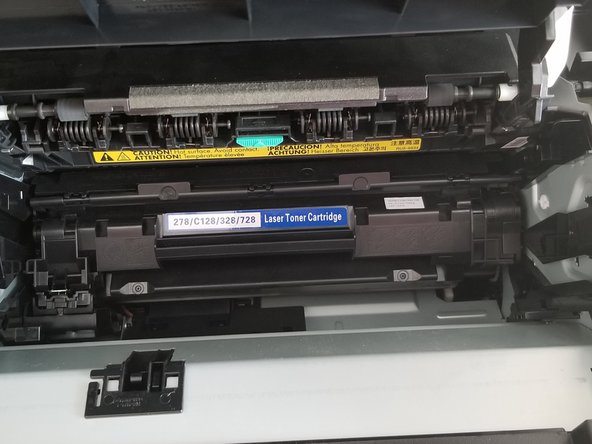
    • Open the toner cover to reveal the toner cartridge.

  4. Canon MF4700n Laser Toner Cartridge Replacement: paso 4, imagen 1 de 3 Canon MF4700n Laser Toner Cartridge Replacement: paso 4, imagen 2 de 3 Canon MF4700n Laser Toner Cartridge Replacement: paso 4, imagen 3 de 3
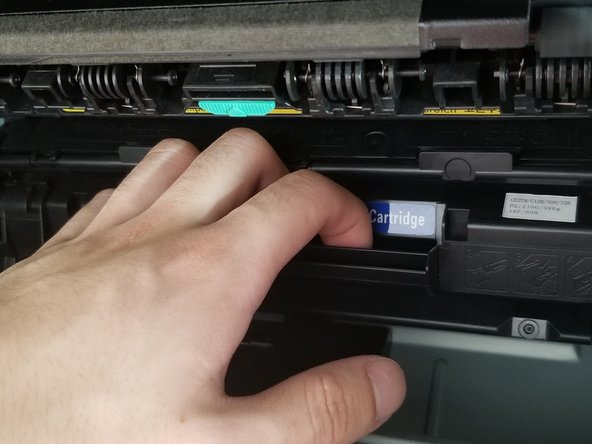
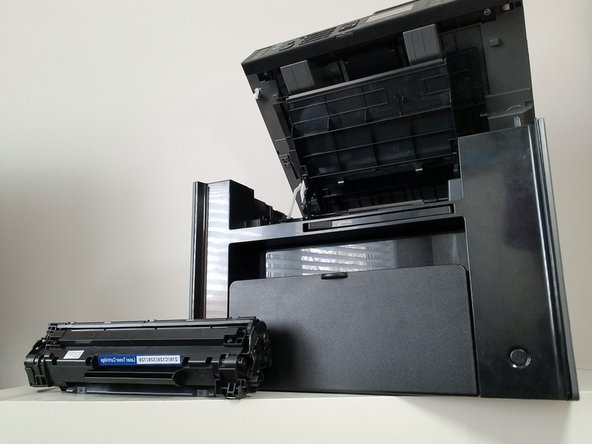
    • Grab the ledge of the cartridge and pull it out.

  5. Canon MF4700n Laser Toner Cartridge Replacement: paso 5, imagen 1 de 2 Canon MF4700n Laser Toner Cartridge Replacement: paso 5, imagen 2 de 2
    • Grab a new/working toner cartridge.

    • If the cartridge is new, then there will be plastic components on it. Follow the manual that comes with the new cartridge to remove the plastic components.

    • Shake the cartridge to distribute the toner evenly inside.

  6. Canon MF4700n Laser Toner Cartridge Replacement: paso 6, imagen 1 de 3 Canon MF4700n Laser Toner Cartridge Replacement: paso 6, imagen 2 de 3 Canon MF4700n Laser Toner Cartridge Replacement: paso 6, imagen 3 de 3
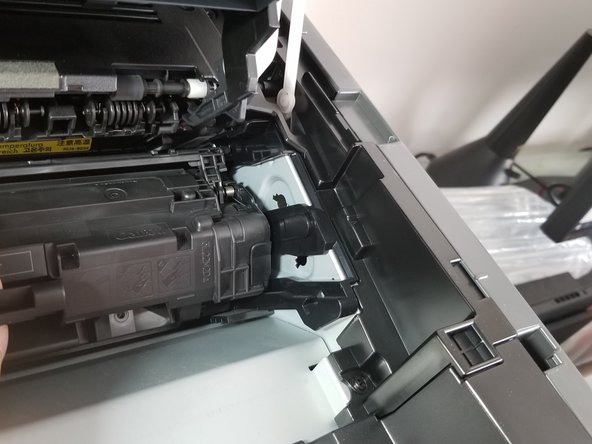
    • On both sides of the cartridge, there are two knobs sticking out.

    • Inside the toner cover, there are two toner guides, one on each side.

    • Align the knobs with the toner guides and push the cartridge securely all the way in.

  7. Canon MF4700n Laser Toner Cartridge Replacement: paso 7, imagen 1 de 3 Canon MF4700n Laser Toner Cartridge Replacement: paso 7, imagen 2 de 3 Canon MF4700n Laser Toner Cartridge Replacement: paso 7, imagen 3 de 3
    • Close the toner cover.

    • Lower the operation panel.

Conclusión

The Canon MF4700n Printer should print normally unless a different component is broken.

Raymond Mach

Miembro Desde 01/16/21

185 Reputación

1 Guía escrita

0 comentarios

Agregar Comentario

Ver Estadísticas:

Ultimas 24 horas: 0

Ultimos 7 días: 3

Ultimos 30 días: 41

Todo El Tiempo: 1,395