Saltar al contenido principal

CASIO CDP-230R Main Circuit Board Replacement

Qué necesitas

  1. CASIO CDP-230R Main Circuit Board Replacement, Panels: paso 1, imagen 1 de 3 CASIO CDP-230R Main Circuit Board Replacement, Panels: paso 1, imagen 2 de 3 CASIO CDP-230R Main Circuit Board Replacement, Panels: paso 1, imagen 3 de 3
    • Flip the keyboard upside down, with the keys on a flat surface.

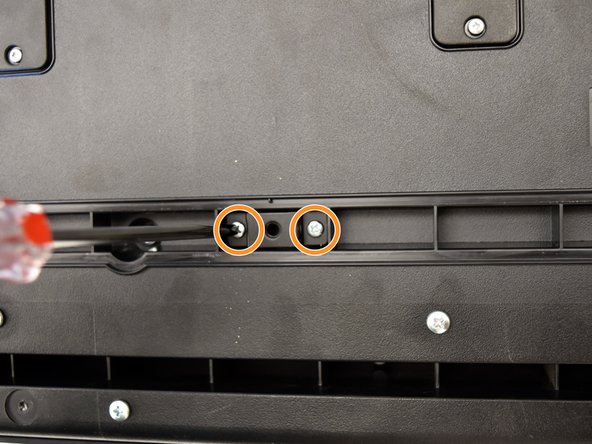
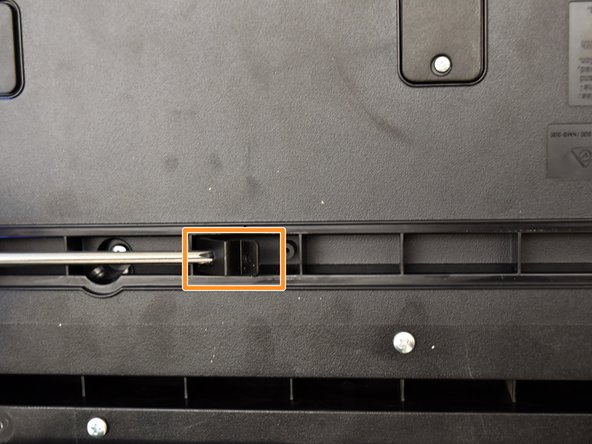
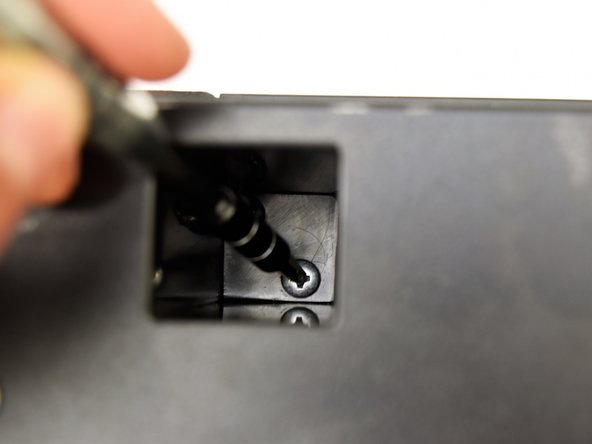
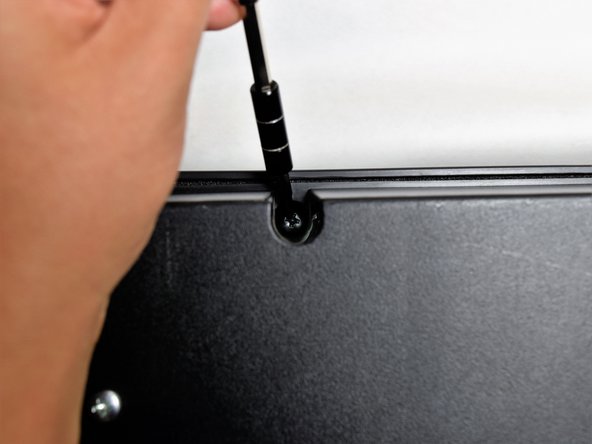
    • Remove the three black 14mm Japanese Industrial Standard (J) head screws using a J1 screwdriver on the top half of the outermost side panel.

  2. CASIO CDP-230R Main Circuit Board Replacement: paso 2, imagen 1 de 3 CASIO CDP-230R Main Circuit Board Replacement: paso 2, imagen 2 de 3 CASIO CDP-230R Main Circuit Board Replacement: paso 2, imagen 3 de 3
    • Use two hands to grab the side panel from both sides.

    • Pull the panel apart from the device one side at a time.

    • There will be popping sounds when you remove this panel.

    • One side panel will not have an orange & white cable connected to it.

  3. CASIO CDP-230R Main Circuit Board Replacement: paso 3, imagen 1 de 3 CASIO CDP-230R Main Circuit Board Replacement: paso 3, imagen 2 de 3 CASIO CDP-230R Main Circuit Board Replacement: paso 3, imagen 3 de 3
    • Remove the three silver 10mm screws with a J1 screwdriver on the bottom half of the innermost side panel of the device.

    • One side panel will not have an orange & white cable running through.

  4. CASIO CDP-230R Main Circuit Board Replacement: paso 4, imagen 1 de 3 CASIO CDP-230R Main Circuit Board Replacement: paso 4, imagen 2 de 3 CASIO CDP-230R Main Circuit Board Replacement: paso 4, imagen 3 de 3
    • Remove the innermost side panel by pinching the top and bottom of the panel and pulling the panel off with both hands.

    • There will be popping sounds when you remove this panel.

    • Repeat steps one through four to remove the other side panel of the keyboard.

  5. CASIO CDP-230R Main Circuit Board Replacement: paso 5, imagen 1 de 3 CASIO CDP-230R Main Circuit Board Replacement: paso 5, imagen 2 de 3 CASIO CDP-230R Main Circuit Board Replacement: paso 5, imagen 3 de 3
    • Remove the two black 30 mm J head screws with a J1 screwdriver to remove the long black bar.

    • Remove the four silver 8mm x 2mm J head screws with a J1 screwdriver and the two brackets from the back panel.

    • There will be two screws per bracket.

  6. CASIO CDP-230R Main Circuit Board Replacement: paso 6, imagen 1 de 3 CASIO CDP-230R Main Circuit Board Replacement: paso 6, imagen 2 de 3 CASIO CDP-230R Main Circuit Board Replacement: paso 6, imagen 3 de 3
    • Remove the eight silver 10mm x 1.5mm J head screws with a J1 screwdriver and the square tabs from the back panel.

    • Remove the eight silver 10mm J head screws with a J1 screwdriver underneath the square tabs.

  7. CASIO CDP-230R Main Circuit Board Replacement: paso 7, imagen 1 de 3 CASIO CDP-230R Main Circuit Board Replacement: paso 7, imagen 2 de 3 CASIO CDP-230R Main Circuit Board Replacement: paso 7, imagen 3 de 3
    • Remove the 36 silver 10mm J head screws with a J1 screwdriver from the back panel.

  8. CASIO CDP-230R Main Circuit Board Replacement: paso 8, imagen 1 de 3 CASIO CDP-230R Main Circuit Board Replacement: paso 8, imagen 2 de 3 CASIO CDP-230R Main Circuit Board Replacement: paso 8, imagen 3 de 3
    • Place a hand on the front panel and speakers and carefully flip the keyboard over with the keys facing up.

    • Having a extra pair of hands will be useful.

    • Grab the center of the front panel with two hands and lift to remove panel.

    • Grab the speakers from the sides and lift to remove. Once you have done this for the first speaker, repeat with the second speaker.

  9. CASIO CDP-230R Main Circuit Board Replacement, Main Circuit Board: paso 9, imagen 1 de 2 CASIO CDP-230R Main Circuit Board Replacement, Main Circuit Board: paso 9, imagen 2 de 2
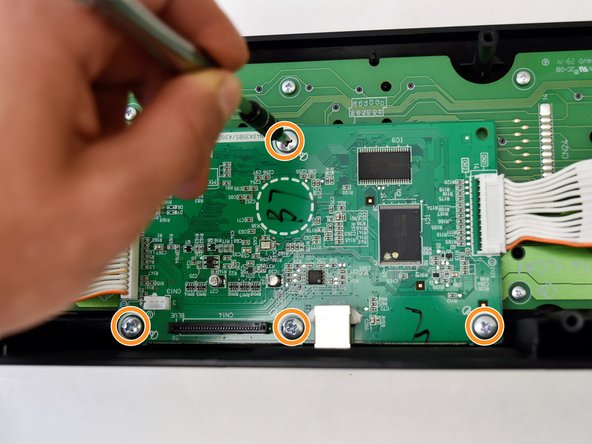
    • The main circuit board is located on the green side of the button panel. The main circuit board is the smaller green board.

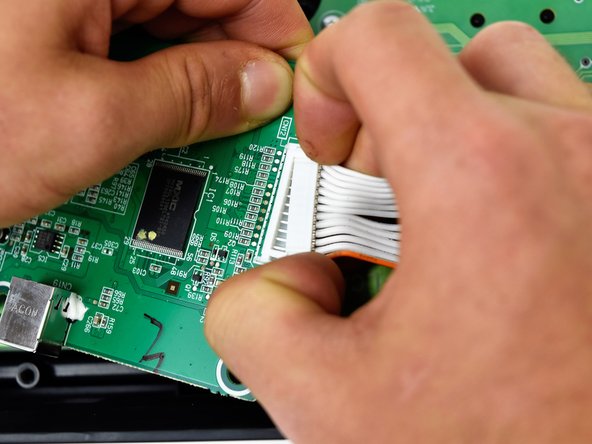
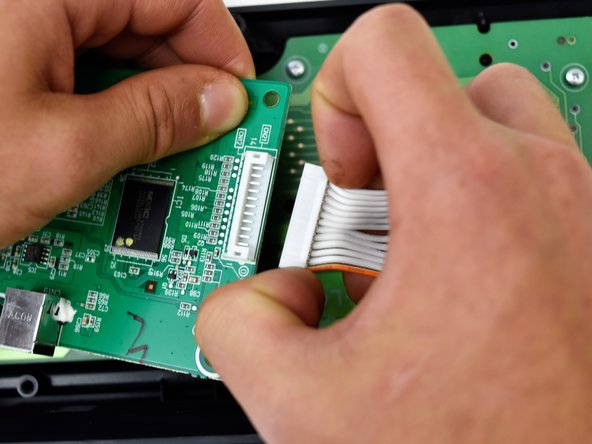
    • Grasp the white ribbon lined with foam and pull up to remove from the main circuit board.

    • Remove the four silver 8mm x 2mm J head screws with a J1 screwdriver.

  10. CASIO CDP-230R Main Circuit Board Replacement: paso 10, imagen 1 de 1
    • Lift the main circuit board from the button panel.

  11. CASIO CDP-230R Main Circuit Board Replacement: paso 11, imagen 1 de 3 CASIO CDP-230R Main Circuit Board Replacement: paso 11, imagen 2 de 3 CASIO CDP-230R Main Circuit Board Replacement: paso 11, imagen 3 de 3
    • Grip the white plastic end of the orange and white cables that is attached to the right side of the main circuit board and pull to the right.

    • Repeat for the orange and white cables attached to the left side of the main circuit board and pull up.

Conclusión

To reassemble your device, follow these instructions in reverse order.

2 personas más completaron esta guía.

Gavin Chao

Miembro Desde 10/02/17

191 Reputación

1 Guía escrita

Equipo

Cal Poly, Team S4-G2, Livingston Fall 2017 Miembro de Cal Poly, Team S4-G2, Livingston Fall 2017

CPSU-LIVINGSTON-F17S4G2

4 Miembros

6 Guías creadas

2 comentarios

Уважаемый fixit это димитрий фенетов твой чертовски мертвый

Roman Ambramovich - Contestar

дорогой ifixit ваша ложь не является исключительной

Roman Ambramovich - Contestar

Agregar Comentario

Ver Estadísticas:

Ultimas 24 horas: 2

Ultimos 7 días: 2

Ultimos 30 días: 20

Todo El Tiempo: 1,736