Saltar al contenido principal

Bowers and Wilkins P5 Headphones Driver Replacement

Qué necesitas

  1. Bowers and Wilkins P5 Headphones Driver Replacement, Driver: paso 1, imagen 1 de 1
    • Remove the earpads from your P5s.

    • Removed driver in centre.

  2. Bowers and Wilkins P5 Headphones Driver Replacement: paso 2, imagen 1 de 1
    • Each side uses three Phillips screws, which are covered in fabric. You can either gently scrape away the fabric in the areas indicated, or insert your driver directly. I did the former but it can bunch up the fabric.

    • This is the right side.

  3. Bowers and Wilkins P5 Headphones Driver Replacement: paso 3, imagen 1 de 1
    • Each side uses three Phillips screws, which are covered in fabric. You can either gently scrape away the fabric in the areas indicated, or insert your driver directly. I did the former but it can bunch up the fabric.

    • This is the left side.

  4. Bowers and Wilkins P5 Headphones Driver Replacement: paso 4, imagen 1 de 2 Bowers and Wilkins P5 Headphones Driver Replacement: paso 4, imagen 2 de 2
    • Gently flip each driver area to the side - it will still be connected to the headband with two soldered wires.

    • De-solder each wire to fully separate the driver area. (Already completed and driver removed in this step.)

  5. Bowers and Wilkins P5 Headphones Driver Replacement: paso 5, imagen 1 de 1
    • The drivers are inconveniently glued in place, but can be relatively easily removed with some elbow grease.

    • I used an iOpener to soften the glue, along with a Jimmy and metal spudger to score the glue around the circumference.

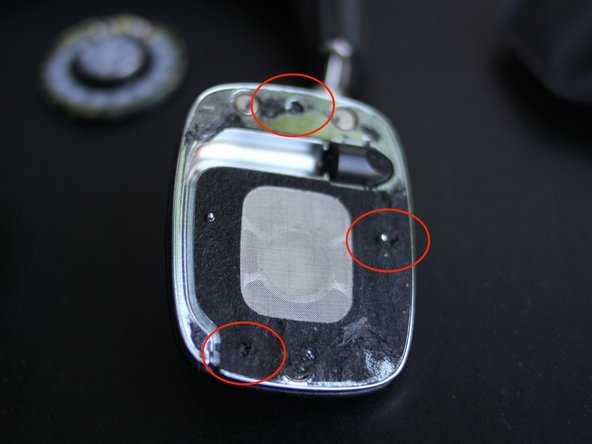
    • Each driver area has a cutout section, as indicated, which will assist you with prying out the driver.

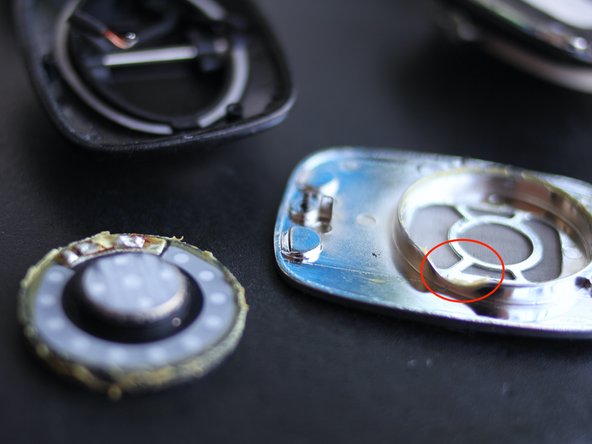
    • Try to work the driver out only by its sides. I pushed my metal spudger underneath and pried upward and damaged the driver grille.

  6. Bowers and Wilkins P5 Headphones Driver Replacement: paso 6, imagen 1 de 1
    • Swap the working driver from one set to the other set and solder it in place.

    • Voila!

Conclusión

To reassemble your device, follow these instructions in reverse order and solder the new driver back in place.

Una persona más ha completado esta guía.

Jon

Miembro Desde 07/16/14

633 Reputación

2 Guías creadas

0 comentarios

Agregar Comentario

Ver Estadísticas:

Ultimas 24 horas: 1

Ultimos 7 días: 21

Ultimos 30 días: 74

Todo El Tiempo: 3,130