Saltar al contenido principal

Blackberry Torch 9800 Logic Board Replacement

Qué necesitas

  1. Blackberry Torch 9800 Logic Board Replacement, Logic Board Replacement: paso 1, imagen 1 de 2 Blackberry Torch 9800 Logic Board Replacement, Logic Board Replacement: paso 1, imagen 2 de 2
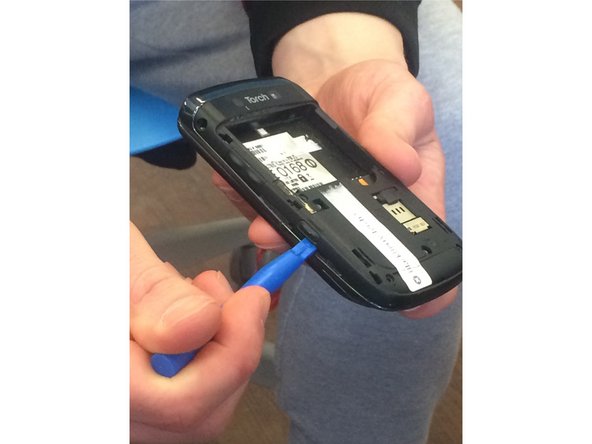
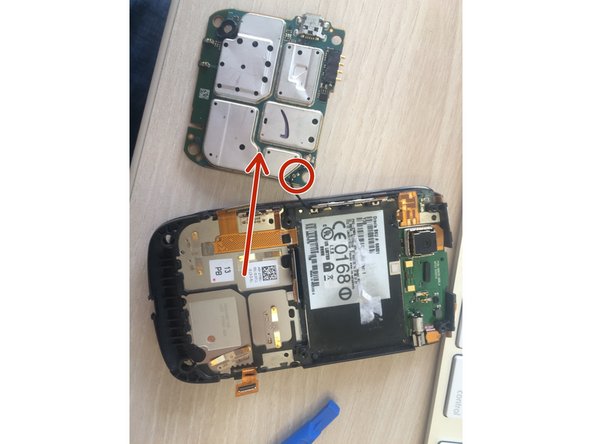
    • Remove the back cover and the battery.

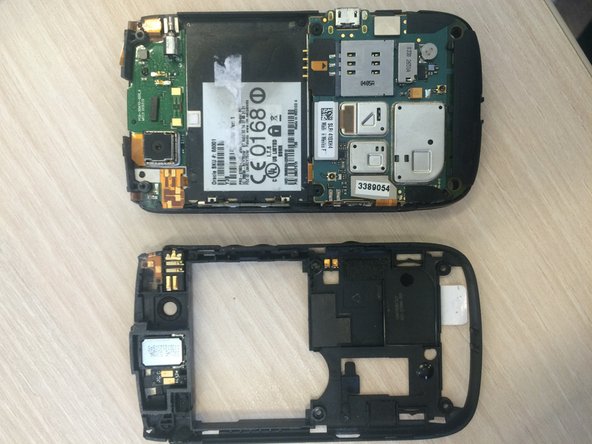
    • Unscrew the four screws using a T6 screwdriver.

    • Removing the top right screw (with the blue cover) will void the warranty.

  2. Blackberry Torch 9800 Logic Board Replacement: paso 2, imagen 1 de 2 Blackberry Torch 9800 Logic Board Replacement: paso 2, imagen 2 de 2
    • Remove the side trim using the plastic opening tool.

    • Apply pressure to push the top side of the side trim towards the phone while pulling the bottom away from the phone to remove the side trim.

    • The side trim is fragile and easily fractured, so handful it with care.

  3. Blackberry Torch 9800 Logic Board Replacement: paso 3, imagen 1 de 3 Blackberry Torch 9800 Logic Board Replacement: paso 3, imagen 2 de 3 Blackberry Torch 9800 Logic Board Replacement: paso 3, imagen 3 de 3
    • Remove the two screws that have been revealed at the top of the device using the T6 screwdriver.

    • You should now be able to easily lift the back panel from the phone.

  4. Blackberry Torch 9800 Logic Board Replacement: paso 4, imagen 1 de 2 Blackberry Torch 9800 Logic Board Replacement: paso 4, imagen 2 de 2
    • Using your hands, carefully peel the three ribbon cable caps from the logic board.

  5. Blackberry Torch 9800 Logic Board Replacement: paso 5, imagen 1 de 2 Blackberry Torch 9800 Logic Board Replacement: paso 5, imagen 2 de 2
    • Lift logic board slightly. The logic board will remain attached to the phone by a small antenna wire.

    • Using your hands, carefully lift the clasp attached to the antenna wire straight upward away from the logic board.

    • Make sure not to disconnect the antenna wire from its clasp.

    • The logic board should now be completely separate from the phone.

Conclusión

To reassemble your device, follow these instructions in reverse order.

3 personas más completaron esta guía.

Keegan Williams

Miembro Desde 02/19/16

216 Reputación

2 Guías creadas

Equipo

Ohio State, Team 1-5, Garvin Spring 2016 Miembro de Ohio State, Team 1-5, Garvin Spring 2016

OSU-GARVIN-S16S1G5

3 Miembros

3 Guías creadas

0 comentarios

Agregar Comentario

Ver Estadísticas:

Ultimas 24 horas: 0

Ultimos 7 días: 1

Ultimos 30 días: 6

Todo El Tiempo: 832