Qué necesitas
-
-
Place the phone on a flat surface with the screen facing down.
-
Remove the plastic backplate by pulling up on the bottom of the cover.
-
-
-
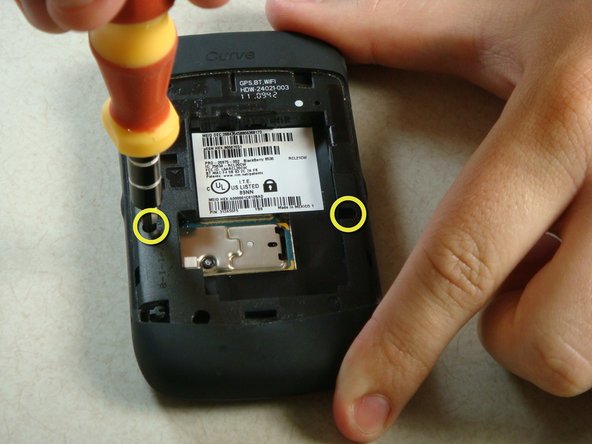
Remove the two screws midway up the phone on the left and right sides using a T6 Torx Screwdriver.
-
Warning: One screw will have warranty tape covering the screw. Removing this screw will likely void the phones warranty.
-
-
-
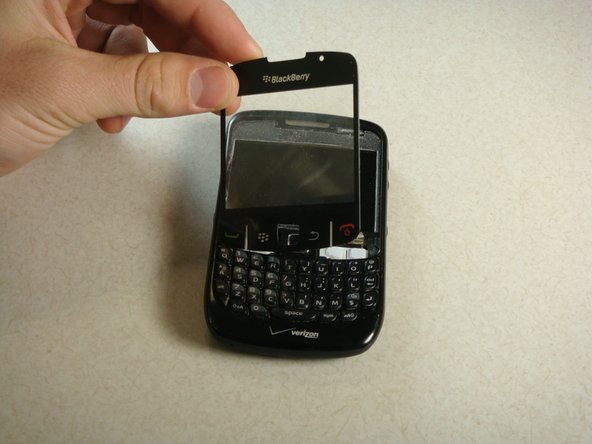
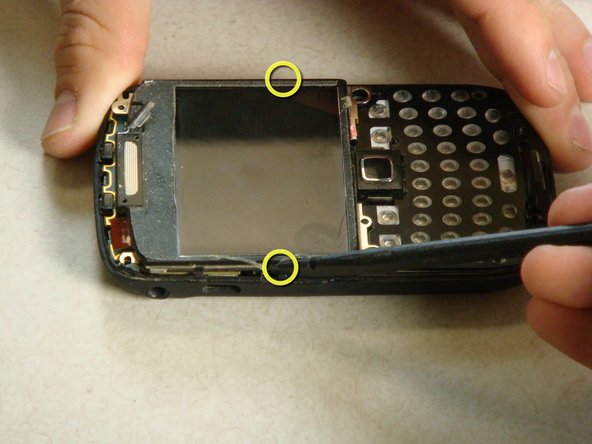
Flip the phone over so the keyboard faces up.
-
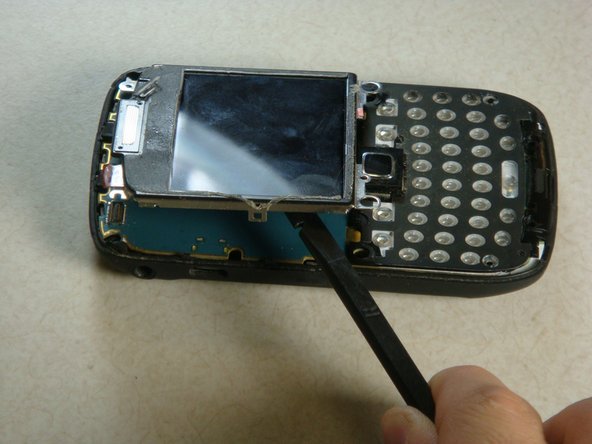
Insert a plastic spudger into the screen where speaker resides.
-
I recommend going from the side. There are two layers to the cover. You need to make sure you get underneath the bottom layer if you plan on reusing this cover.
-
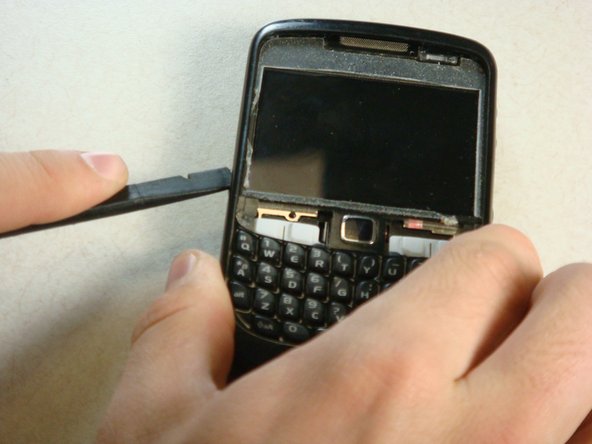
Gently lift up plastic screen cover until screen cover separates from screen.
-
Continue until screen cover is completely removed.
-
-
-
-
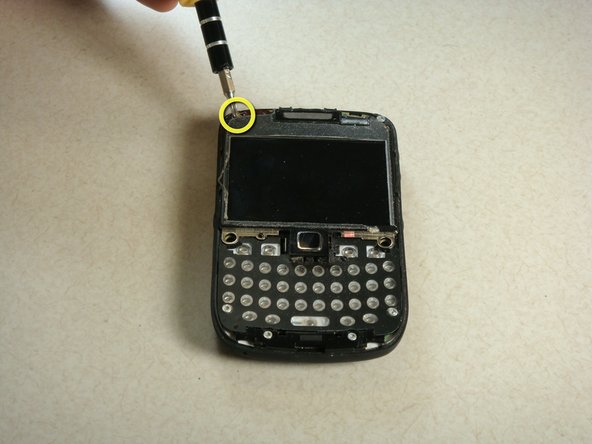
To detach the screen, there are two screws at the top of the phone to be removed. Use the T6 Torx Screwdriver to remove the screws.
-
There is a gold ribbon on the top left of the phone. Lift up this ribbon gently until it is detached from the phone.
-
Note: When reassembling, the ribbon should be reattached before replacing the top screws.
-
-
-
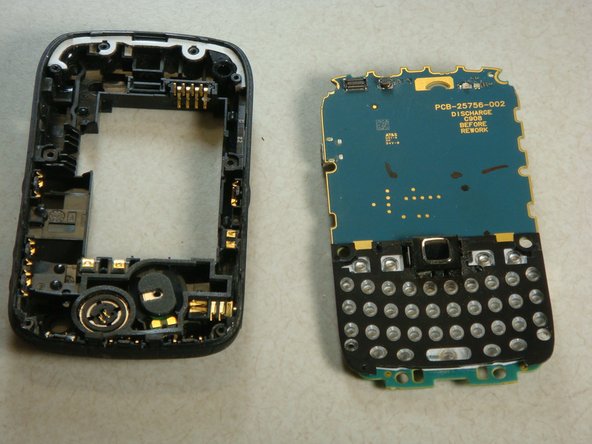
Now there are four screws that need to be removed. They are located at the bottom of the phone and can also be removed using a T6 Torx Screwdriver.
-
-
-
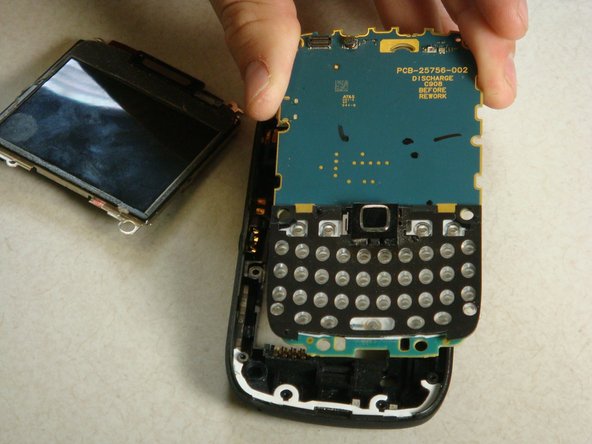
Flip over the motherboard.
-
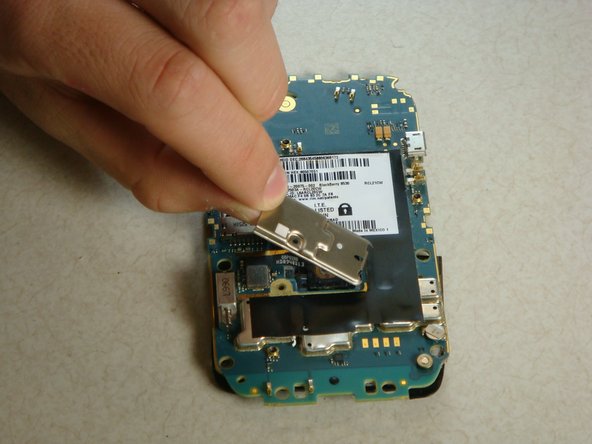
There is another torx screw near the middle of the motherboard on the left side.
-
Using the T5 Torx Screwdriver, remove the screw and the metal casing.
-
Note: Distinguish this screw from the others for reassembly purposes.
-
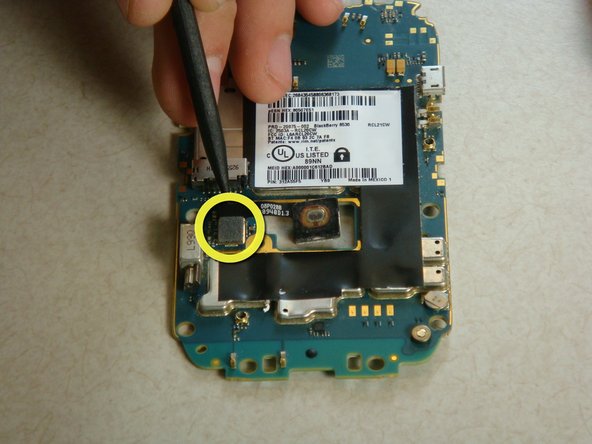
Detach the clip holding the track pad in.
-


Cancelar: No complete esta guía.
6 personas más completaron esta guía.
Equipo

Cal Poly, Team 15-13, Regan Spring 2011 Miembro de Cal Poly, Team 15-13, Regan Spring 2011
CPSU-REGAN-S11S15G13
3 Miembros
5 Guías creadas
Un comentario
No need to full disassemble the phone. Just remove the back and the battery and unscrew the T5 screw, presto 20 minutes saved.