Saltar al contenido principal

BlackBerry 7130e LCD Replacement

Qué necesitas

  1. BlackBerry 7130e LCD Replacement, battery: paso 1, imagen 1 de 1
    • Turn the phone over so that the screen is facing the work surface

  2. BlackBerry 7130e LCD Replacement: paso 2, imagen 1 de 1
    • Press your thumb against the battery latch. While pressing on latch, slide off battery cover towards the bottom of the phone.

    • You may need to apply considerable force on the latch at the bottom of the phone to complete this successfully.

  3. BlackBerry 7130e LCD Replacement: paso 3, imagen 1 de 1
    • Remove the battery by pushing downward on the area where prongs connect to bottom inside of the phone while using a thumb, finger, or tool to pull on the top of the battery to lift it out.

  4. BlackBerry 7130e LCD Replacement, BlackBerry 7130e Disassembly: paso 4, imagen 1 de 1
    • Using the T6 Torx screwdriver, remove the bottom two screws on the back of the phone.

  5. BlackBerry 7130e LCD Replacement: paso 5, imagen 1 de 1
    • Remove speaker phone cover by unsecuring the two latches on the edge close to top of the phone with the plastic opening tool.

  6. BlackBerry 7130e LCD Replacement: paso 6, imagen 1 de 1
    • Detach the speaker phone cover by pulling up on the bottom of the speaker phone cover.

    • As you detach the speaker phone cover you will notice a sticky glue sealing the rubber gasket from the cover to the speaker mesh. This is normal and will correctly reset the first few times the pieces are separated.

  7. BlackBerry 7130e LCD Replacement: paso 7, imagen 1 de 1
    • Remove top two screws with T6 Torx screw driver, from the back of phone.

  8. BlackBerry 7130e LCD Replacement: paso 8, imagen 1 de 1
    • Turn the phone sideways and unlatch the hinge on one side of the phone by pushing inwards and twisting to the side with the plastic opening tool.

  9. BlackBerry 7130e LCD Replacement: paso 9, imagen 1 de 2 BlackBerry 7130e LCD Replacement: paso 9, imagen 2 de 2
    • You should now be able to easily separate the phone into two pieces.

    • The battery prong may fall out when the separation occurs, just don't loose it!

  10. BlackBerry 7130e LCD Replacement, Replace Keypad: paso 10, imagen 1 de 1
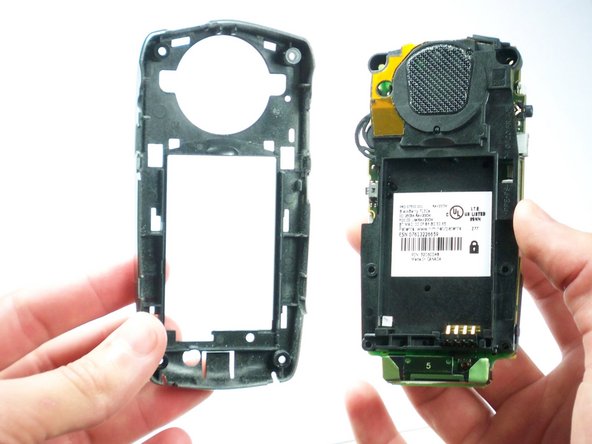
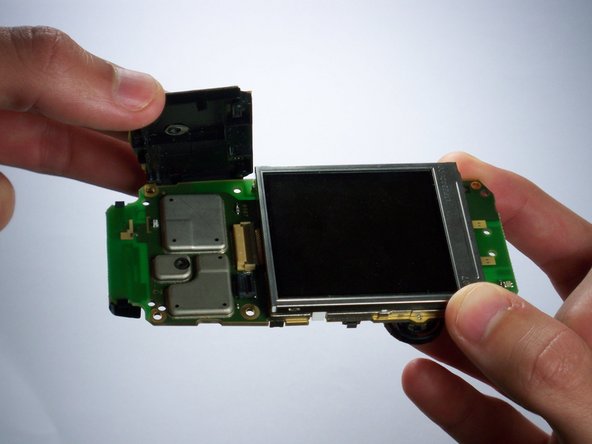
    • Once the phone comes apart into two pieces,the key buttons are on the inside of the front panel of the phone.

    • The buttons will fall out of the phone when you turn it over.

  11. BlackBerry 7130e LCD Replacement: paso 11, imagen 1 de 1
    • Simply insert a new set of buttons and reassemble the phone.

    • Continue on with the guide if you are replacing the key pad circuit board that is beneath the key pad.

  12. BlackBerry 7130e LCD Replacement: paso 12, imagen 1 de 1
    • Turn the part of phone with circuit board for the keypad still attached upside down.

    • Remove the four screws outlining the keypad with the T6 Torx screw driver.

  13. BlackBerry 7130e LCD Replacement: paso 13, imagen 1 de 1
    • Wedge the plastic opening tool between the circuit board and the black hinge of the keypad.

    • Pry the black latch up and the keypad will come loose.

  14. BlackBerry 7130e LCD Replacement: paso 14, imagen 1 de 1
    • Carefully detach the keypad board from the phone.

    • There is no need to unlatch the opposite side, it will come loose freely. Just be careful to snap back on both sides when you put on the new keyboard.

    • Watch out the plastic cap on the bottom of the phone fall loose at this point. Just don't loose it or forget to re-assemble.

  15. BlackBerry 7130e LCD Replacement, LCD Replacement: paso 15, imagen 1 de 1
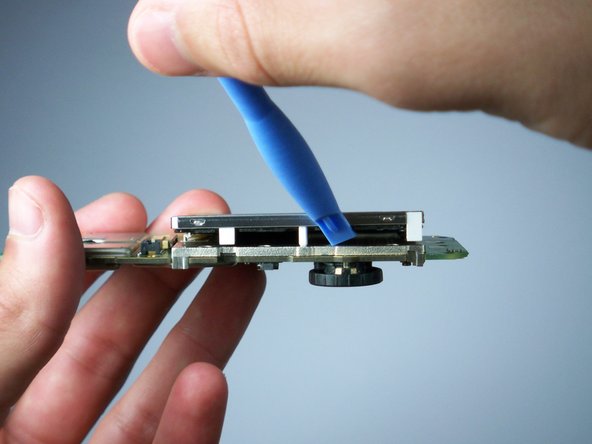
    • Use the BlackBerry opening tool to pop out the top corner as shown in picture.

  16. BlackBerry 7130e LCD Replacement: paso 16, imagen 1 de 2 BlackBerry 7130e LCD Replacement: paso 16, imagen 2 de 2
    • Wedge the BlackBerry opening tool between the adhesive and LCD, twist upward so the LCD becomes loose.

  17. BlackBerry 7130e LCD Replacement: paso 17, imagen 1 de 2 BlackBerry 7130e LCD Replacement: paso 17, imagen 2 de 2
    • The LCD should now be loose and only attached to the phone by the data wire.

    • Flip up the bar attached to the data wire with the BlackBerry opening tool, then the LCD data wire will slide out of the connector.

  18. BlackBerry 7130e LCD Replacement: paso 18, imagen 1 de 1
    • The LCD should easily separate from the phone at this point.

    • Put aside the old LCD and push the data wire of the new LCD into the area where the bar can secure it into place.

Conclusión

To reassemble your device, follow these instructions in reverse order.

Sean Tiernan

Miembro Desde 01/20/10

5 Reputación

5 Guías creadas

Equipo

Cal Poly, Team 3-16, Maness Winter 2010 Miembro de Cal Poly, Team 3-16, Maness Winter 2010

CPSU-MANESS-W10S3G16

4 Miembros

10 Guías creadas

0 comentarios

Agregar Comentario

Ver Estadísticas:

Ultimas 24 horas: 0

Ultimos 7 días: 0

Ultimos 30 días: 2

Todo El Tiempo: 1,553