Saltar al contenido principal

BlackBerry 7100g Housing Replacement

Qué necesitas

  1. BlackBerry 7100g Housing Replacement, Battery: paso 1, imagen 1 de 1
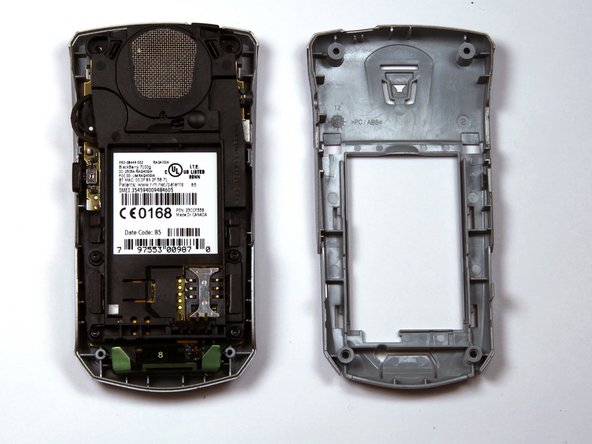
    • Turn over your BalckBerry 7100g so that the back cover is facing up.

    • Locate the battery cover release button near the bottom of the back panel.

  2. BlackBerry 7100g Housing Replacement: paso 2, imagen 1 de 3 BlackBerry 7100g Housing Replacement: paso 2, imagen 2 de 3 BlackBerry 7100g Housing Replacement: paso 2, imagen 3 de 3
    • Push down on the release button with one thumb.

    • Slide the battery cover off with the other thumb.

  3. BlackBerry 7100g Housing Replacement: paso 3, imagen 1 de 1
    • Remove the battery from the battery housing by flipping up the top of the battery.

  4. BlackBerry 7100g Housing Replacement, Housing: paso 4, imagen 1 de 3 BlackBerry 7100g Housing Replacement, Housing: paso 4, imagen 2 de 3 BlackBerry 7100g Housing Replacement, Housing: paso 4, imagen 3 de 3
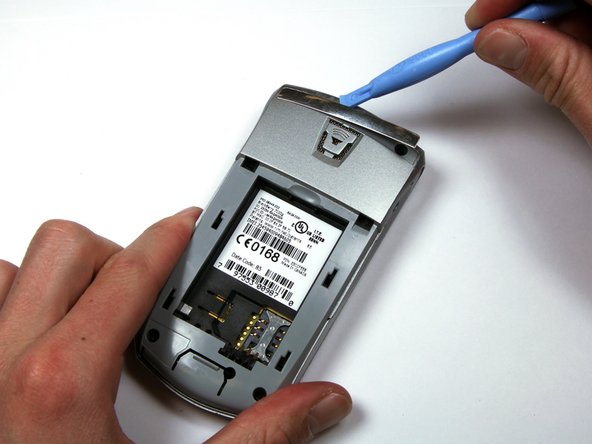
    • Locate the silver strip near the top of your BlackBerry.

    • Use a plastic opening tool to pry off the edge of the silver lining.

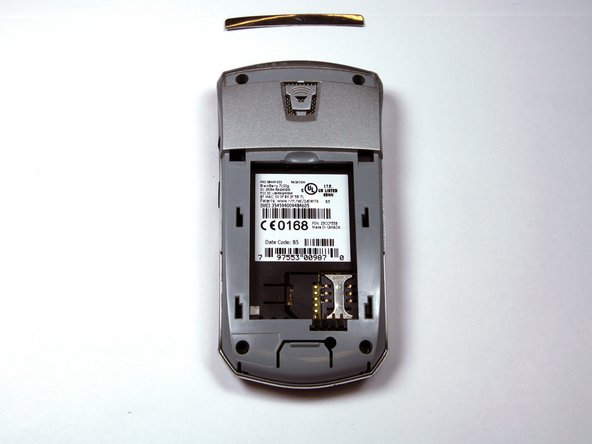
    • Slide the tool along the length of the silver strip to completely remove it.

  5. BlackBerry 7100g Housing Replacement: paso 5, imagen 1 de 2 BlackBerry 7100g Housing Replacement: paso 5, imagen 2 de 2
    • Do not lose the screws. They are quite small and can easily be misplaced.

    • Locate and unscrew the four (4) screws using a T6 screwdriver.

  6. BlackBerry 7100g Housing Replacement: paso 6, imagen 1 de 3 BlackBerry 7100g Housing Replacement: paso 6, imagen 2 de 3 BlackBerry 7100g Housing Replacement: paso 6, imagen 3 de 3
    • The keypad cover may fall out of the housing when prying the housing apart.

    • Tightly pinch the top of the front and back halves of the housing.

    • Carefully pry the two halves of the housing apart.

  7. BlackBerry 7100g Housing Replacement: paso 7, imagen 1 de 1
    • You can now easily remove the "guts" of the phone from the housing.

Conclusión

To reassemble your device, follow these instructions in reverse order.

Una persona más ha completado esta guía.

Kellan

Miembro Desde 03/30/10

277 Reputación

3 Guías creadas

Equipo

Cal Poly, Team 25-87, Amido Spring 2010 Miembro de Cal Poly, Team 25-87, Amido Spring 2010

CPSU-AMIDO-S10S25G87

4 Miembros

16 Guías creadas

0 comentarios

Agregar Comentario

Ver Estadísticas:

Ultimas 24 horas: 0

Ultimos 7 días: 0

Ultimos 30 días: 2

Todo El Tiempo: 2,254