Esta versión puede contener ediciones incorrectas. Cambie a la última instantánea verificada.
Qué necesitas
-
Este paso está sin traducir. Ayuda a traducirlo
-
Remove the six 9.5mm screws on the back panel using a #2 Phillips screwdriver.
-
-
Este paso está sin traducir. Ayuda a traducirlo
-
Remove the two 13mm screws, located between the feet on the bottom of the cover, using a Torx T15 screw driver.
-
On the TO1313SB, a Security Torx T15 driver is required — the screws have a center pin that prevents use of a regular T15 driver.
-
-
Este paso está sin traducir. Ayuda a traducirlo
-
Using the metal spudger, carefully pry out the rubber base on each foot to access the screws.
-
-
Este paso está sin traducir. Ayuda a traducirlo
-
Remove the 11.5 mm screws using a #2 Phillips screwdriver.
-
-
Este paso está sin traducir. Ayuda a traducirlo
-
Remove the back cover by gently pulling the sides of the cover apart from the rest of the oven. Then, tilt the cover towards the face and pull back at an upward angle. The cover should slide right off.
-
-
-
Este paso está sin traducir. Ayuda a traducirlo
-
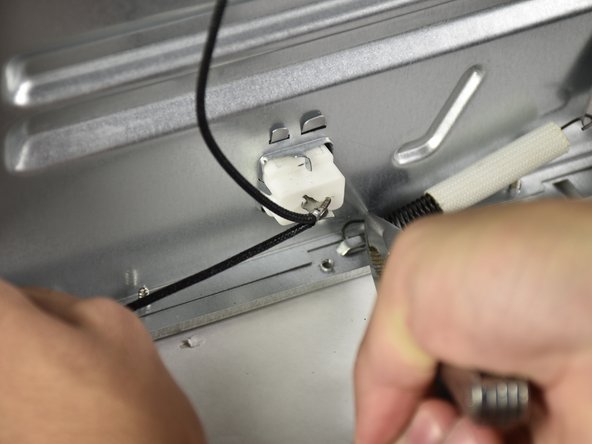
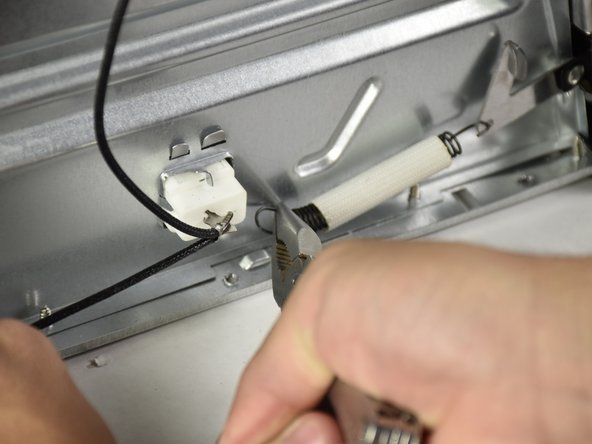
With the needle nose pliers, grasp the hook of the rear spring as close as you can to the coils. Stretch the spring back and, with a twisting motion, pull the hook out of its catch.
-
-
Este paso está sin traducir. Ayuda a traducirlo
-
Using two metal spudgers, pry the top control knob directly outward.
-
-
Este paso está sin traducir. Ayuda a traducirlo
-
Using the two metal spudgers, pry the middle control knob directly outward.
-
-
Este paso está sin traducir. Ayuda a traducirlo
-
Using the two metal spudgers, pry the bottom control knob directly outward.
-
-
Este paso está sin traducir. Ayuda a traducirlo
-
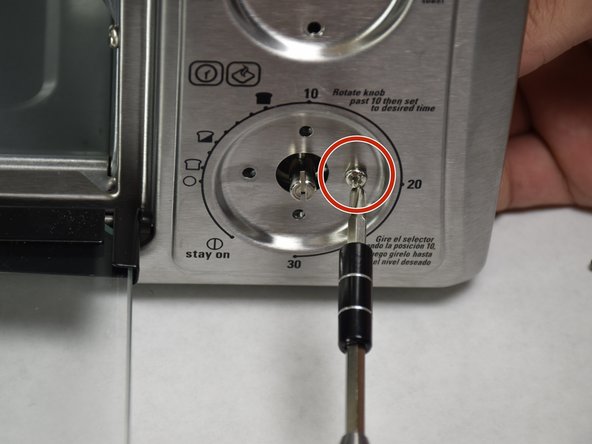
Remove the two #2 Phillips Head x 5.5mm screws holding the timer controls to the face.
-
-
Este paso está sin traducir. Ayuda a traducirlo
-
On the left side, use a metal spudger to push the hinge pin in as far as you can.
-
-
Este paso está sin traducir. Ayuda a traducirlo
-
On the right side, pull the now extruded hinge pin out about 1/4 of an inch.
-
-
Este paso está sin traducir. Ayuda a traducirlo
-
On the left side, push out the spring attachment while pulling on the door in an upward, outward, location
-
-
Este paso está sin traducir. Ayuda a traducirlo
-
To remove the door, slightly pull the bottom left corner away from the face and slide the entire door to the left.
-


Equipo

Cal Poly, Team 5-11, Maness Fall 2015 Miembro de Cal Poly, Team 5-11, Maness Fall 2015
CPSU-MANESS-F15S5G11
4 Miembros
5 Guías creadas
Un comentario
I have the Black and Decker TROS1500 SpaceMaker Toaster Oven and the door handle fell off. Although my model is somewhat different, these images gave me the confidence to disassemble the unit and remove the door to work on the handle. I thought a rivet had broken, but it turned out that the handle attaches with screws and the screws had just come loose. I could have fixed that without disassembly, but I may not have started if I hadn’t seen this page. Kudos to you and IFIXIT!
I was not able to find any repair images or video on Google or YouTube. The SpaceMaker line is down to one model with mediocre reviews. I’m glad I was able to repair mine and save $130.