Saltar al contenido principal

Bella 4-Slice Toaster Oven Timer Replacement

Qué necesitas

  1. Bella 4-Slice Toaster Oven Timer Replacement, Outer Shell: paso 1, imagen 1 de 1
    • Remove five 11.6 mm Phillips #2 screws from the rear of the device.

  2. Bella 4-Slice Toaster Oven Timer Replacement: paso 2, imagen 1 de 1
    • Open the front glass door of the toaster oven.

  3. Bella 4-Slice Toaster Oven Timer Replacement: paso 3, imagen 1 de 1
    • Locate retaining screw on the upper-middle portion of the door frame.

  4. Bella 4-Slice Toaster Oven Timer Replacement: paso 4, imagen 1 de 1
    • Remove one 21.9 mm Phillips #2 retaining screw from upper-middle portion of door frame.

  5. Bella 4-Slice Toaster Oven Timer Replacement: paso 5, imagen 1 de 1
    • Flip toaster onto back panel with feet facing forward.

  6. Bella 4-Slice Toaster Oven Timer Replacement: paso 6, imagen 1 de 1
    • Use spudger to pry the grey rubber inserts from the black plastic feet.

  7. Bella 4-Slice Toaster Oven Timer Replacement: paso 7, imagen 1 de 1
    • Remove four 13.7mm Phillips #2 screws from black plastic feet to separate the cover from the device.

  8. Bella 4-Slice Toaster Oven Timer Replacement: paso 8, imagen 1 de 1
    • Lift the black outer cover off of the toaster

  9. Bella 4-Slice Toaster Oven Timer Replacement, Timer: paso 9, imagen 1 de 1
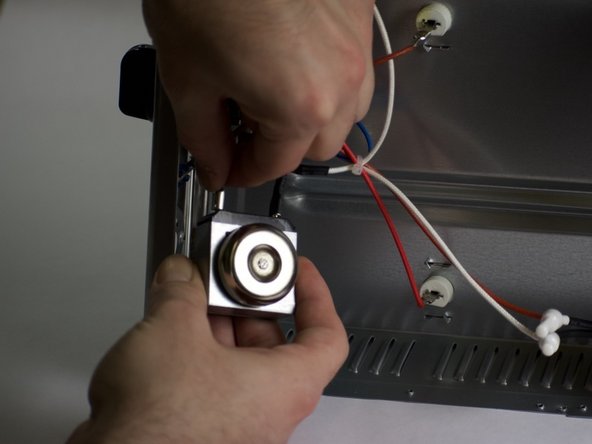
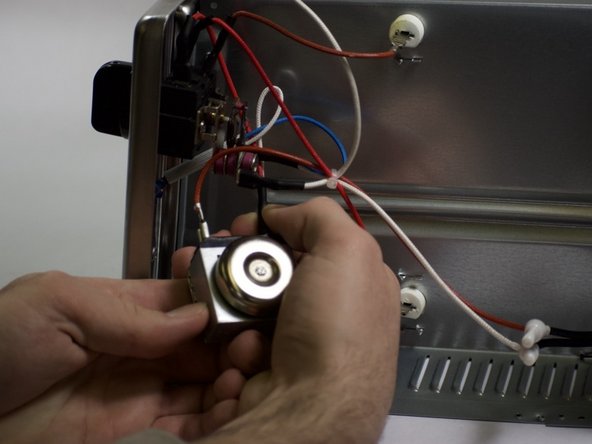
    • Using a plastic spudger, gently pry the black plastic timing dial away from the face of the toaster.

  10. Bella 4-Slice Toaster Oven Timer Replacement: paso 10, imagen 1 de 2 Bella 4-Slice Toaster Oven Timer Replacement: paso 10, imagen 2 de 2
    • Remove two 5.91 mm #2 Phillips screws which secure the timer to the toaster.

  11. Bella 4-Slice Toaster Oven Timer Replacement: paso 11, imagen 1 de 3 Bella 4-Slice Toaster Oven Timer Replacement: paso 11, imagen 2 de 3 Bella 4-Slice Toaster Oven Timer Replacement: paso 11, imagen 3 de 3
    • Inside the device, unplug the red and black wires from the top of the timer.

  12. Bella 4-Slice Toaster Oven Timer Replacement: paso 12, imagen 1 de 1
    • Remove timer from device interior.

Conclusión

To reassemble your device, follow these instructions in reverse order.

Una persona más ha completado esta guía.

0 comentarios

Agregar Comentario

Ver Estadísticas:

Ultimas 24 horas: 0

Ultimos 7 días: 2

Ultimos 30 días: 9

Todo El Tiempo: 604