Saltar al contenido principal

Beboncool Gamepad for Nintendo Switch Vibration Motors Replacement

Qué necesitas

  1. Beboncool Gamepad for Nintendo Switch Vibration Motors Replacement, Beboncool Nintendo Switch Gamepad Disassembly: paso 1, imagen 1 de 3 Beboncool Gamepad for Nintendo Switch Vibration Motors Replacement, Beboncool Nintendo Switch Gamepad Disassembly: paso 1, imagen 2 de 3 Beboncool Gamepad for Nintendo Switch Vibration Motors Replacement, Beboncool Nintendo Switch Gamepad Disassembly: paso 1, imagen 3 de 3
    • Use the plastic opening tool to remove the blue plastic grips from the sides of the controller.

  2. Beboncool Gamepad for Nintendo Switch Vibration Motors Replacement: paso 2, imagen 1 de 2 Beboncool Gamepad for Nintendo Switch Vibration Motors Replacement: paso 2, imagen 2 de 2
    • Use the Phillips #0 screwdriver to remove the seven 5mm screws from the back of the controller.

  3. Beboncool Gamepad for Nintendo Switch Vibration Motors Replacement: paso 3, imagen 1 de 3 Beboncool Gamepad for Nintendo Switch Vibration Motors Replacement: paso 3, imagen 2 de 3 Beboncool Gamepad for Nintendo Switch Vibration Motors Replacement: paso 3, imagen 3 de 3
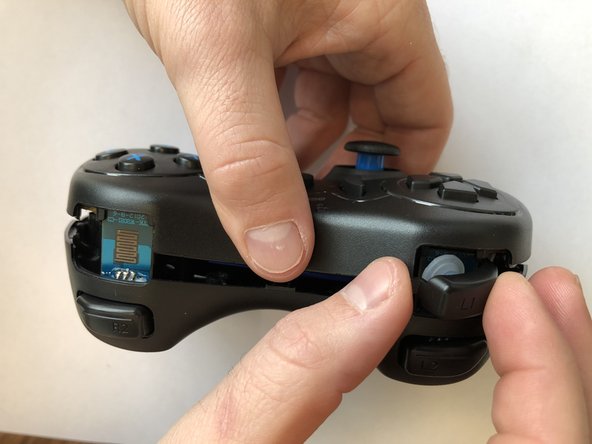
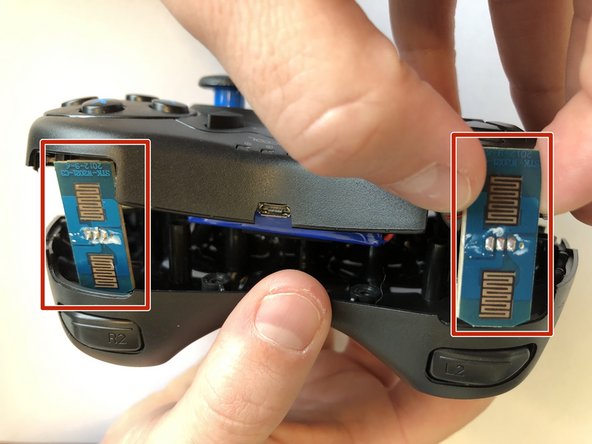
    • Gently separate the two halves of the controller.

    • As the two covers come apart the L1 and R1 button, will fall free from the controller. Be sure not to lose them if they should pop out and fall.

    • Be sure to slide the small circuit boards out of the covers to be able to separate the two halves

  4. Beboncool Gamepad for Nintendo Switch Vibration Motors Replacement: paso 4, imagen 1 de 2 Beboncool Gamepad for Nintendo Switch Vibration Motors Replacement: paso 4, imagen 2 de 2
    • Use the Phillips #0 screwdriver to remove the two 3.5mm screws holding the circuit board in place.

  5. Beboncool Gamepad for Nintendo Switch Vibration Motors Replacement: paso 5, imagen 1 de 3 Beboncool Gamepad for Nintendo Switch Vibration Motors Replacement: paso 5, imagen 2 de 3 Beboncool Gamepad for Nintendo Switch Vibration Motors Replacement: paso 5, imagen 3 de 3
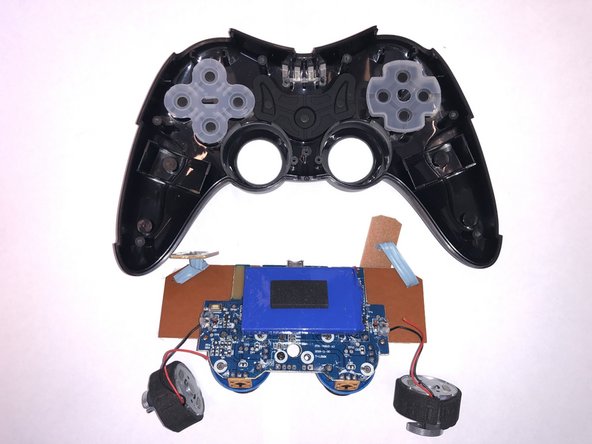
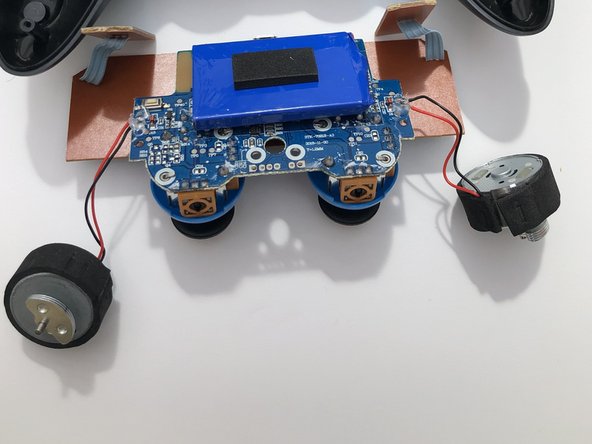
    • Lift the motherboard from the back case with the vibration motors and button boards attached.

  6. Beboncool Gamepad for Nintendo Switch Vibration Motors Replacement, Vibration Motors: paso 6, imagen 1 de 3 Beboncool Gamepad for Nintendo Switch Vibration Motors Replacement, Vibration Motors: paso 6, imagen 2 de 3 Beboncool Gamepad for Nintendo Switch Vibration Motors Replacement, Vibration Motors: paso 6, imagen 3 de 3
    • Locate the two solder points corresponding to the malfunctioning vibrational motor.

  7. Beboncool Gamepad for Nintendo Switch Vibration Motors Replacement: paso 7, imagen 1 de 2 Beboncool Gamepad for Nintendo Switch Vibration Motors Replacement: paso 7, imagen 2 de 2
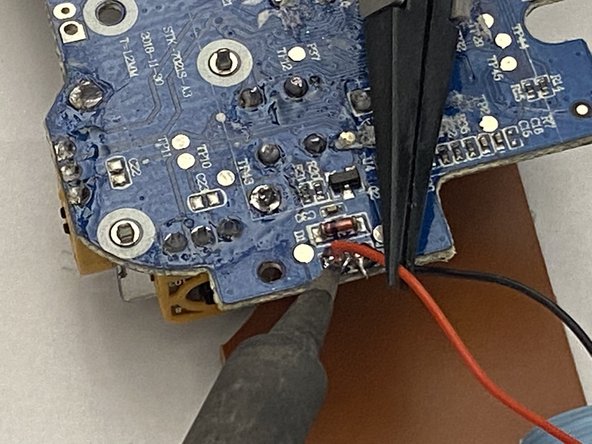
    • Desolder the two connection points corresponding to the malfunctioning vibration motor.

    • Once the solder has been sufficiently melted, carefully pull the wires away from the solder point with tweezers.

    • For help with soldering best practices, check out this Soldering and Desoldering Connections Guide.

Conclusión

To reassemble your device, follow these instructions in reverse order.

0 comentarios

Agregar Comentario

Ver Estadísticas:

Ultimas 24 horas: 2

Ultimos 7 días: 3

Ultimos 30 días: 6

Todo El Tiempo: 175